Display Layer editor


Display > UI Elements > Channel Box/Layer Editor

Lets you organize large-scale pieces of the scene so you can show, hide, or edit them all at once.

You can switch between the Display Layer editor, the Render Layer editor, and the Animation Layer editor by clicking the radio button. For more details on the Render Layer editor, see Render Layer Editor. For more information on the Animation Layer Editor, see Animation Layer Editor.

Related topics

Menus

Layers menu

Create Empty Layer

Creates a new display layer, depending on the selection in the drop-down list, with a default name, for example layer1.

Select Objects in Selected Layers

Selects the objects contained in the selected layer(s).

Remove Selected Objects from Selected Layers

Removes all objects from the selected layer(s) and assigns them to the default layer. The selected layer(s) becomes empty so you can assign other objects.

Membership

Opens the Relationship Editor for removing or adding objects to layers.

Attributes

Opens the Attribute Editor for the selected layer(s). There are some attributes in the Attribute Editor not available through the Edit Layer window.

Delete Selected Layers

Deletes the selected layer(s), but not the objects in the layer.

Delete Unused Layers

Delete layers if they have no content.

Set All Layers / Set Selected Layers / Set Only Selected Layers

You can set all layers or selected layer characteristics. When you set selected layer characteristics, you can specify whether unselected layers will be affected or not.

You can set the following characteristics:

Visible/Invisible

Normal/Template/Reference

Full Detail/Bounding Box

Shaded/Unshaded

Textured/Untextured

Playback On/Playback Off

The above layer settings menu items are also available when you -click a Display layer.

Sort Layers Alphabetically

Sorts layers by name.

Sort Layers Chronologically

Sorts layers by time of creation.

Options menu

You can set the following binary options:

Context-sensitive menu

The following commands are available when you -click a layer:

Add Selected Objects / Remove Selected Objects / Select Objects

Add or remove objects from a display layer. You can also select all objects in the current display layer.

Set All Layers / Set Selected Layers / Set Only Selected Layers

See above.

Empty the Layer

Removes all objects from a layer, leaving it empty.

Delete Layer

Deletes the layer.

Membership Attributes

See above.

Display layer properties window

Display Layer

Type the name of the layer.

Drawing Override options

Enable Overrides

Turn this option off to disable the effects of the layer. Objects in the layer appear and behave as though they do not belong to the layer.

Display Type

Select how the layer appears.

Normal

Objects in the layer display normally, according to the settings for the layer. You can select objects in the layer and snap to them.

Template

Objects in the layer become templates. You can see template objects in the workspace, but you cannot select them, nor can you snap them.

Reference

You can snap to objects in the layer, but you cannot select them or modify them.

Level of Detail

Select the level of display detail for layer objects:

Full

Displays full detail for layer objects.

Bounding Box

Shows objects as boxes that represent their bounding volumes. Bounding boxes speed up Maya operations making a significant difference for complex models.

Shading

Turn on to make layer objects appear shaded when in shaded display.

Texturing

Turn on to show textures on layer objects when in shaded display.

Playback

Turn on to animate layer objects during playback. If you have several characters in a scene and want to look at each character’s animation separately, you can place each character in its own layer and play back the animation of each character as desired.

Visible

Turn on to make the objects in the layer visible.

Color

Select the color of all objects belonging to the layer.

Number

This is the number assigned to the layer.

Merging display layers when importing files

To facilitate the merging of layers when you read in files, select Window > Settings/Preferences > Preferences click the Files/Projects category, and in the Display Layer section select one of the following options for File Import Merge:

None

All layers read in are put in a new layer, and renumbered and renamed, if necessary to preserve uniqueness.

By Number

All layers read in that have the same index number as an existing layer are merged with that layer rather than creating a new layer.

By Name

All layers read in that have the same name as an existing layer are merged with that layer rather than creating a new layer.

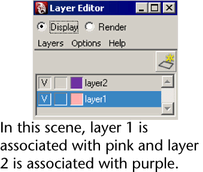
Identifying display layers by color

You can associate each display layer with a different color so that it is easier to identify which objects are in each display layer in the Hypergraph and in the scene view.

NoteIf the object or node is selected, it still appears in yellow in the Hypergraph and outlined in green in the scene view. You only see the color for each display layer if the object and node is not selected.

To associate each display layer with a color

  1. Click Display in your Render Layer Editor (Window > Rendering Editors > Render Layer Editor) to view your display layers.
  2. In the Render Layer Editor, select the display layer that you wish to associate with a color. Double-click the color box, which is the box beside the layer name, and the Edit Layer dialog box appears.
  3. Select a color from the Color attribute and click Save.

    All objects in the selected layer appear in the designated color in the scene view and all nodes in the selected layer appear in the designated color in the Hypergraph.