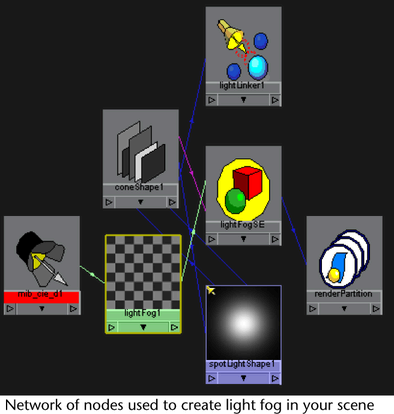
Create light fog using mental ray for Maya sample
workflow
The following is a sample workflow for creating
light fog using mental ray for Maya.
First,
create a spot light in your scene. Light fog is supported with point lights
or spot lights.
Under
the spotLightShape node, under Light Effects,
click the Map button. The lightFog node
is created.
Scale
your spot light to create the fog effect that you desire.
Under
the spotLightShape section, expand the mental ray section, under the Custom
Shaders section, click on the Map button
beside the Light Shader field and select
a mental ray light shader, for example, mib_light_spot.
Under
the mib_light_spot node, ensure that Attenuation is
on.Set the Start value to specify the
distance from the light where attenuation begins. Set the Stop value
to specify the maximum distance reached by the light. Increase the
cone value for a more subtle fog effect.
Under
the coneShape node, Render Stats section, enable Volume
Samples Override and increase the number of Volume
Samples for better quality. Enable
Depth Jitter if
necessary.
To
modify the color of your fog, you can change the Color attribute
within the mib_light_spot node. Alternatively, you can click on
the Map button beside the Color attribute
and map the color attribute to the mental ray mib_cie_d node. Under
the mib_cie_d node, increase the temperature. A value of 4000 gives
a sunset feel. For a more blue toned fog, increase the temperature.