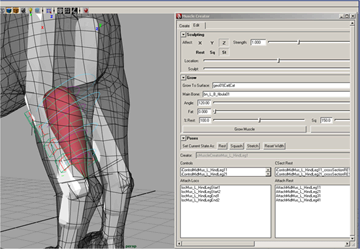
The Muscle Creator gives you the advantage of sculpting muscles by growing them. You select a muscle and have points “grow” outward to the model surface. This saves time because you are not manually editing the muscle surface.
This scene contains the sabertooth tiger with muscle applied to the neck and leg joints. You will be growing the hind leg muscle in each pose state.
 button
to load the sabertooth mesh.
 button
next to Main Bone to load it the length
of the muscle.
The Main Bone Tip field automatically populates the section with the proper joints.
By default, the growing occurs outwards from the centerline defined by the Main Bone and Main Bone Tip bones you select. All points within the Angle range specified in the Grow settings are grown.

Depending on the values you have set in the %Rest/Sq/St fields, the muscle cross sections grow out in their respective pose state to the surface you selected as the Grow To Surface. The higher you set the %Rest/Sq/St values, the more expansion the muscle takes outwards to the selected skin mesh, and eventually grows past it.
In this lesson you learned how to grow a muscle using the controls from the Edit tab in the Muscle Creator. A completed file for this example, Sabertooth_Grow_Muscle_End.mb, can be found.