


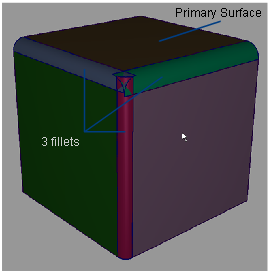
Create a ball corner surface between three fillets and a primary surface.
This tool simplifies the task of creating ball corners.
Given the following conditions:
the following steps will produce a clean result.
Create a ball corner surface between fillets
 .
.
The transitional surfaces are highlighted in purple, the primary surface is highlighted in yellow, and small red arrows appear, indicating the intersection points.

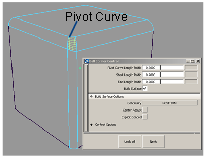
The input surfaces are trimmed at their intersections, the ball corner surface is built, and the option box pops open.
You will only see the Max. New Spans option if Explicit Control is off, and Continuity is Tangent or Curvature.
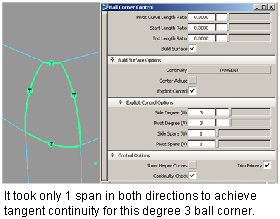
Every time the value of an option changes, the curves on surface that were created on the input surfaces update, the surfaces are re-trimmed (if needed), and the ball corner surface is rebuilt (if Build Surface is turned on).
The ball corner surface is also rebuilt if the input fillet surfaces are modified.