


How to quickly measure distances on shaded models using Evaluate > Dynamic Measurement. This tool also works on wireframe models.
To create a dynamic measurement
A cross-hair appears.
A ruler appears between the two points and the distance between the points is displayed (in the current linear units).
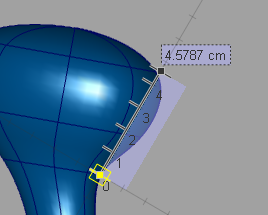
To modify the start and end points of a dynamic measurement
The point turns yellow.
The ruler turns yellow.
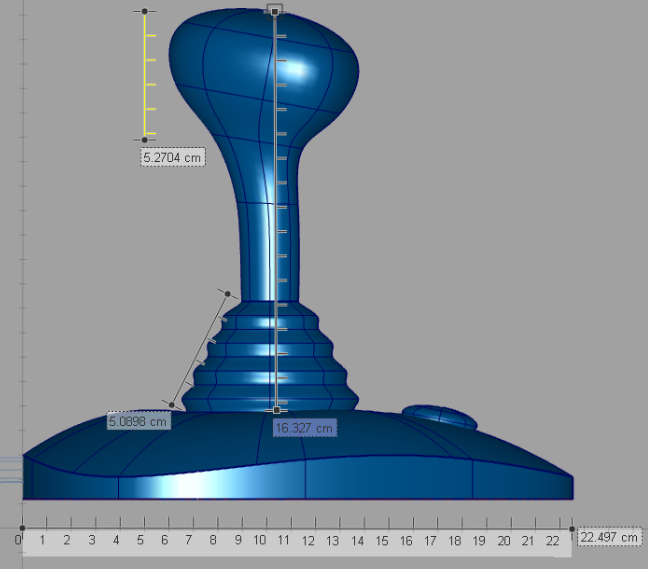
The start point turns into a square to indicate that it is attached to the object. The ruler becomes lavender and remains parallel to the view plane.
A measurement can be anchored in any view, including the Perspective view.
All measurements disappear as soon as you choose another tool. However, if you need to remove them while still in the Dynamic Measurement tool, press the Clear button at the bottom of the window.
Using the tool in the Perspective window
Dynamic Measurement works differently in the Perspective window depending if the mode is truly perspective, or if it is set to orthographic.
(Hold the  and
and  (Windows) or
  and (Mac) keys and uncheck Perspective in the Viewing Panel). The behavior is also different depending if the measurement is anchored or not. See the table below.
| Persp | Ortho | |
|---|---|---|
| Anchor | The start point of the ruler stays attached to the object when you change the view. The ruler is drawn in lavender and always faces you. | |
| Fixed | Invalid. Measurement displays (in red) so you can anchor it. | If you pan the view or rotate the view, the measurement appears to be anchored to the screen (it does not move relative to the modeling window). When you zoom the camera, the measurement appears to zoom with the model. |
Unlike Locators, Dynamic measurements are not designed to be saved with a model or to persist beyond the use of the tool. As well, they cannot be truly snapped to grid or geometry, only temporarily anchored so they follow the motions of the object.
Dynamic measurements work (that is, they can be anchored) even when a model wireframe is toggled off (for example, in a modeling window where only hardware shade appears). Snapping does not work when the model wireframe is toggled off.