If you are using the Windows browser, you can import the image as a mask layer directly from the Canvas Layer Editor by choosing Layer > New Image Layer (import) in the editor’s menu.
If you are using the Alias browser, choose File > Import > Canvas Image .
.
The type of browser can be changed by choosing Preferences > General Preferences and going to the System section.
To create a mask from an image file using the Windows browser
 icon next to the canvas name in the Construction Plane Editor or select it from the lister in the Canvas Layer Editor. The former takes priority.
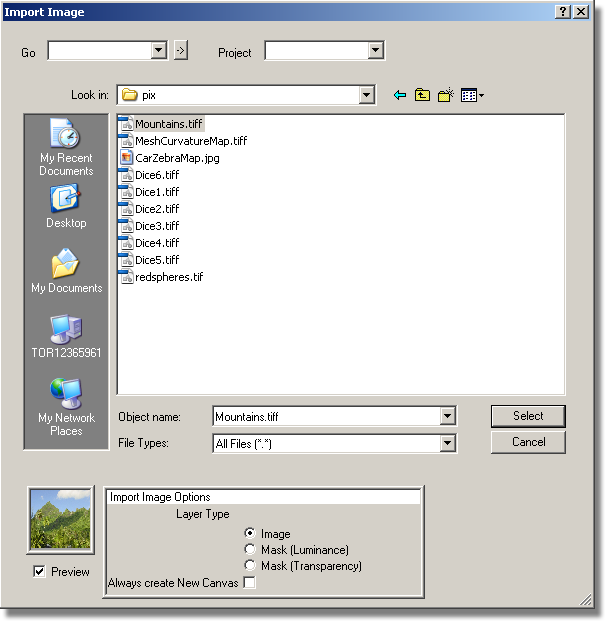
The Image Import browser opens.
The image is shown in the Preview window.
The content of the Preview updates.
If Always create New Canvas was on, a new canvas plane is created and the image is loaded onto it as a mask layer (filling the entire canvas plane). The size of the canvas plane is based on the size of the current view window.
Otherwise, the image is imported as a new mask layer and centered on the canvas plane.
The new mask layer is linked to the active image layer, and is automatically selected.
To create a mask from an image file using the Alias browser
icon next to the canvas name in the Construction Plane Editor or select it from the lister in the Canvas Layer Editor. The former takes priority.
❒ to open the option box. 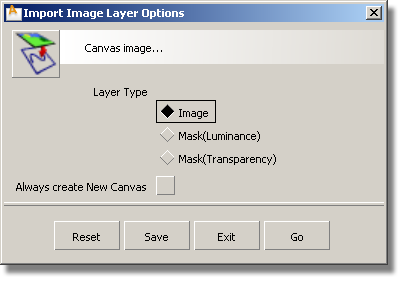
The File Browser opens
If Always create New Canvas was on, a new canvas plane is created and the image is loaded onto it as a mask layer (filling the entire canvas plane). The size of the canvas plane is based on the size of the current view window.
Otherwise, the image is imported as a new mask layer and centered on the canvas plane.
The new mask layer is linked to the active image layer, and is automatically selected.


