When printing an image there are many variables that define the final image quality. Take these variables into account before printing:
Much has been written about high quality photographic printing and general guidelines for outputting high quality photographic imagery. The print industry frequently uses the terms ppi & dpi interchangeably. Pixels per Inch (ppi) is the correct term for an image in the computer and Dots per Inch (dpi) defines the physical dots per inch used to print an image. A third term used by the print industry is Lines per Inch (lpi).
Although you may be accustomed to seeing the term “dpi” used for an inkjet or laser printer, it is important to know that one dot does not equal one pixel. A modern ink jet printer uses many dots of ink to create a single pixel of a source image.
Look at black and white postscript printers, for example:
The printer can print at 300 dpi. However, it takes a 5x5 matrix of the printer’s tiny dots to make a print-type dot of variable size and gray levels. Being a 5x5 matrix, it can print 25 gray levels. Divide the 300 dpi by 5, and come up with a real line screen of 60 lines per inch on the printer.
You could increase the size of the matrix to increase the number of gray levels, and given that the printer has an absolute maximum of 300 dpi, you'll reduce the number of lines per inch... taking the matrix up to 6x6, creating 36 gray levels, reduces the line screen to 50lpi.
Generally, the pixels per inch of an image should be provided to the printer at a level higher than the line screen (to avoid obvious staircasing and aliasing), but no more than double the line screen (more than double the line screen results in drop-outs, and wasted raster image processing (RIP) for postscript conversion time).
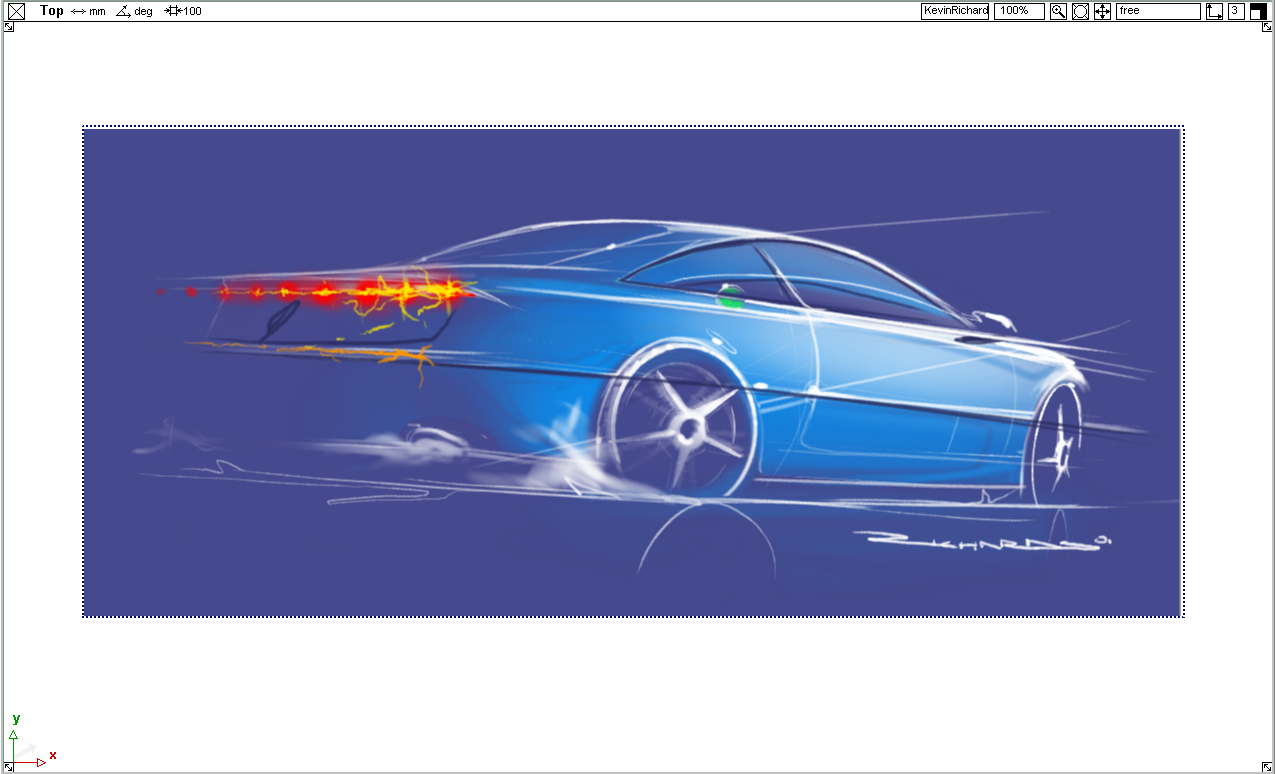
One of the easiest errors to make is to assume that what looks good on a high-resolution computer monitor will look good when printed on paper. Let’s assume you are using a default image plane resolution of 1268x770 pixels, established by sketching into a top view full screen, on a 19” monitor with a resolution of 1280x1024 pixels. As you will see, this resolution is very low for printing high quality large images on paper.
What we hope to do in this document is help you understand how to use Alias to print good quality images and how to set the correct image plane resolution for a given paper size.
What Image Plane Resolution Do You Require for a Design Sketch?
This depends on many variables; in this example we suggest some guidelines and set some assumptions.
Typical printer manuals assume that 260 ppi produces an excellent photographic style print on photo quality paper at 2880 dpi. You can also read more on an excellent web site dedicated to scanning: although it is aimed at scanned images, it does include some excellent fundamental information on resolution:
With any specified image plane size and resolution, you can either lower the ppi (pixels per inch) to achieve the desired image size, or maintain the ppi and accept a reduced size print.
A default Alias image plane 1268x770 pixels when printed at 260 ppi results in an image size of 4.9” x 3”. The following image shows how the number of pixels per inch changes the size of the image on a piece of 11-inch wide paper.
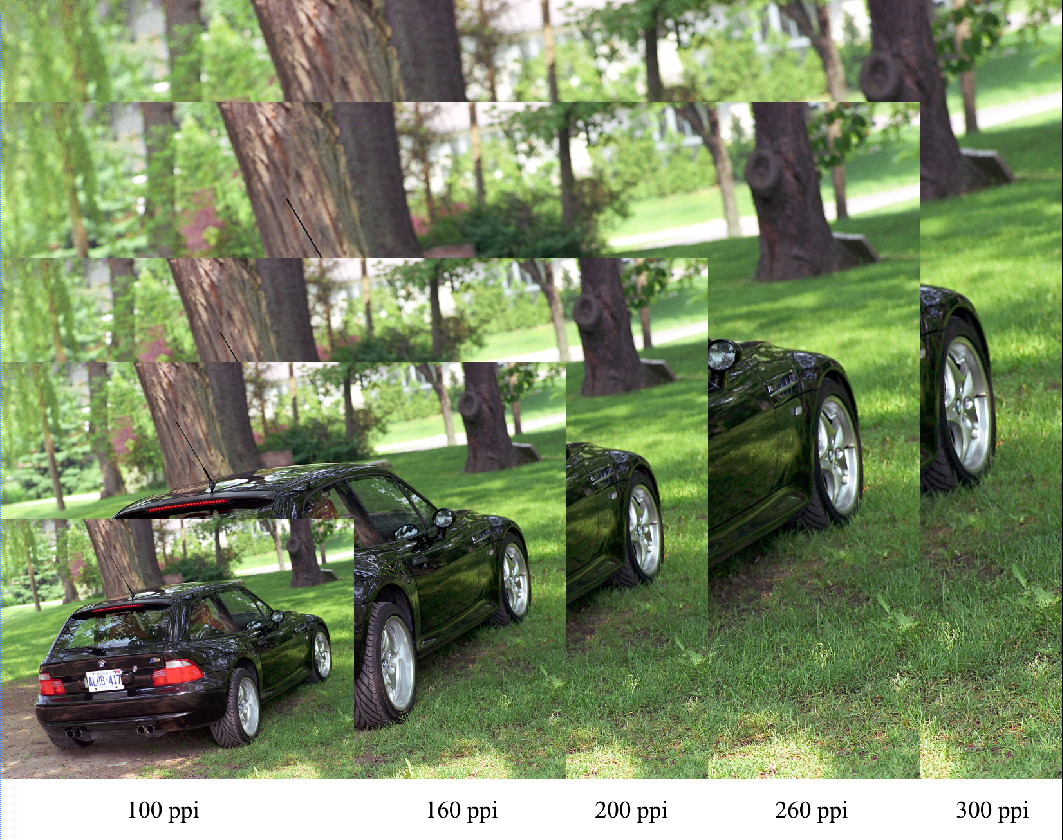
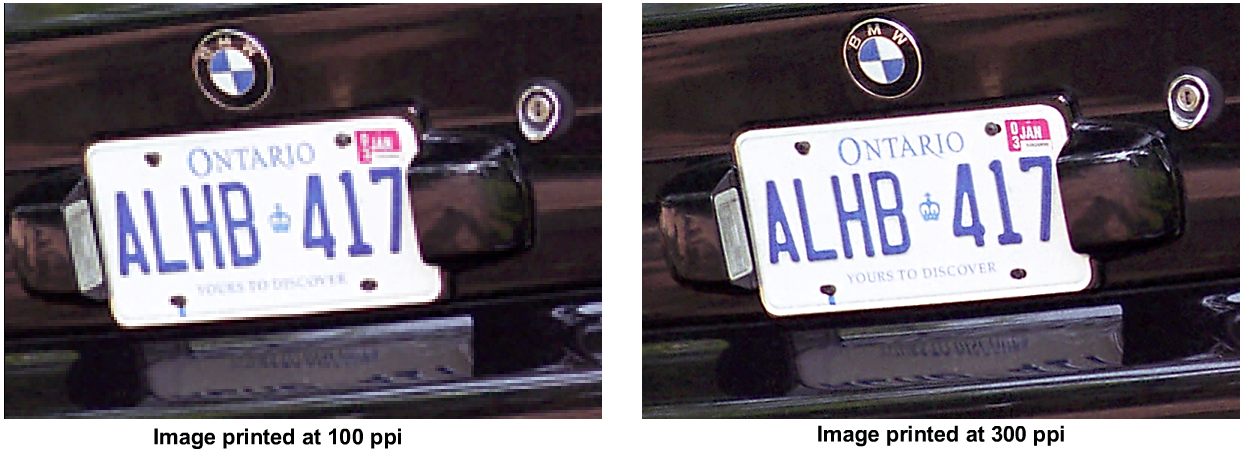
The default Alias image plane 1268x770 pixels when printed on a letter size paper 11” wide has a resolution of 115 ppi (pixels per inch). The following image shows how the quality of the image dramatically reduces when an image is printed at a lower resolution. The straight lines in the image break up with a staircase effect and the image sharpness reduces.
Enlarging an image: trade-off between size and quality
Frequently, you can enlarge an image to a size where the number of pixels per inch is no lower than the number of lines per inch your printer is capable of creating. Ideally, the ppi should be between one and two times the lpi. Unfortunately, most ink jet printers don’t come with information about how many lines per inch they are capable of printing. You need to experiment.
Here are three general guidelines for a typical modern ink jet printer; conduct tests on your own printer and choice of paper.
Example paper sizes with image plane resolution information
| cm | cm | ppi | # pixels | # pixels | |
| A3 Paper | 21 | 29 | 300 | 2480 | 3508 |
| A3 Paper | 21 | 29 | 200 | 1654 | 2339 |
| A3 Paper | 21 | 29 | 100 | 827 | 1169 |
| A2 Paper | 29.7 | 42 | 300 | 3508 | 4961 |
| A2 Paper | 29.7 | 42 | 200 | 2339 | 3307 |
| A2 Paper | 29.7 | 42 | 100 | 1169 | 1654 |
How To Create an Image Plane With The Correct Resolution?
Select Canvas > New Canvas ❒ and set the number of pixels to suit the paper size and output ppi. Remember, you can save all Alias option preferences by selecting Preferences > User Options > Save Options
 .
.
ppi * height = number of pixels high the image plane should be (in inches).
ppi * width = number of pixels wide the image plane should be (in inches).
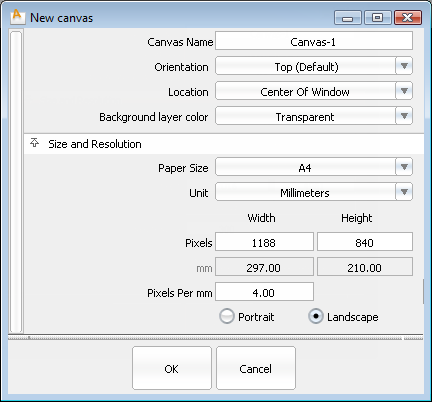
In this example we have chosen to create an image plane suitable for A4 paper at 4 pixels per mm.
How to modify a current image plane size
Sometimes when you’re sketching, you may find the image plane size is too small to fit the complete sketch.
The resolution of the image plane can easily be corrected in one of two ways.
 ❒.
❒.
 (rectangle) and define a new image plane size. (larger or smaller)
How to change the size of an image plane
If the image plane looks too large or too small in the Print Preview window, you may need to resize it.
An Alias image plane exists in a 3D environment and its size is defined by the Alias units. During the early stages of design, you may just start sketching without considering printing size, but then find that it does not print at an appropriate size.

 from the tool palette and place two locator points.
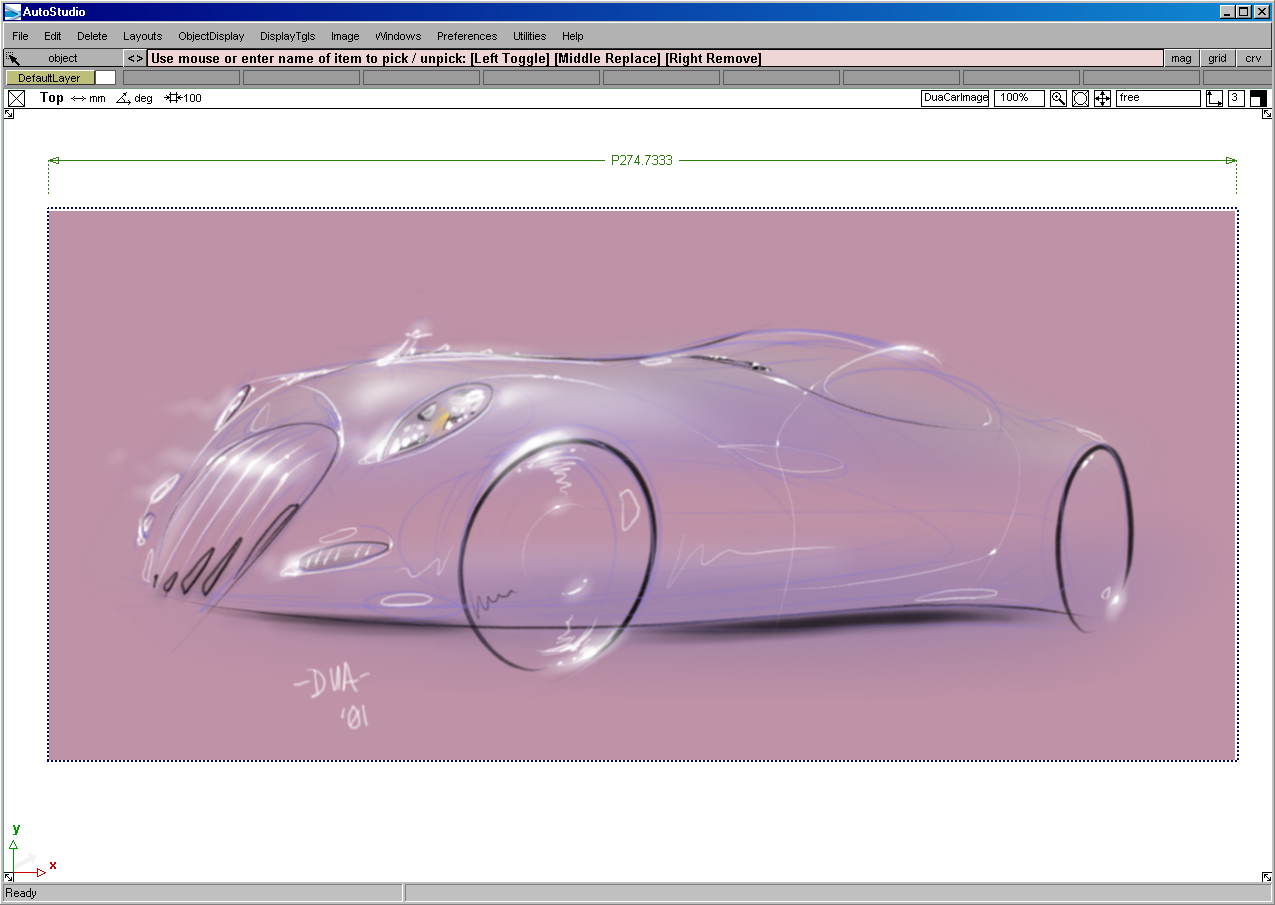
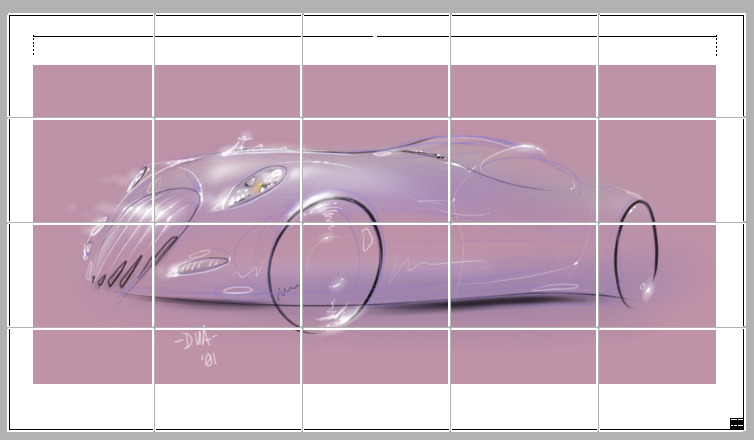
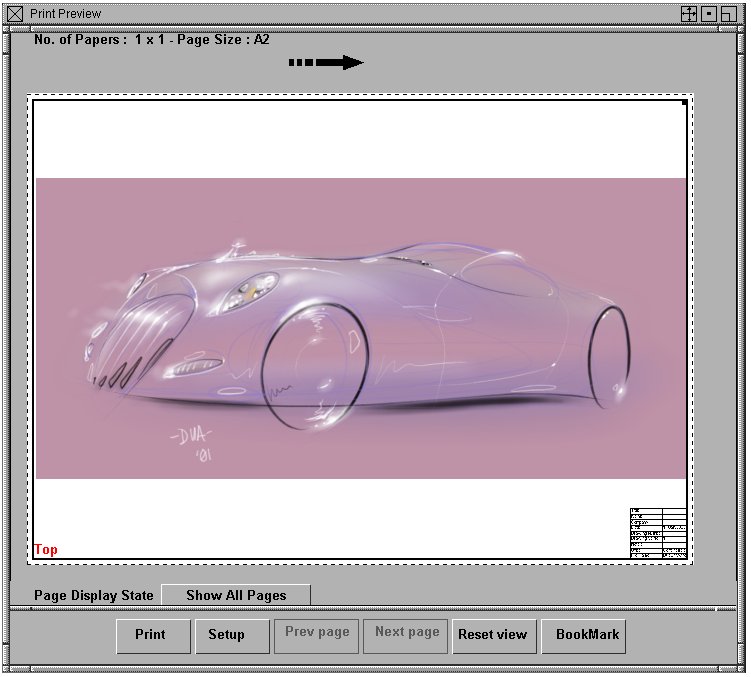
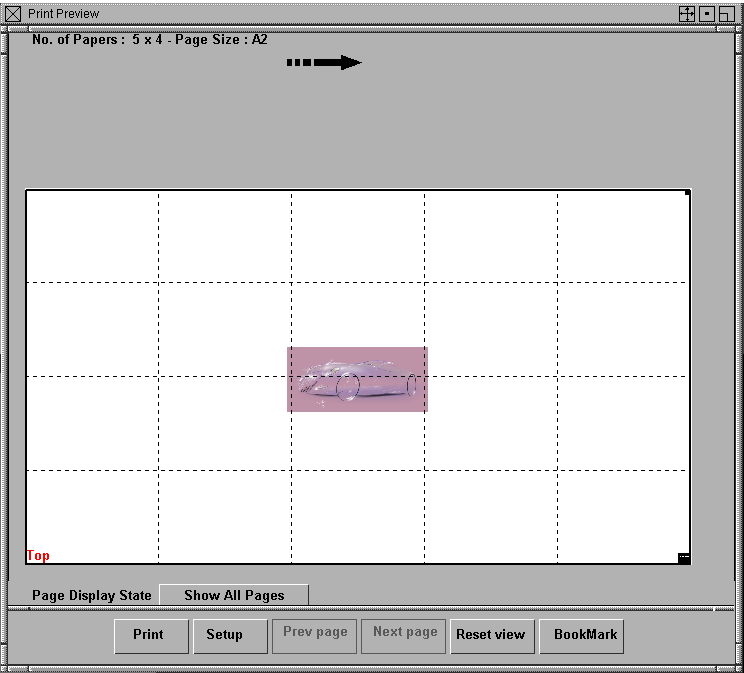
In this example, the width of the sketch is 274 cm; A2 paper size is 42 cm wide. In the Print Preview window, you can see that the sketch would require 20 sheets of A4 paper, as show in the following image.
 from the tool palette.
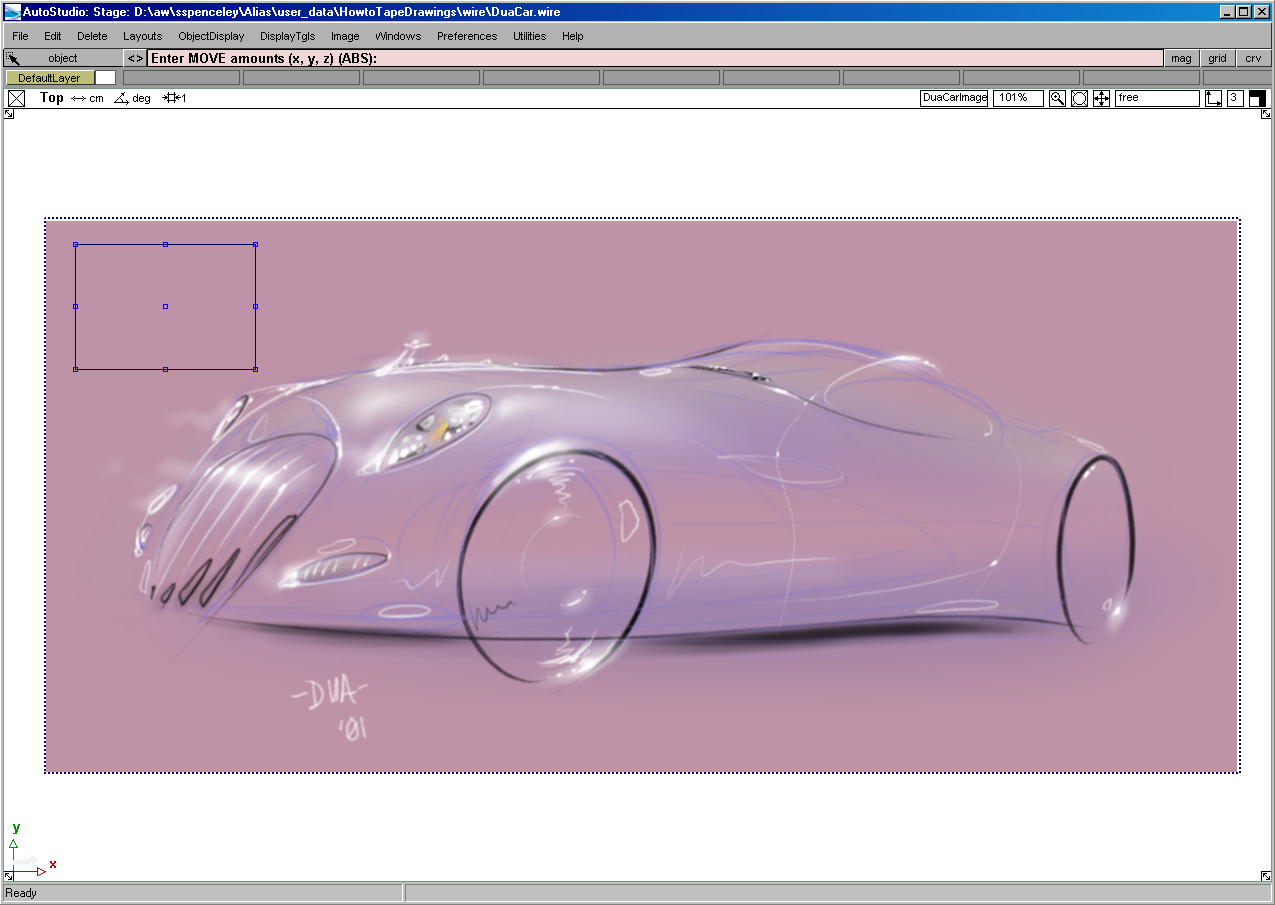
 and expand the Attributes section to type the correct width (42cm) and height(29.7cm). You now have a rectangle that is the same size as A4 paper to
use as a visual reference.
and expand the Attributes section to type the correct width (42cm) and height(29.7cm). You now have a rectangle that is the same size as A4 paper to
use as a visual reference. 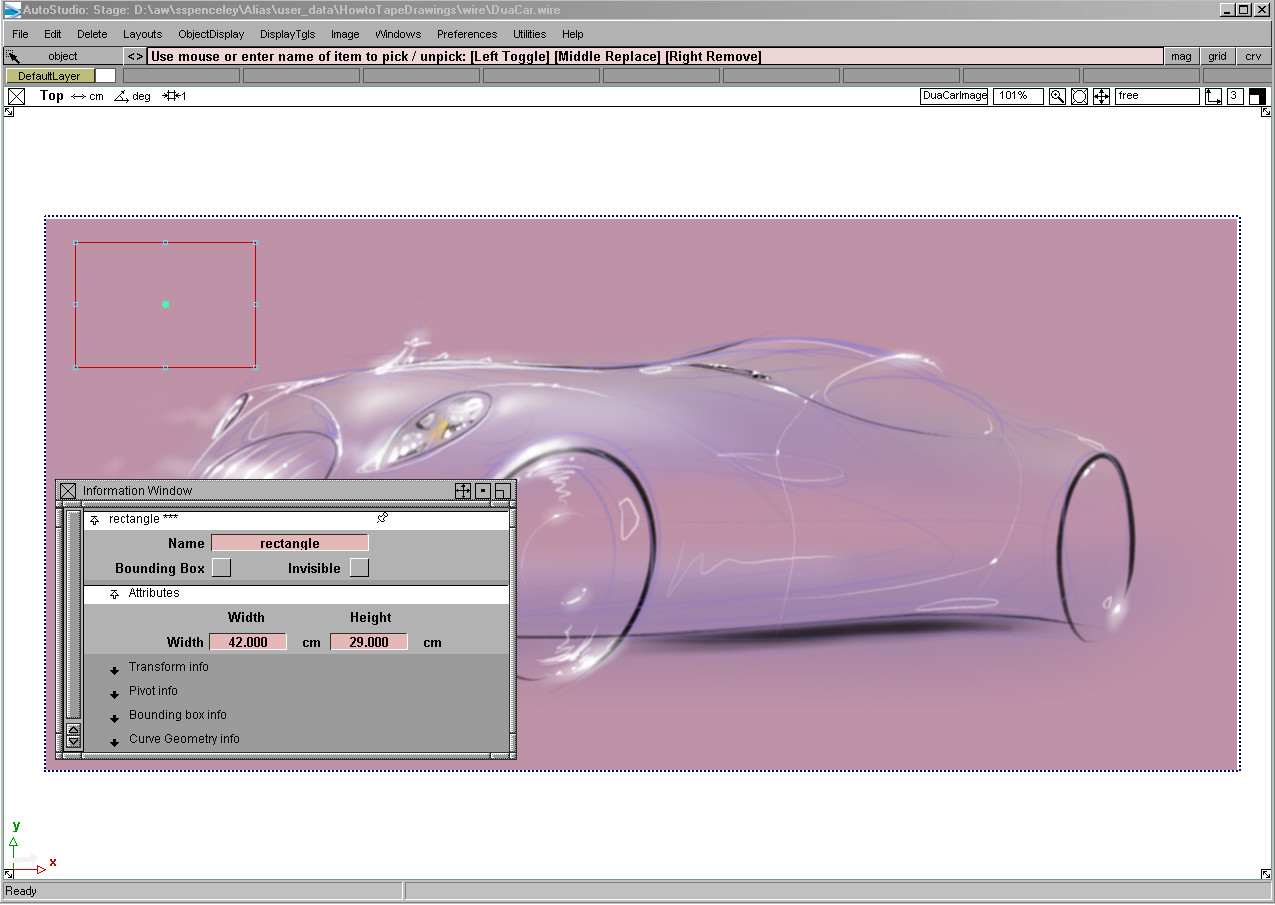
 to make it active, and then choose Transform > Scale
 and click on the image plane to display its 2D manipulators.
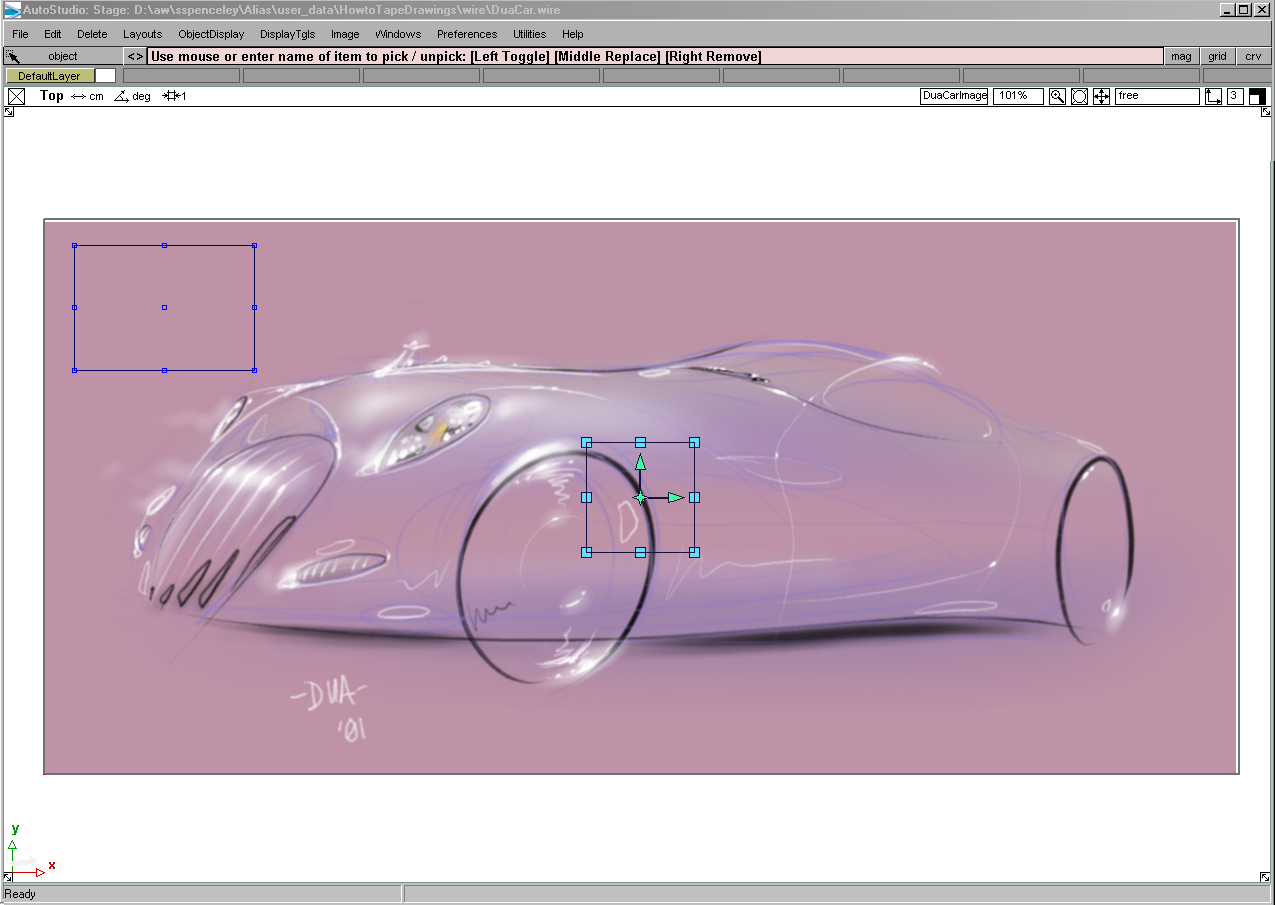
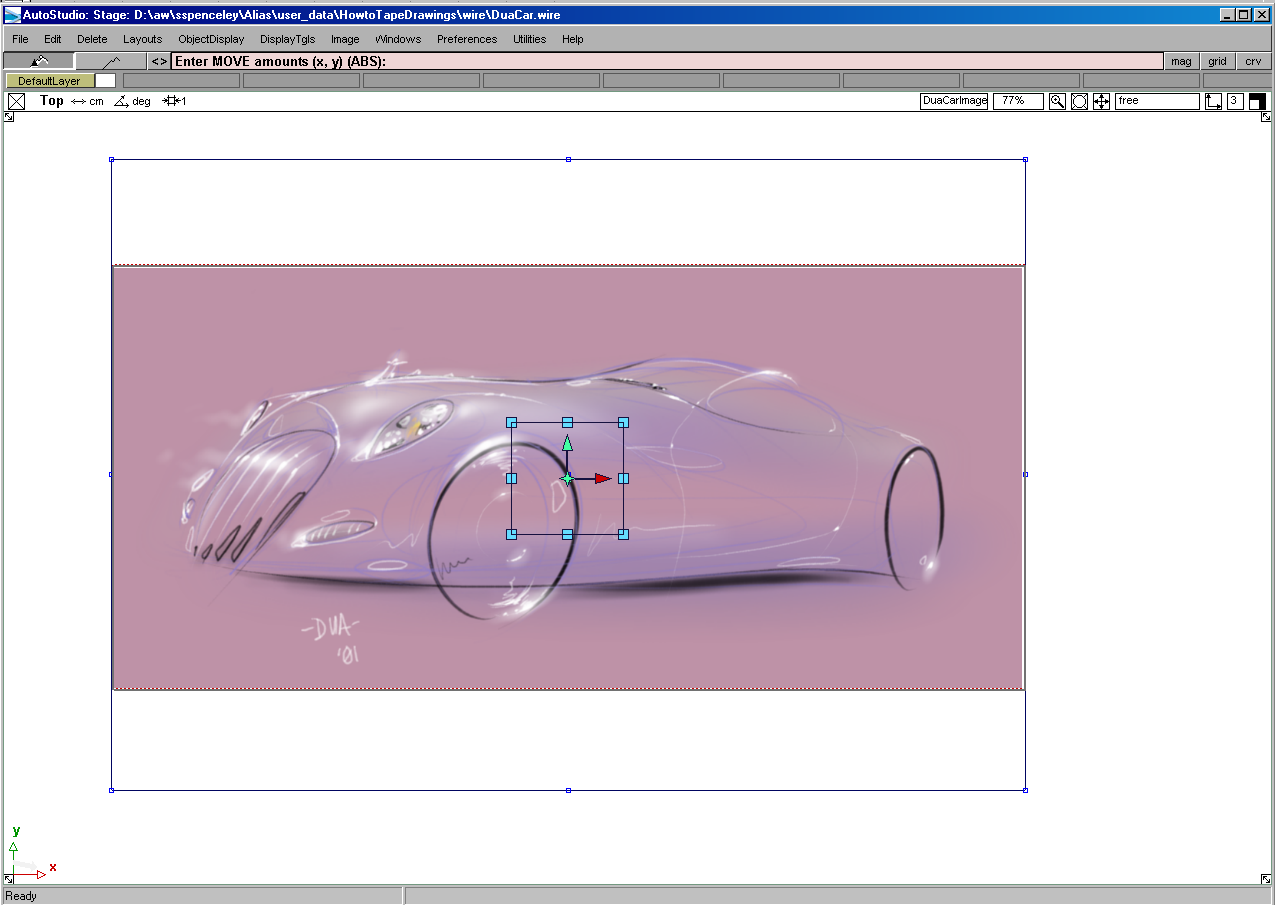
As you scale the image plane the ppi (pixels per inch) dynamically changes but the total number of pixels on the image plane remains the same.
No data is added or removed from the image plane by scaling or transforming the image plane.
Scaling planes and layers produces different results. When an image layer is transformed new pixel information is added or removed and the image layer resolution is changed.
Two alternative workflows that achieve a similar results
or
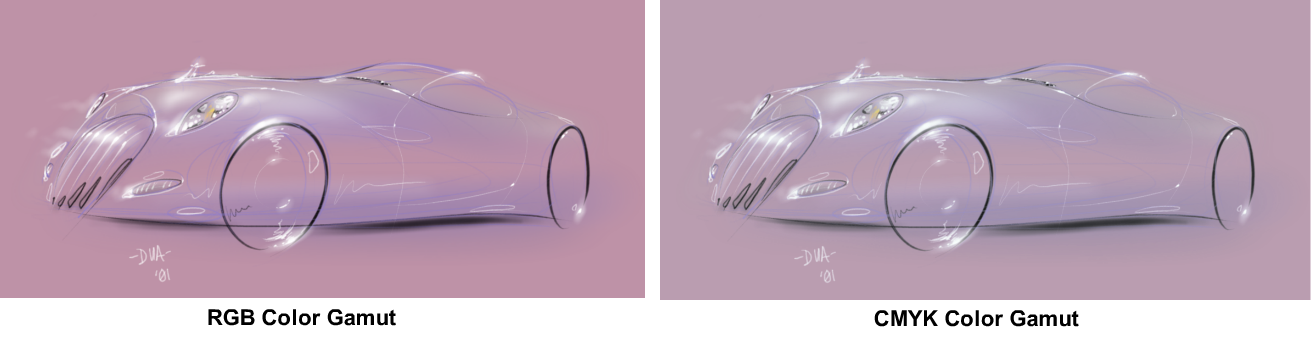
The final issue with printing is the color perceived by the naked eye and the representation of the color on different monitors, paper types, and inks. Monitors are RGB output devices and the range of colors, saturation, and contrast they can display is often very different to what a printer can print. Sketches, when presented on the computer, often display strong dynamic colors that cannot be printed using process inks. Generally, most monitors are able to display over 16 million colors. When printing on a press in CMYK, the range is usually quoted as under 20,000 distinguishable colors.
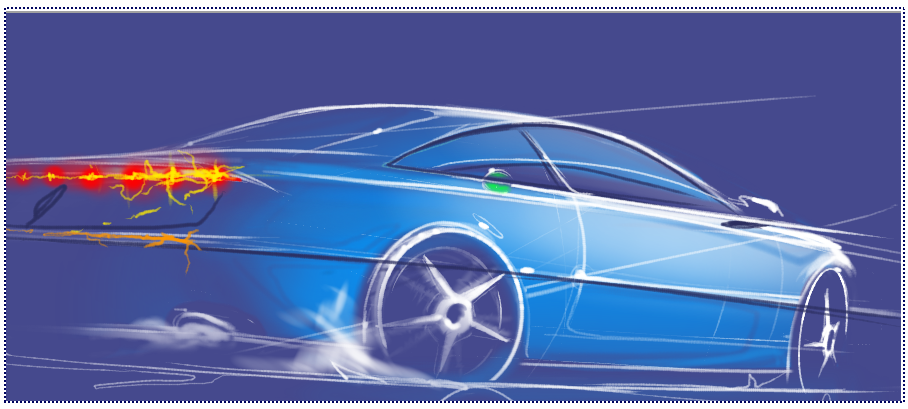
To help you understand the differences between monitor and paper, Alias supports a print preview option for CYMK. This converts the colors from your sketch into the color gamut of your output devices.
Here is an example of a simple sketch in RGB color space compared to CYMK color space.
To add to the complexities of printing in color, each paper type also has its own color gamut that it can display. For more information about paper types, see the manufacturer’s web page or information booklet.


