How to create a high-quality NURBS curve from scan data.
Section data in reference layers can be selected from within this tool.
Fit a NURBS curve to a scan line
- Choose Curve Edit > Fit Curve
 .
.
The control window opens automatically.
- Click the scan line (section data).
A NURBS curve is fit to the section data.
- Do any of the following:
- Drag the start and end point manipulator arrows to control which part of the scan line the curve is fit to. Usually you will
want to fit curves to sections with little curvature.
When dragging the arrow manipulators on a fitted curve, snappable points appear automatically (without having to hold any
control keys).
Light blue segments indicate snap divisions (equally spaced along the fitted curve).
Pink crosses indicate locations where the fitted curve intersects other curves or surfaces in the current view.
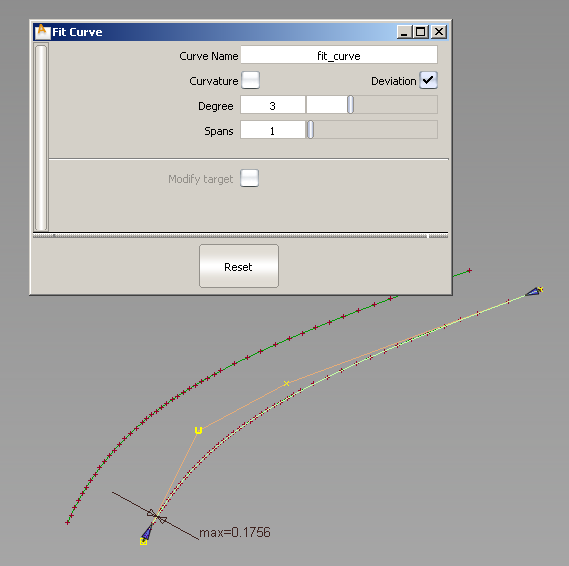
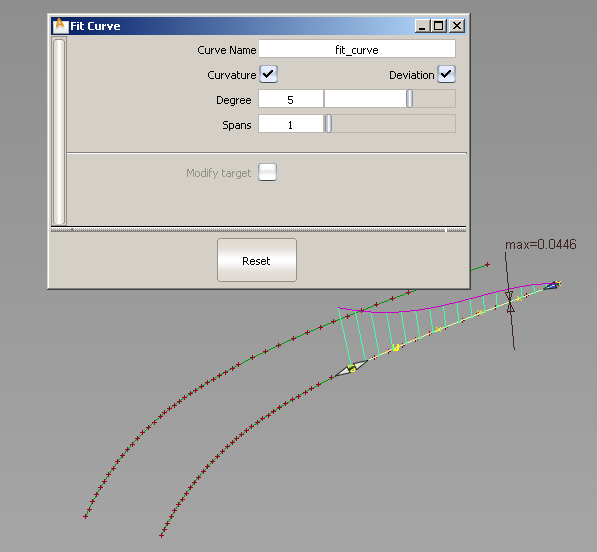
- Turn on the option to show a curvature comb plot on the new curve.
- Turn on the option to show the maximum deviation between the new curve and the scan line.
- Adjust the and settings in the control window to try to achieve a better fit. Increasing these values will make the curve fit the scan line better, but
will also give you a more complex curve.
Note
The new NURBS curve has construction history.