Create surfaces that round off the edges and corners between existing surfaces.
To create fillets along edges only
 .
.
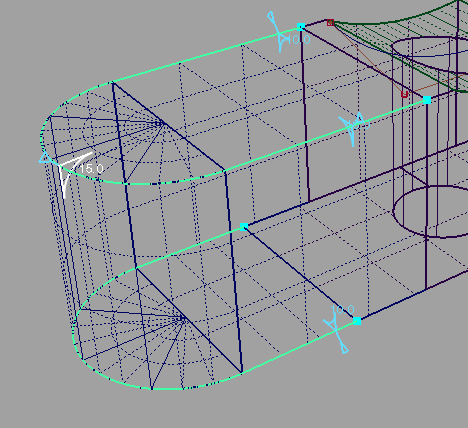
The common edge is highlighted in green with two blue squares indicating the end points.
A radius manipulator with a radius value appears on each edge.
This will set the fillet radius at those points. You can specify as many radii along an edge as you want.
 and click on an edge or
radius to remove it.
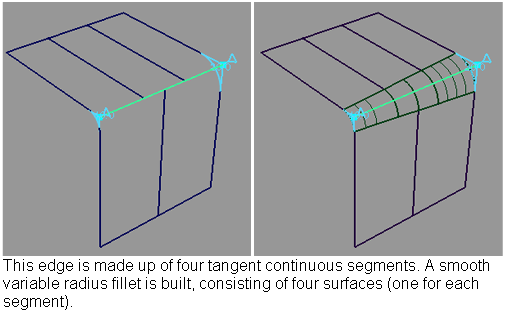
If two edges are tangent continuous, they are treated as a single edge and a single fillet is built.

Fillet surfaces are built along each shared edge. All new surfaces are grouped under the same DAG node.

The fillets are removed
and surfaces are untrimmed. You can then select/deselect edges (by
holding the  key) then press Build again.
Notes on variable radius fillets


 .
.
The shared edges are highlighted in green with blue squares indicating the end points.
A radius manipulator with a radius value appears on each edge.
A corner shape manipulator appears at the corner.

This will set the fillet radius at those points. You can specify as many radii along an edge as you want.
 and click on an edge or
radius to remove it.
If two edges touch, they will be treated as a single edge and a single fillet will be built.
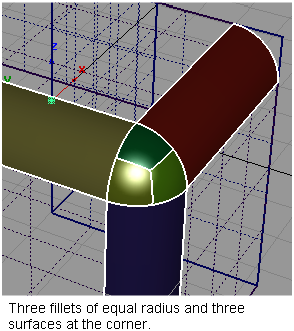
Fillet surfaces are built along each shared edge, and corner surfaces are built at the corners between fillets. All new surfaces are grouped under the same DAG node.

The fillets and corner surfaces are removed, and surfaces are untrimmed. You can then select/deselect edges, then press Build again.
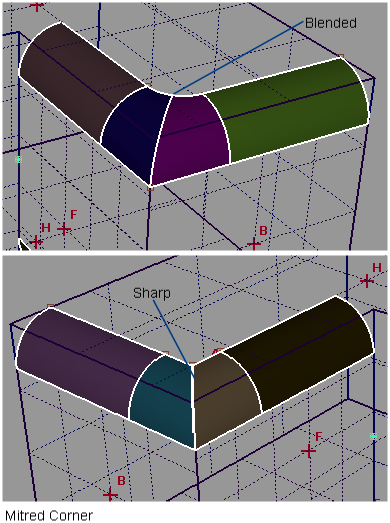
To successfully create a mitered surface, one surface is common to both edges; the other two surfaces must intersect.
 .
.
The shared edges are highlighted in green with blue squares indicating the end points.
Radius manipulators and a corner shape manipulator appear.

Four surfaces are built: two fillets and two surfaces at the corner.

The fillets and corner surfaces are removed, and surfaces are untrimmed. You can then select/deselect edges, then press Build again.

The radius manipulator appears when you click on an edge. It has two handles, as shown above.
Holding the  key and clicking on a radius
manipulator removes it.
Using the Corner shape manipulator
This manipulator can have one of six possible shapes:

Clicking on it will toggle it between all the possible choices for the corner geometry. The shapes available depend on the radii of the fillets incident on the corner.
This manipulator only appears when creating corners.
For more information
on the different corner types, see Options in Surfaces > Round  .
.
The round operation fails?