Not all balls are equal. Mass and elasticity affect how high the ball will bounce, and how far it will travel. So does the friction of the surface on which the ball lands. This lesson compares the bouncing of a bocce ball, a tennis ball, and a golf ball.
Even a hard rubber ball won’t bounce, if you drop it onto the dry part of a sandy beach. In this lesson, we assume that the balls are bouncing on a hard, uniform surface such as smooth concrete or a hardwood floor. An uneven surface can cause unexpected motion: That is the subject of the lesson that follows.
The friction of air (air resistance or “drag”) can affect a ball’s motion as well. Usually this is a subtle effect. On the other hand, even a lightweight, highly elastic ball such as a golf ball eventually loses momentum and comes to a stop. So unlike the indefinitely bouncing basketball in the previous lesson, the balls in this lesson bounce for a limited time only, and with decreasing energy.
We’ll start with a heavy ball that doesn’t have much bounce to it, at all. Bocce balls weigh from 31 ounces to 42 ounces (900 to 1200 grams): on the average, a bit over 2 pounds (about 1 kilogram).
Here is the graph of a bocce ball dropped onto a hard, smooth floor from a height of just over 25 feet (7.6 meters):
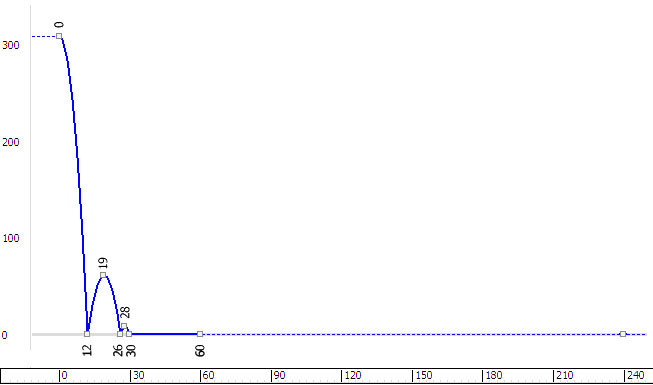
As the graph shows, the ball bounces only twice, and does not have much forward momentum, either.
 (Open File), navigate to
the \scenes\animation\auto_key folder, and
open compare_bocce_start.max.
The scene contains a bocce ball and a plane that will act as the floor. It isn't animated yet.
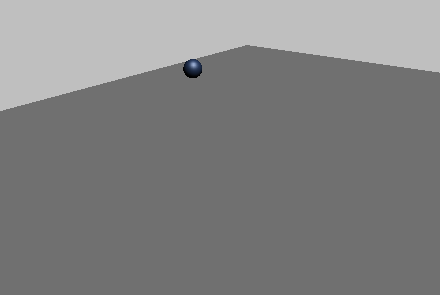
Keyframe the bounces and adjust the keys:
 (Auto Key), and then in
the Front viewport,
  move the ball to create the
following keyframes:
Don’t sink the ball through the floor as you did with the basketball: Bocce balls are typically metal or wood, so squash and stretch is not an issue in this exercise!
 (Auto Key).
The bounce is now blocked out.
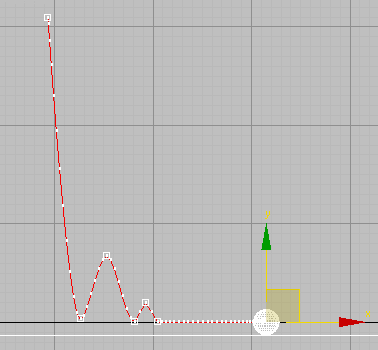
As with the basketball, the keys where the ball strikes the floor are not crisp enough, yet.

The three Z Position floor keys selected
 (Set Tangents To Fast).
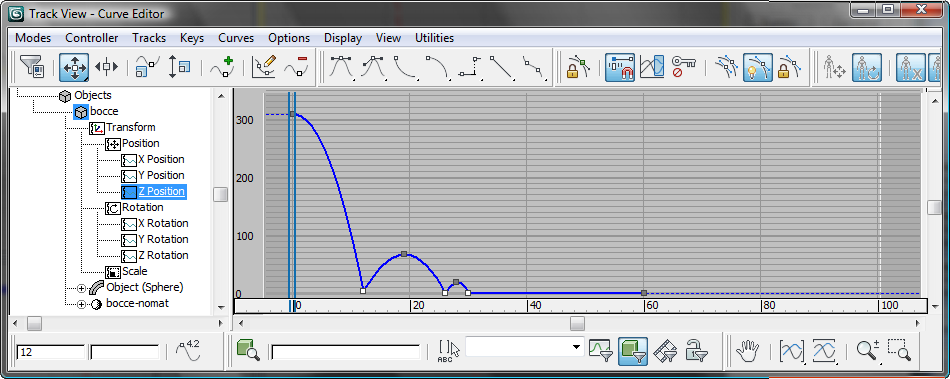
The Z Position bounce keys corrected
 (Set Tangents To Linear).
X Position rolling keys corrected

Trajectory of the bocce ball after adjusting the keys
 Play the animation.
The keys you created give a convincing animation of a heavy, solid ball.
As you might expect, a tennis ball bounces more often than a bocce ball, and travels farther while it does so.
A tennis ball is hollow rubber, coated with felt. The standard weight of a tennis ball is 22 ounces (624 grams).
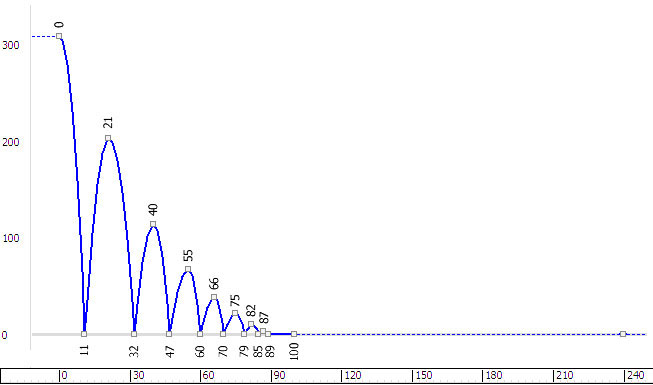
In this section, we won’t make you enter keyframes by hand again. Instead, we demonstrate a shortcut way to model the diminishing energy and magnitute of bounces: This is a technique that you could apply to an out-of-range, repetitious bounce such as you created for the basketball in the previous lessons.
 (Open File), navigate to
the \scenes\animation\auto_key folder, and
open compare_tennis_start.max.
The scene contains a tennis ball and a plane that will act as the floor. The ball is animated, but it keeps bouncing back to approximately the same height: the scene doesn’t yet model a normal loss of energy. (As the ball travels, its bounces do grow closer together: The spacing of the keyframes is based on the real-world chart shown above, but the height of the bounces isn’t adjusted, yet.)
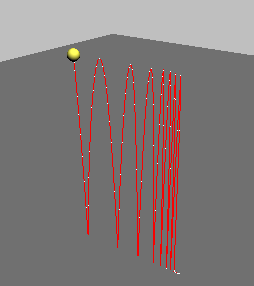
Adjust the Z Position curve by using a multiplier curve:
 select the tennis ball,
right-click it, and choose Curve Editor from the quad menu.
 controller window, click the Z Position
track to display this curve in the curve window.
 Apply
- Multiplier Curve.
3ds Max Design adds a multiplier curve to the Z Position track. It also changes the curve window display so all curves are visible.
 (the plus-sign icon that
now appears next to the Z Position entry in the controller window).
Then click the Multiplier Curve track to highlight it.
As you can see, the default value of the multiplier curve is completely flat.
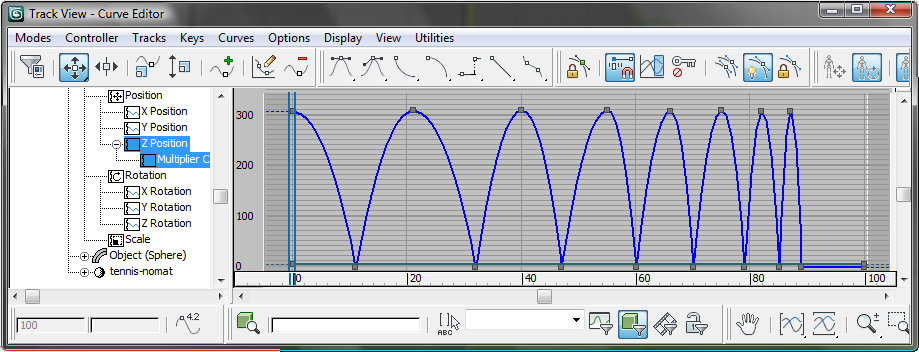

This key is close to the final key for the tennis ball itself, but is slightly above it, overlapping.
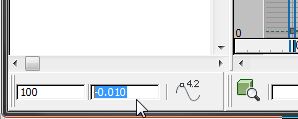
The Key Stats toolbar is the status bar at the lower left of the Curve Editor. The first field shows the current frame number, and the second field is the key value. In this field, initially set to 1.000, enter –0.01.
Now the multiplier curve “damps” the bounce of the tennis ball, simulating the loss of energy as it travels and strikes the floor.

Are the new values realistic? Comparing the results obtained from the multiplier curve with the chart for an actual tennis ball, it appears that in real life, the tennis ball loses energy, and bounce height, even more quickly than our simulation. If realism is a concern, consider keyframing each bounce, as you did for the bocce ball. But if your main concern is creating a general impression, then the multiplier curve is a useful shortcut.
In this section, you simply compare the path of a bouncing golf ball to the other two balls in this example.
A golf ball typically weighs 1.62 ounces (45 grams), and is made of rubber (or a comparably elastic plastic) wound around a core, then encased in a plastic shell. Its extreme elasticity means that it bounces a lot: So much so, that to animate it requires more than the default 100 frames of a 3ds Max Design scene.

Open the scene with all three balls:
 (Open File), navigate to
the \scenes\animation\auto_key folder, and
open compare_completed.max.
The scene contains the bocce ball, the tennis ball, and the golf ball. They are animated already. All are dropped from the same height at the same time.

Compare the balls and how they bounce:
 Play the animation.
The balls bounce according to their mass and elasticity.
Incidentally, the golf ball hits the floor slightly before the tennis ball, which precedes the bocce ball: So our real-world measurements account for air resistance, as well as mass and elasticity.
Click  (Stop) when you are done
observing the animation.
You can also play the movie compare.avi to see a rendered version of this animation.