At a resolution of 640 x 480, it can take 1 minute or more to render each frame, depending on the speed of your computer, so you probably don't want to render the entire animation: At 200 frames, that would take a few hours on a standalone system. This lesson describes some ways to check your work and preview what the final result would be.
 open the file wt_finalgather.max.
A preview renders at low resolution, with shading but no rendering effects. It is a good way to check the animation you've created.
 Grab Viewport
  Create Animated Sequence
File.
3ds Max Design renders the animation as an AVI movie file. As it creates the preview, 3ds Max Design displays a progress bar at the bottom of the 3ds Max Design window. When the preview is done, it launches the Windows Media Player and plays the preview animation.
You can replay the preview in the Media Player
by clicking Play once more, or launch the Media Player from 3ds Max Design again by
choosing Tools  Grab
Viewport
  View
Animated Sequence File.
The preview gives you a precise idea of the speed and rhythm of the animation, and lets you see if there is anything you need to fix. At this point, you might want to make adjustments by changing the camera's target position or the shape of the path.
While the preview shows the animation's speed and rhythm, it doesn't show how frames look when fully rendered. To get a better idea of the look of the animation, you can render sample frames.
 (Render Setup) or press F10.
 Common panel, on the
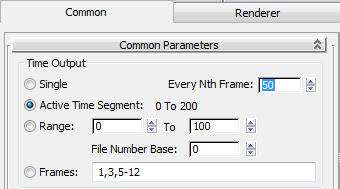
Common Parameters rollout, find the Time Output group. Change the
output from Single to Active Time segment, and then change Every
Nth Frame to 50.
This will render five frames that are sampled along the duration of the animation, from frame 0 to frame 200. (Rendering five frames will take probably 5 to 10 minutes: Adjust the Every Nth Frame value to suit the time you want to spend on this lesson.)
For animations or multiple frames, you need to specify a file or files where the renderings will be saved.

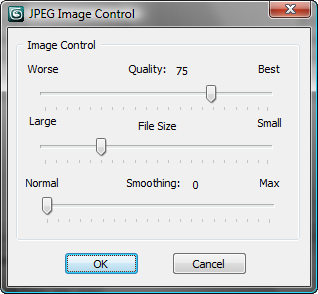
When you render an animation to a still-image file type such as JPEG, 3ds Max Design creates a sequence of image files. Each has the file name you chose (wt_samples) followed by a sequence number (for example, wt_samples0000.jpg).
3ds Max Design opens a JPEG Image Control dialog.

As each image is rendered, it is stored in the \renderoutput folder. When a frame is completed, view it to see if there is a problem with it. If something seems wrong, stop the rendering by clicking Cancel in the Rendering dialog or by pressing Esc. Correct the problem, and then render sample frames once more. This sampling process should help you spot problems before you take the time to render the full animation.
When you are ready to render a full animation, you can change the output file type to a movie format. AVI and MOV are both available options. 3ds Max Design prompts you to choose a compressor/decompressor (codec) for the movie. Change Every Nth Frame back to 1, and then render the complete animation.
You can view a sample
AVI movie of the walkthrough by choosing Rendering  View Image File, and from the tutorials folder
opening \sceneassets\renderassets\wt.avi.
A final version of the scene is in the \using_autocad_files\walkthrough\ folder, saved as wt_final.max.