In this lesson, you prepare
a 2D DWG file as the basis for the 3D house model.
NoteIf you don't have
a running version of AutoCAD, skip ahead to the next lesson,
Importing the DWG File.
A DWG file with the necessary preparation is available in the
\import\AutoCAD files folder.
Open the file:
- Start
 AutoCAD 2010.
NoteYou can open this
DWG file with a version as early as AutoCAD 2007, but be aware that
the user interface has changed (in particular, for Layers), and
won’t exactly match the steps in this lesson.
- From the
 Application menu, choose
Open. In the file dialog, browse to the \3ds
max design 2011 tutorials\import\AutoCAD_files\ folder.
Open wt_start.dwg.
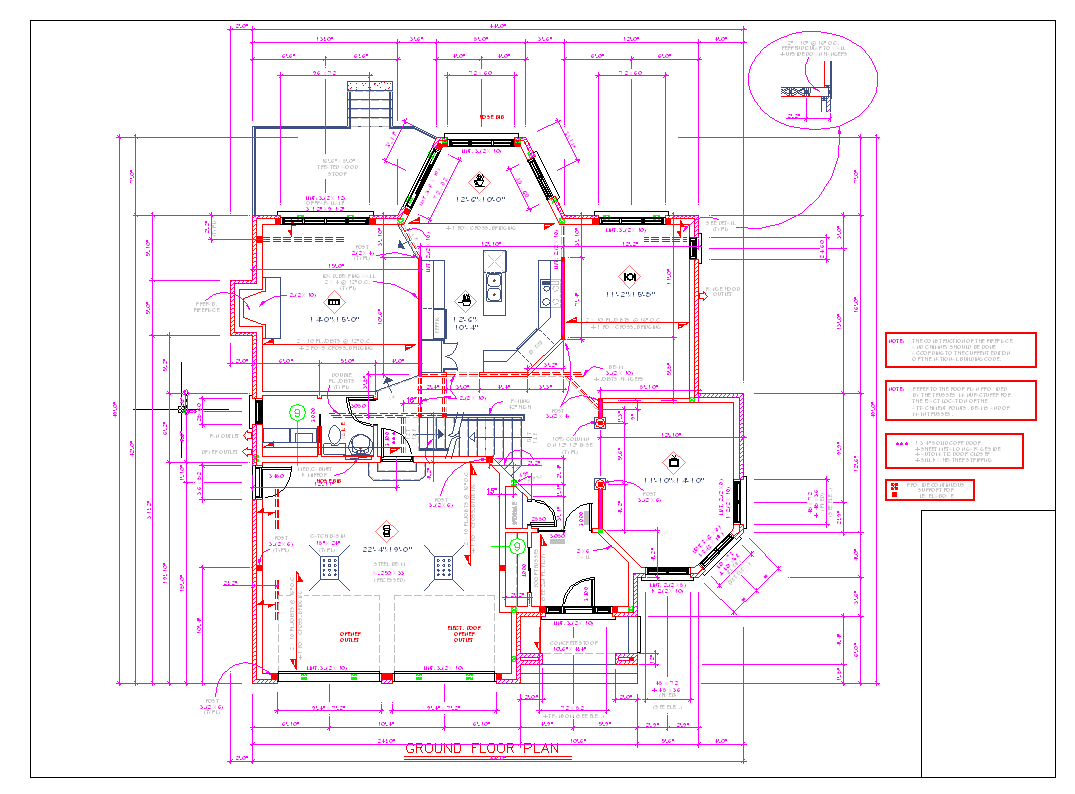
The file is the ground
plan of a house.
NoteYou might see a message
that tells you to resave the file. Close the dialog, but don’t resave.
Freeze the layers:
This file contains a
lot of elements that aren't necessary for the 3D walkthrough. Using
the Layer Manager, you can hide all the elements that you will not
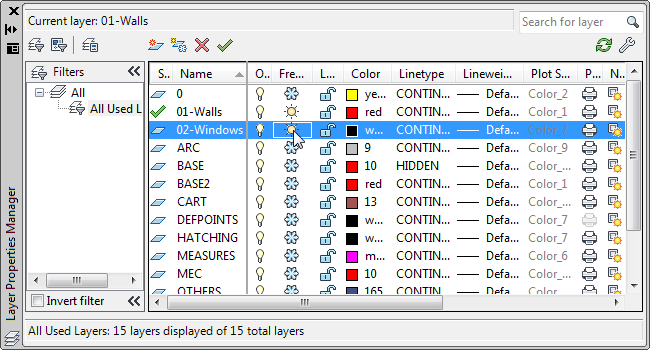
use. The only layers that are required for this tutorial are 01-Walls and 02-Windows.
- On the ribbon
 Home tab
  Layers panel, click
  (Layer Properties).
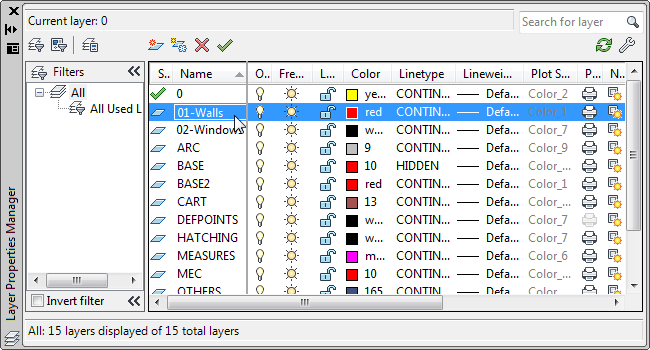
AutoCAD opens the Layer
Properties Manager dialog.
- On the Layer Properties Manager, click
to select the layer 01-Walls.
- On the Layer Properties Manager toolbar,
click
 (Set Current) to make this
layer current.
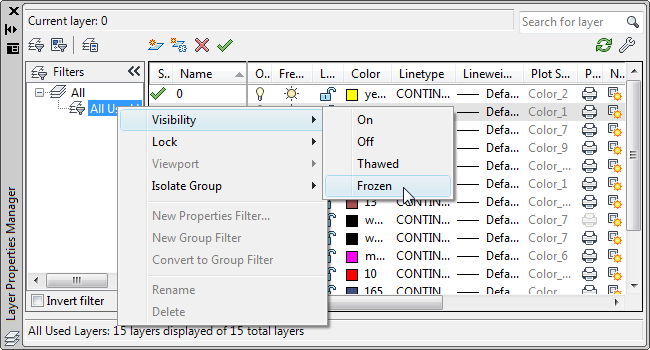
- In the left pane, right-click All Used
Layers, then choose Visibility
 Frozen to freeze all the layers. A dialog
appears to inform you that the current layer cannot be frozen. Click
OK.
- Click the
 icon to unfreeze the 02-Windows layer
as well.
- Click
 (New Layer). Name this new
layer 3DWalls. Use the square color
icon in the Color column to change its color to a dark blue.
- Highlight the new layer (3DWalls) and
click
 (Set Current).
- Close the Layer Manager.
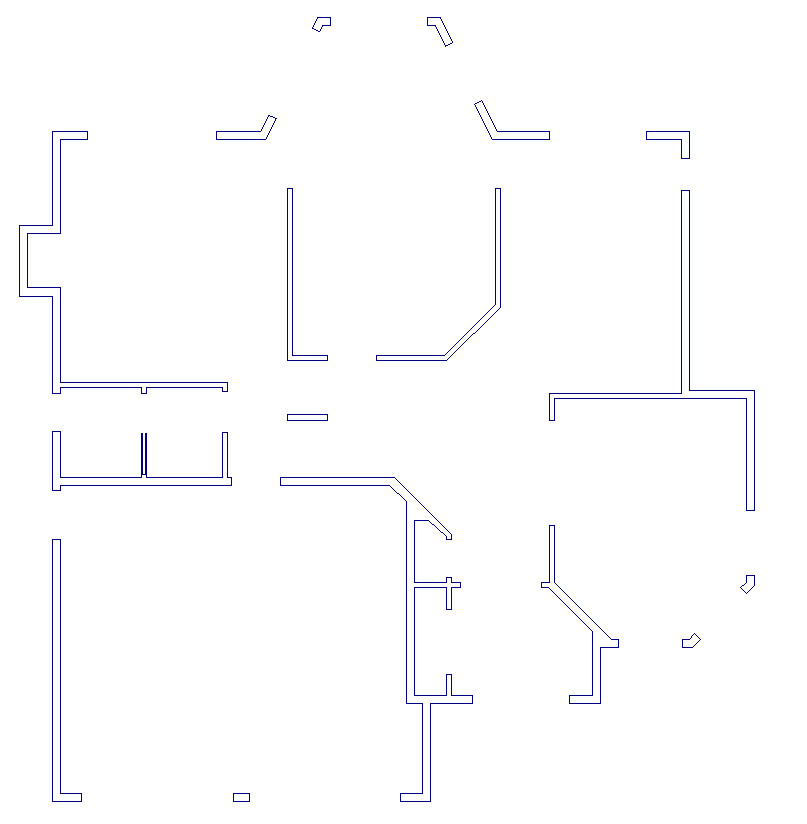
The drawing should now show walls, windows,
and doors.
Create polylines:
In order to create 3D
walls in 3ds Max Design efficiently, you need to create Polylines using
the wall lines and the Bpoly command. This command draws a closed
polyline around the boundary of a selected field, leaving the original
wall lines untouched. Using polylines instead of lines greatly simplifies
the creation of walls later on in 3ds Max Design.
- Make sure Snap is turned off. (Pressing F9 toggles Snap)
- In the viewport, zoom out until you see
all the wall lines. This is required for the Bpoly command to work.
- Type bpoly and then
press Enter.
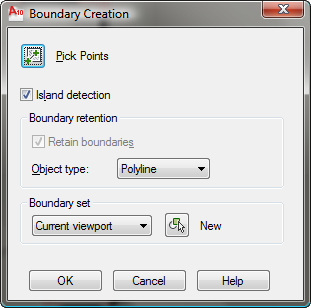
AutoCAD opens a Boundary Creation dialog.
- In the Boundary Creation dialog, click
 (Pick Points).
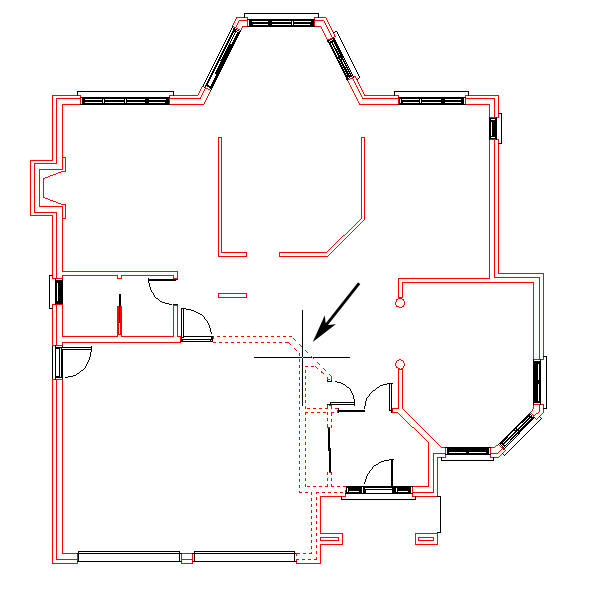
- Click inside the wall shown in the following
illustration, and then press Enter.
AutoCAD creates a polyline.
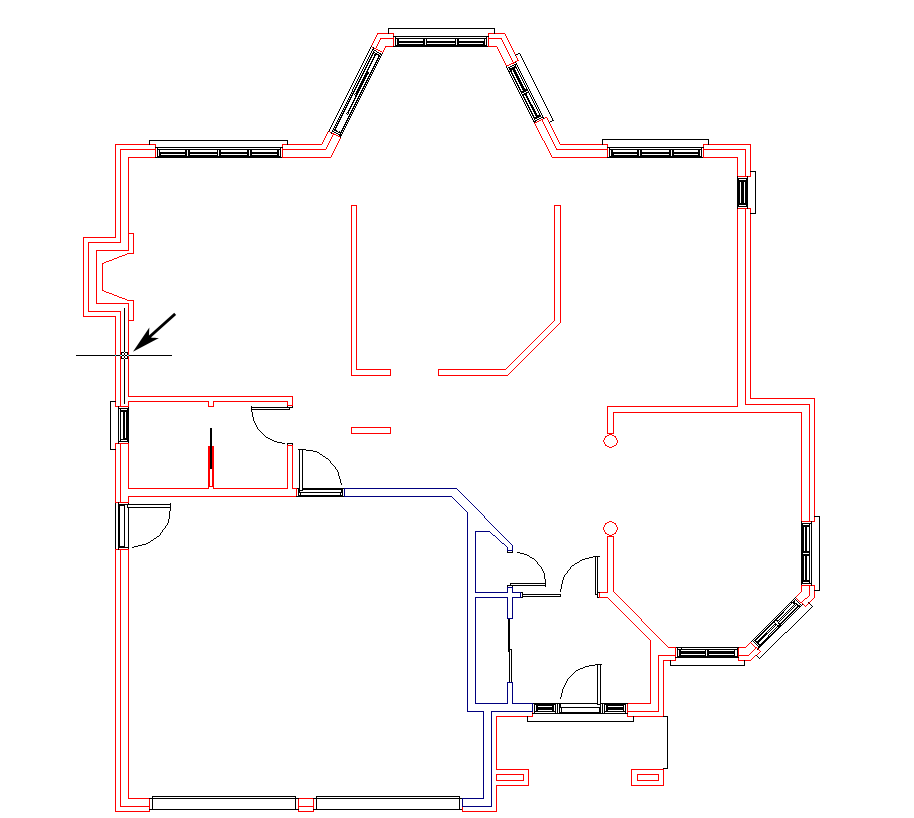
- Retype bpoly. Click
Pick Points once again, then click inside the wall shown in the
following illustration. Press Enter.
This time the polyline wasn't created properly. Press Ctrl+Z to undo this last operation.
The polyline was not created because the wall
is not continuous. You must close the gap before you can create
a polyline.
- Press Esc to
exit the Bpoly command.
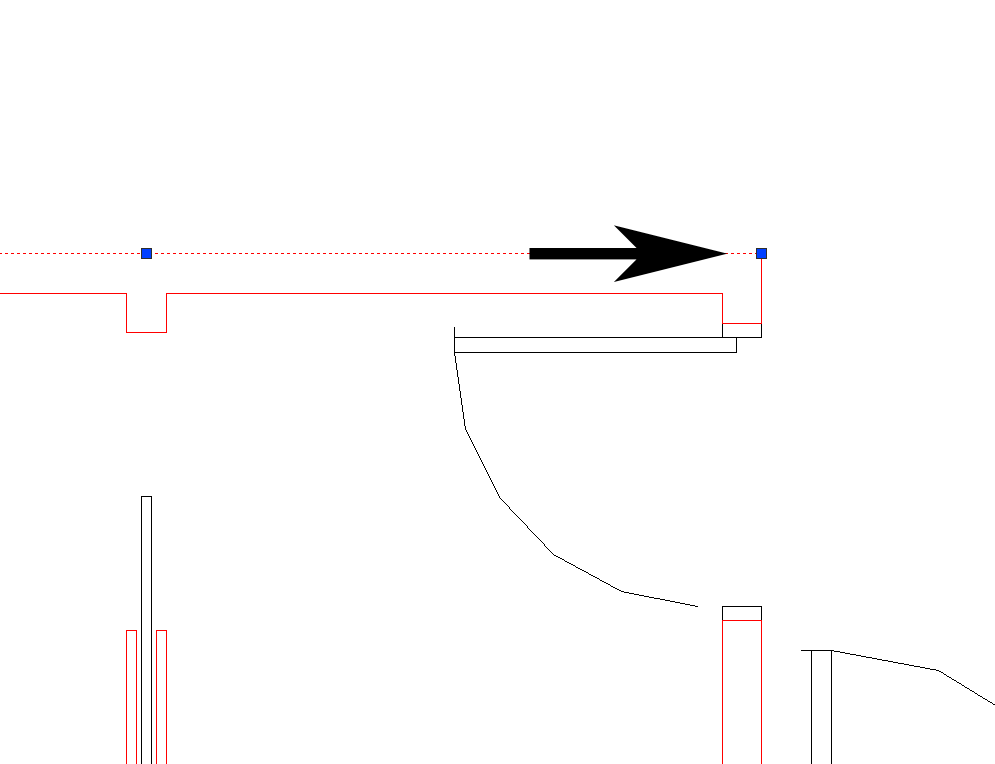
- Zoom in until you get a better view of
the gap between the walls.
- Fix the gap by extending the line on
the left to the endpoint of the next wall. Click the line to select
it, then drag from its endpoint to the endpoint of the other wall.
- Zoom out until you see all the wall lines
again, then repeat the Bpoly command.
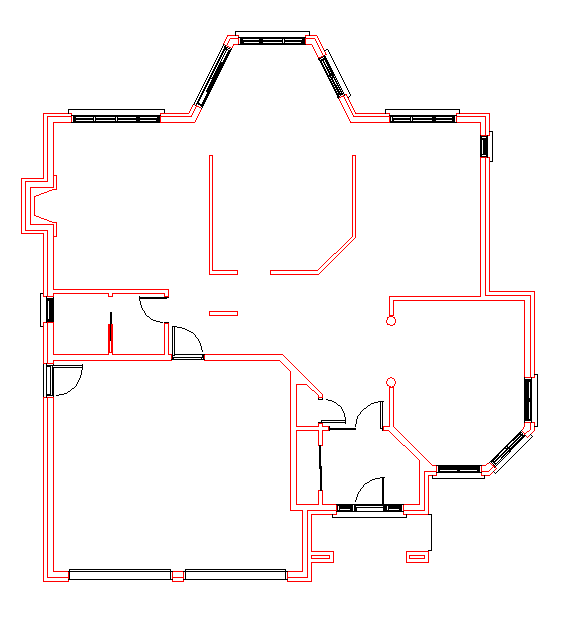
This time, a polyline is created.
- Use Bpoly to create polylines from all
the walls in the drawing file. Don't forget the small lines between
the windows.
If you see a warning that says “Valid Hatch
Boundary not found,” zoom out so all the wall lines are visible
in the viewport, and then use the Bpoly command again.
NoteThe new polylines
should have the dark blue color of the 3DWalls layer.
Save the DWG file:
- Your work in AutoCAD is now done. Save
the file as my_wt_2dplan.dwg, and then exit
AutoCAD.
 AutoCAD 2010.
 Application menu, choose
Open. In the file dialog, browse to the \3ds
max design 2011 tutorials\import\AutoCAD_files\ folder.
Open wt_start.dwg.
 Home tab
  Layers panel, click
  (Layer Properties).
 (Set Current) to make this
layer current.
 Frozen to freeze all the layers. A dialog
appears to inform you that the current layer cannot be frozen. Click
OK.
 icon to unfreeze the 02-Windows layer
as well.
 (New Layer). Name this new
layer 3DWalls. Use the square color
icon in the Color column to change its color to a dark blue.
 (Set Current).

 (Pick Points).
