Modeling the lintel is a bit more complicated than modeling the windows. On the other hand, the doorways themselves are a simple extrusion as the windows are.
Correct the outline of the lintel beam:
 Pan and
  Zoom to get a good view
of the faces that show the lintel beam.
Zoom to get a good view
of the faces that show the lintel beam.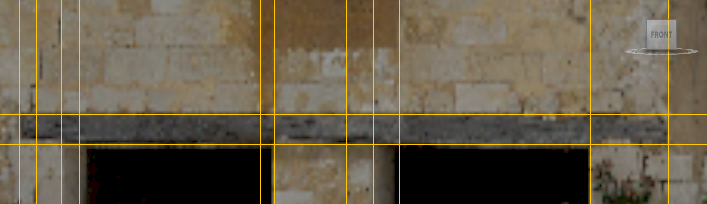
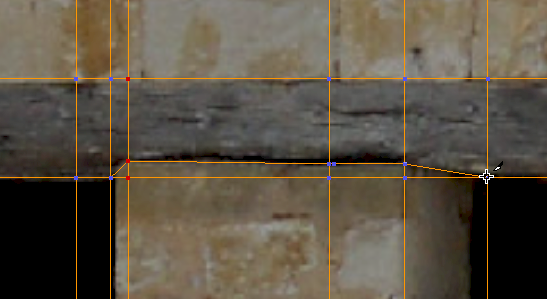
As you can see in the bitmap, the lintel has an irregular outline. You will edit the faces so they correspond to the outline of the wooden beam.
 (Vertex) to go to the Vertex
sub-object level.
(Vertex) to go to the Vertex
sub-object level.
 move the three lower vertices
so they follow the outline of the beam.
move the three lower vertices
so they follow the outline of the beam.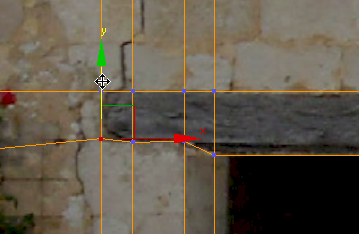
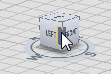
 (SwiftLoop), then add a
new vertical loop where the stones of the pillar form an angle into
the beam.
(SwiftLoop), then add a
new vertical loop where the stones of the pillar form an angle into
the beam.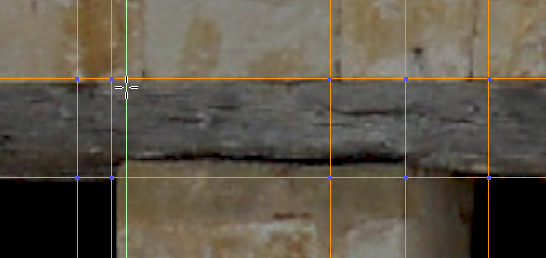
This new loop of edges is so you can add a vertex at the angle point without creating a free-standing vertex. Free-standing vertices are never a good idea.
 Edit panel, click to turn on
  (Cut).
(SwiftLoop), then add two
new vertical loops where the stones rise into the beam.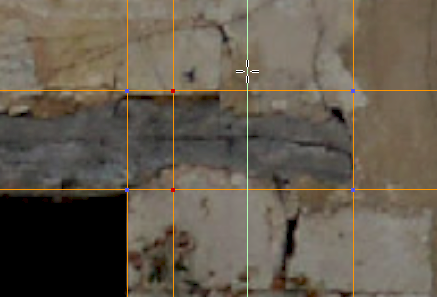
(Cut).
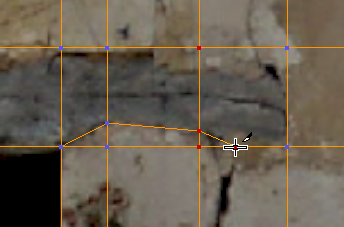
Move the two upper vertices
at the right end of the beam, to better follow the beam contour.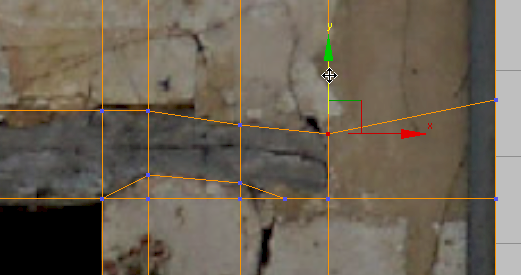
 (Select Object) and turn
off Move.
(Select Object) and turn
off Move.
Now the faces over the lintel are a fair approximation of the shape of the beam.
zoom out and pan so you can see the entire
lintel.
 (Polygon) to go to the Polygon sub-object
level.
(Polygon) to go to the Polygon sub-object
level.
 Click and Ctrl+click to select all of the
lintel faces.
Click and Ctrl+click to select all of the
lintel faces.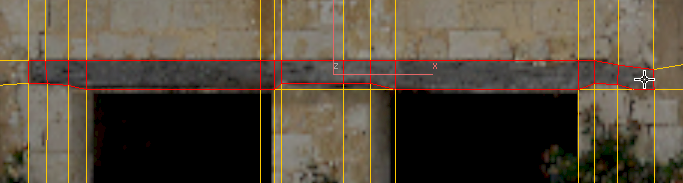
 (Extrude) to turn it on,
then drag in the viewport so the lintel extends above the doorways.
(Extrude) to turn it on,
then drag in the viewport so the lintel extends above the doorways.
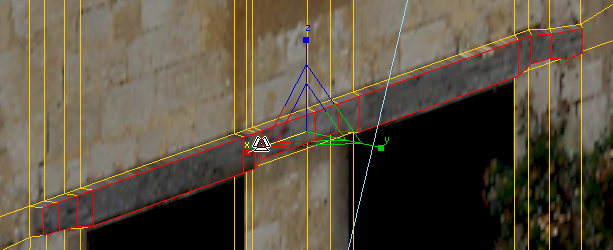
Zoom, pan, and  orbit (or use the ViewCube)
to get a better view of the doorways.
Click and Ctrl+click to select the doorway
faces. Include the portion with stone to the left of each door.
(The left-hand doorway has an extra sliver of face that the right-hand
doorway does not have.)
orbit (or use the ViewCube)
to get a better view of the doorways.
Click and Ctrl+click to select the doorway
faces. Include the portion with stone to the left of each door.
(The left-hand doorway has an extra sliver of face that the right-hand
doorway does not have.)
(Extrude), then use the
caddy’s Weight field to extrude the doorways inward by a value of –0.6m.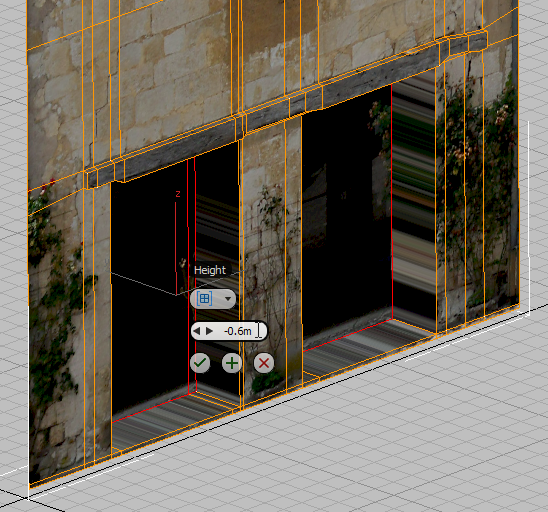
 (OK) to accept the extrusion.
Orbit (or use the ViewCube)
to see the doorways from the other side.
(OK) to accept the extrusion.
Orbit (or use the ViewCube)
to see the doorways from the other side.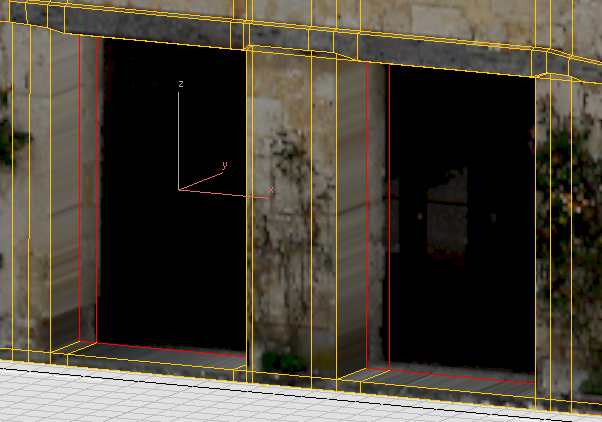
 (Edge) to turn on the Edge
sub-object level.
Click and Ctrl+click to select the four vertical
edges that are part of the doorways, but whose faces show stonework.
(Edge) to turn on the Edge
sub-object level.
Click and Ctrl+click to select the four vertical
edges that are part of the doorways, but whose faces show stonework.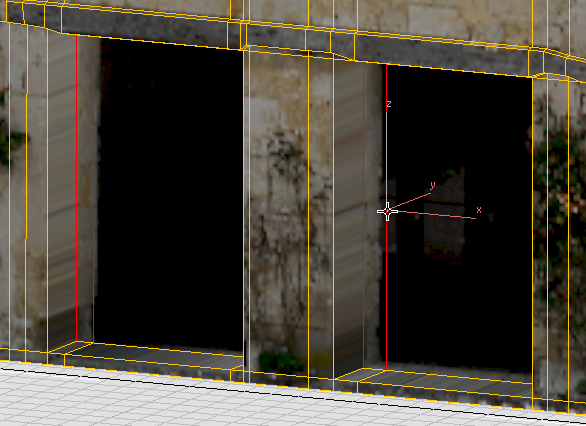
Move these edges to the
right along the X-axis until the faces show only the shadows beyond
the door.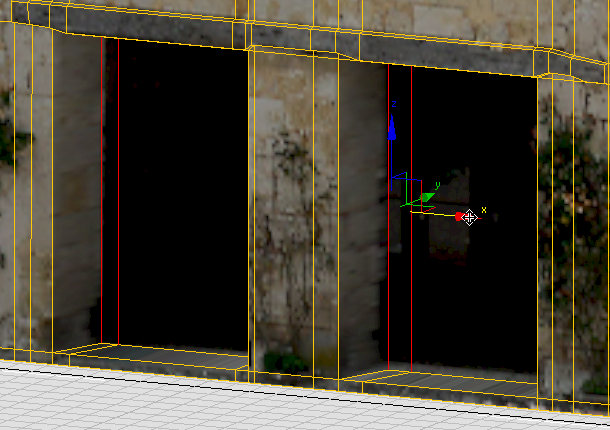
Incidentally, the perspective captured by the camera helps with the texture projection onto the left-hand doorjambs: These now look good. The right-hand doorjambs don’t look as good. This is a problem that you will fix in a later lesson.
 (Edge) to exit the Edge
sub-object level.
(Edge) to exit the Edge
sub-object level.


 when the cursor is at a
vertex
when the cursor is at a
vertex
 when the cursor is on an
edge
when the cursor is on an
edge
 when the cursor is on a
face
when the cursor is on a
face