The HSDS modifier implements Hierarchical SubDivision Surfaces. It is intended primarily as a finishing tool rather than as a modeling tool. For best results, perform most of your modeling using low-polygon methods, and then use HSDS to add detail and adaptively refine the model.
The modifier's primary features are:
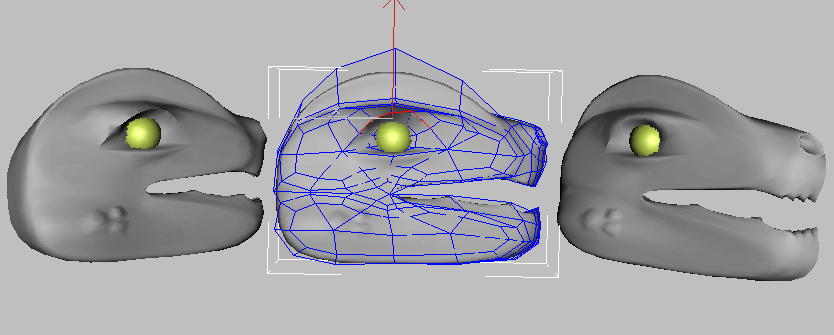
With local refinement, you subdivide part of a polygon mesh and edit the mesh in the subdivided area. This is done indirectly by manipulating sub-objects in a control grid. Use this feature when you need to increase mesh resolution in specific areas of a model rather than uniformly over the entire object, as with the Tessellate modifier. An example of usage would be a human hand. Once you've modeled the basic shape, you might use the HSDS modifier to add bumps for the knuckles.
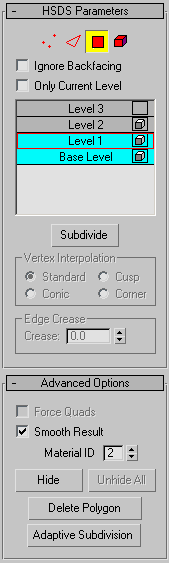
The HSDS modifier supports multiple levels of detail, hence its hierarchical nature. The Subdivision Stack lets you visually navigate the levels of detail at any time while using the modifier. Thus, you can edit the same part of a mesh at different mesh resolutions. If you work at a level of detail lower than the highest available, the higher-detail areas are still in effect, but you control them indirectly by means of the more widespread sub-objects at the lower level.
Sub-object animation is supported only at the lowest level of detail: Base Level. This is accomplished by animating the mesh below the HSDS modifier. To apply deformation animation after HSDS modeling, first convert the object to an editable mesh by right-clicking the modifier stack and choosing Collapse All.
The adaptive tessellation automatically subdivides polygons as needed to maintain a smoothly curved surface when transforming mesh sub-objects. You can use a preset or provide custom settings.
Also, The HSDS modifier does not handle changes to the modified object's topology, such as altering a sphere's Segments setting. Topology changes to the input mesh results in the loss of all edits made in the HSDS modifier.
By default, the HSDS modifier doesn't convert non-quadrilateral polygons to quads. Because the modifier works best with four-sided polygons, it's recommended you perform the conversion if necessary.
If the object is made up of quads only, Force Quads isn't available because no conversion is necessary.
The object is covered with a gold control grid (or, in Vertex sub-object mode, a white grid with blue vertices), indicating that the entire mesh is available for subdivision and/or sub-object transformation at base level.
 Select one or more sub-objects.
The modifier again subdivides and smoothes the selected sub-objects as well as all surrounding polygons. The resultant sub-objects reside at a higher level of detail, as indicated by the addition of a level in the Subdivision Stack. Now the control grid shows only polygons at the new level. With sub-objects other than Element, this typically covers only part of the object's surface.

A control grid on a sphere at level 2. Subdivisions at lower levels are visible as gold lines.
In wireframe views, you can still see polygons at lower levels of detail, but you can select only sub-objects resulting from the subdivision, as indicated by the control grid. You can subdivide sub-objects further, transform them, hide and delete them, and change material IDs.
Each time you subdivide a sub-object that has been subdivided, a higher level in the Subdivision Stack is hightlighted, indicating a finer mesh resolution. You can then work at that level, or any lower level by selecting the level.
The sub-objects available in the HSDS modifier belong to the control grid rather than the mesh object itself. Transforming the grid sub-objects also transforms the underlying mesh, but the mesh doesn't always move to the full extent of the control grid. This is particularly true in cases where you transform a sub-object at a level lower than the highest level in which the sub-object resides.
For example, if you subdivide a vertex at the Base Level, it then resides in the Base Level and Level 1. If you then move the vertex in the base level, the mesh doesn't, by default, move as far as the vertex. This is roughly analogous to the way free-form deformation works, but with HSDS, the control grid conforms much more closely to the shape of the mesh object.
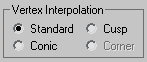
With vertices, you can control the degree to which the mesh follows the control-grid vertex with the settings on the Vertex Interpolation group.
 Vertex
 Edge
Edge Polygon
 Element
Shows the current level of the subdivision hierarchy. Automatically increments when you subdivide a sub-object selection. To edit at a different level of detail, select the level in the stack. The current level is outlined in red.
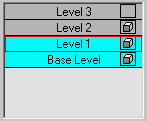
 Visibility is controlled by the box icon to the right of the level label. Turning on the visibility at one level activates
the visibility from that level down to the base level. Visibility above that level will be turned off.
Visibility is controlled by the box icon to the right of the level label. Turning on the visibility at one level activates
the visibility from that level down to the base level. Visibility above that level will be turned off.

Box icon for invisible layer
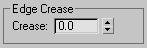
Determines the extent to which selected edges are treated as creases during subdivision. Available only in Edge sub-object mode.
For best results, use with control grid edges at a level of detail lower than the highest in which the edge resides. Also, for creasing to be visible, the edge should be offset from the surrounding surface by a significant amount.
Left: Crease=1.0
Center: The eyebrow edges selected at LOD 0
Right: Crease=0.0
When on, the modifier converts all non-quadrilateral faces or polygons to four-sided polygons. When off, converts all polygons to triangles. Available only when the object contains any non-quadrilateral faces or polygons. Default=off.
When you change the status of Force Quads, any edits made in the HSDS modifier are lost. A message appears warning you of this, and asking you to confirm the change.
Because the modifier works best with four-sided polygons, it's recommended you confirm the conversion if an object contains non-quadrilateral faces or polygons. The sphere primitive is an example of such an object; the uppermost and lowermost faces are three-sided.
Displays the material ID assigned to the current selection. Available only in Polygon and Element sub-object modes. If multiple sub-objects are selected and they don't share an ID, this field is blank.
You can change the material ID assigned to selected sub-objects at the current and higher levels of detail by changing this setting.
Material IDs are used primarily with Multi/Sub-Object material.
Opens the Adaptive Subdivision dialog. This option is best used for smoothing subdivided and edited portions of the mesh when you're finished using the HSDS functionality.
These controls let you set a gradual falloff of influence between selected and unselected vertices. See Soft Selection Rollout (Edit/Editable Mesh).
Use adaptive subdivision for smoothing subdivided and edited portions of the mesh when you're finished using the HSDS modifier. Alternatively, you can use adaptive subdivision to remove a level of detail from the object.


 Modify panel