The Linked XForm modifier links the transforms for any object or sub-object selection to another object, called the control object. The control object's motion, rotation, and/or scale transforms are passed onto the object or sub-object selection.
Linked XForm connects any geometry it receives from the stack to another object, which is called the control object. Its single control simply picks the control object. To use this modifier, you must have at least two objects in your scene.
To apply a Linked XForm modifier:
 Select the object you want to be the control object.
This completes the link. The name of the control object appears on the Parameters rollout.
To apply a Linked XForm modifier at a Sub-Object level:
Select an Editable Mesh or an object to which a Mesh Select modifier has been applied.
 Vertex sub-object level and select some vertices on the object.
Select another object that you want to control the sub-object selection.
Vertex sub-object level and select some vertices on the object.
Select another object that you want to control the sub-object selection.
This completes the link. The name of the control object appears on the Parameters rollout.
 Move the control object and see how the vertices are affected.
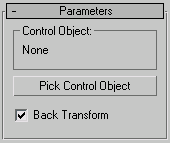
Allows an object with a Linked XForm modifier to be linked to a Control Object. Normally, moving the Control Object causes the linked object to move twice as much as it should, once with the Control Object and once with the link. When the switch is turned on, any transforms to the Control Object are only applied to the linked object once. This switch is similar to the 'Back Transform Vertices' switch of the Skin modifier.


 Modify panel