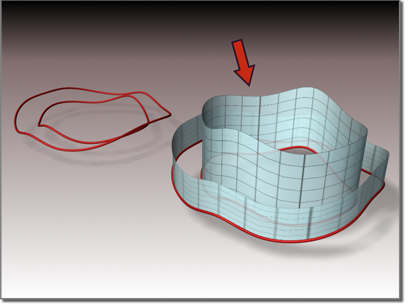
An extrude surface is extruded from a curve sub-object. It is similar to a surface created with the Extrude modifier. The advantage is that an extrude sub-object is part of the NURBS model, so you can use it to construct other curve and surface sub-objects.

Surface extruded from a curve
The NURBS object must contain at least one curve.
 (Create Extrude Surface).
By default, the surface extrudes along the NURBS model's local Z axis. A gizmo (yellow by default) indicates the direction of extrusion. Transforming the extrude surface's gizmo changes the direction of the extrude, letting you extrude along an axis that isn't aligned with a local coordinate axis.
The Flip Normals control lets you flip the surface normals at creation time. (After creation, you can flip normals using controls on the Surface Common rollout.)
While an extrude sub-object is selected, a rollout with the extrusion parameters is displayed at the bottom of the Modify panel.
When on, two surfaces are generated to close the ends of the extrusion. While they are present, the cap surfaces are maintained so they match the dimensions of the extrude surface. The parent curve must be a closed curve.
The Cap check box appears only on the creation rollout. If you want to remove the caps later, simply select them as surface sub-objects and delete them. Think of extrude capping as a workflow shortcut rather than a property (or parameter) of extrude surfaces.
To flip the normal of an extrude cap, select it as a Surface sub-object and use the Flip Normals toggle on the Surface Common rollout.