The Panels sub-object level of the Garment Maker modifier lets you position and bend the panels of your pattern to fit your object or figure.
You can also use these controls to adjust the texture mapping of your garment.

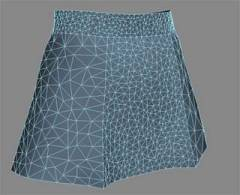
Controls the mesh density of a selected panel. This value is applied as a multiplier of the Main Parameters rollout  Density setting. You can increase the density of a particular panel by raising this value.
If Main Parameters rollout  Auto Mesh is off when you change this value, go back to the Main Parameters rollout (Cloth level in modifier stack) and click
Mesh It! to update the mesh. For this reason, it is recommended that you leave Auto Mesh on. The only time you might want to turn
off Auto Mesh is while creating the seams at the Curves sub-object level. Re-meshing can take some time, so you might want
to define a number of seams before re-meshing.

Different Density settings applied to separate panels
These buttons move the selected panel to a specified position. These positions are determined by 3ds Max based on the positions you set with the Mark Points On Figure controls at the Garment Maker object level. The positions are:
Sets where the top of the panel should go. Garment Maker derives these locations from the locations you specify with the Mark Points On Figure controls. The choices are:
If you change the setting here, it affects the subsequent Panel Position results.
When Garment Maker is in Flat Panels mode (that is, the Main Parameters rollout  Flat Panels optionis chosen), the texture coordinates are defined by the positions of the panels. Imagine the panels are being cut out of a
large piece of fabric. The location and orientation of a panel in that large piece of fabric determine how the texture is
aligned on it. By moving and rotating a panel, you can change its texture coordinates. Remember, you must be in Flat Panels
mode to do this.