Paint Deform provides tools for deforming mesh geometry interactively and intuitively by dragging the mouse over an object surface. The primary tools are Shift, for moving vertices with falloff in the direction you drag the mouse, and Push/Pull, for moving vertices inward and outward. Additional tools include Smudge, Flatten, Noise, and more.
Paint Deform tools work the same way at the object level and at all sub-object levels, and are independent of any sub-object selection. To exit a Paint Deform tool, click its button again or right-click in the active viewport.
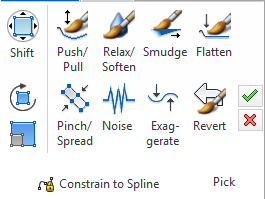
Paint Deform panel on minimized ribbon

Paint Deform panel on maximized ribbon
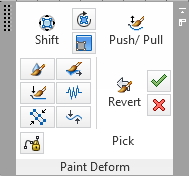
Paint Deform panel floating

 Shift /
  Shift Rotate /
  Shift Scale
Move, rotate, or scale sub-objects around in screen space (perpendicular to the viewing direction) with an adjustable falloff effect. The Shift tools are roughly equivalent to transforming with Soft Selection, but no initial selection is necessary.
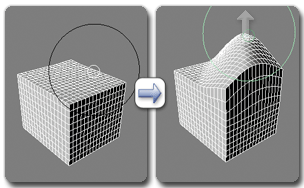
Using Shift on a mesh object
Shift affects only vertices within the brush area when you start to drag; to affect other vertices, release and then drag again.
When you activate the Shift tool, its Options panel opens with settings for adjusting the tool’s effect. Certain settings are also available via the following keyboard modifiers:
 Push/Pull
Drag the brush to move vertices outward; Alt+drag to move them inward.
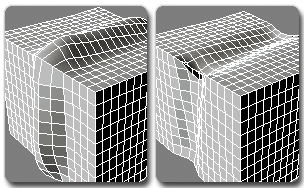
Using Pull (left) and Push (right) on a mesh object
Following is a list of other effects available with keyboard alternatives:
Change brush size, strength, and other settings on the Paint Options Panel.
 Relax/Soften
Drag the brush to smooth out the surface; for example, to round off corners.
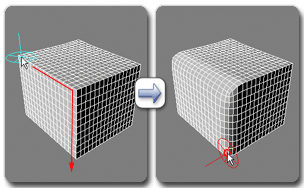
Using Relax/Soften on a mesh object
Following is a list of effects available with keyboard alternatives:
Change brush size and strength on the Paint Options Panel.
 Smudge
Drag to move vertices around. Smudge is roughly equivalent to the Shift tool, but updates the area of effect continually as you drag, and doesn’t use falloff.
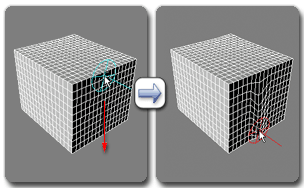
Using Smudge on a mesh object
Following is a list of effects available with keyboard alternatives:
Change brush size and strength on the Paint Options Panel.
 Flatten
Drag the brush to flatten convex and concave areas.
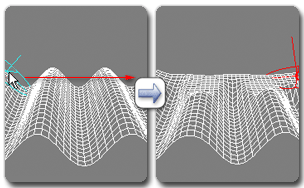
Using Flatten on a mesh object
Following is a list of effects available with keyboard alternatives:
Change brush size and strength on the Paint Options Panel.
 Pinch/Spread
Move vertices closer together by dragging, or spread them apart with Alt+drag.
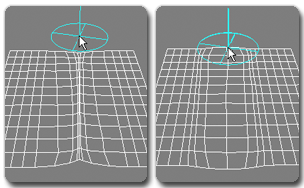
Using Pinch (left) and Spread (right) on a mesh object
Following is a list of additional effects available with keyboard alternatives:
Change brush size and strength on the Paint Options Panel.
 Noise
Noise
Drag to add convex noise to the surface, or Alt+drag to add concave noise.
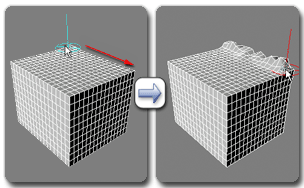
Using Noise on a mesh object
Following is a list of additional effects available with keyboard alternatives:
Change brush size, strength, and other settings on the Paint Options Panel.
 Exaggerate
Makes the features of the painted surface more pronounced by moving convex areas outward and concave areas inward.
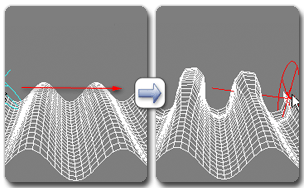
Using Exaggerate on a mesh object
Following is a list of effects available with keyboard alternatives:
Change brush size, strength, and other settings on the Paint Options Panel.

 Constrain to Spline
For best results, follow this procedure:
Now, when you move the mouse in the active viewport, the paint brush gizmo is attached to the spline and can move only along its length.
 Revert
Paint to restore the mesh to its previous shape, before the last use of Commit (see following).
If you haven’t used Commit yet, Revert goes back to the object’s initial shape.
Following is a list of effects available with keyboard alternatives:
Change brush size and strength on the Paint Options Panel.
 Commit
 Cancel
This panel, which floats by default, opens when any Shift tool is active, and provides settings for modifying its effects.
This panel opens when Paint Deform tools other than Shift are active, and provides settings for modifying their effects.