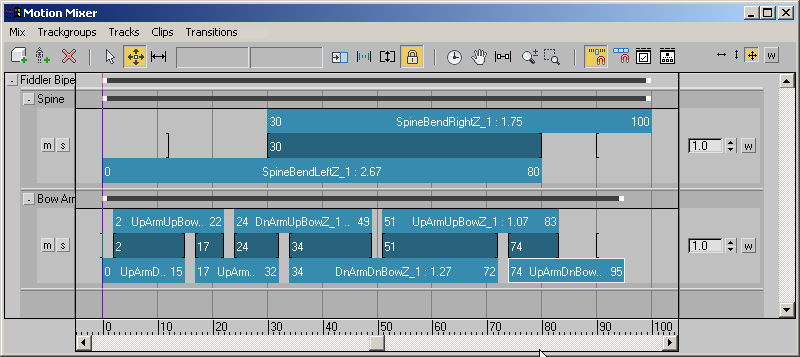
When two or more clips are placed on a transition track, you can create transitions between any two clips. A transition creates a constant, gradual change from one clip to another.

Clips and transitions on Transition track. Transitions are shown as dark areas between clips.
To learn how to create a transition track, see Adding Tracks to the Mixer.
If you want to make a less linear blend between clips than the blend created by a transition, see Adjusting Track Weight.
Transitions are automatically created between clips when you load the clips into a Transition track. You can adjust the start or end point of a transition by dragging either end of the transition in the Mixer.
When a transition appears with hatchmarks, this indicates that the transition is invalid. This can occur when a clip's brackets are reversed, with the out-bracket before the in-bracket. You can correct this problem by dragging each end of the transition to reverse the ends.
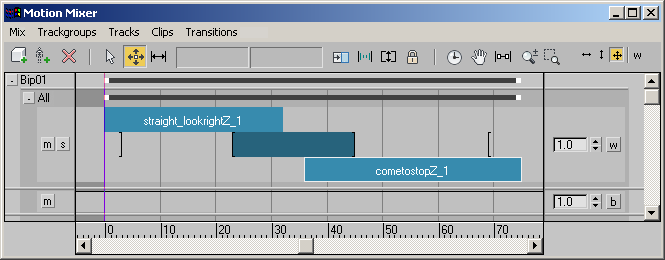
A useful transition can occur anyplace where two clips overlap. The unused part of the clip on either side of the transition appears with hatchmarks to indicate that that part of the clip will not be used in the mix. This type of transition is often used for foot-based clips, when the best place for a transition is not always at the edge of a clip.

Hatched parts of the clips are not used in the mix.
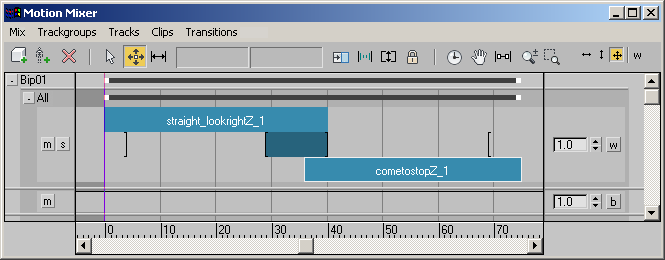
The Motion Mixer will allow you to extend a transition into an area where two clips do not overlap. However, this transition will most likely result in undesirable motion in the mix.


Transitions extending into areas where clips don't overlap can create unpredictable results.
For the best results, make sure all your transitions cover only areas where two clips overlap completely.
To aid in making your transitions as smooth as possible, you can select transitions and use the Transitions menu  Optimize option. This feature searches the two clips to find the start and end time that will result in the smoothest transition,
and adjusts the transition accordingly.
 If you want to snap the ends of a transition to the ends of clips, turn on Snap Clips on the Motion Mixer toolbar before
dragging the transition edges.
 When you move or scale a clip on a transition track, by default its transitions are also moved or scaled. To prevent transitions
from changing when you move or scale a clip, turn on Lock Transitions on the Motion Mixer toolbar.
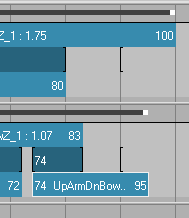
On a transition track, transition brackets appear around each transition, and at the start or end of each clip that is not surrounded by a transition.

Transition brackets
When you load a clip onto a transition track where clips already exist, the clip creates a transition between the last clip on the track and the new clip. The transition is created at the location of the last clip's transition bracket.
You can move a transition bracket to create the transition automatically exactly where you want it before loading the next clip. This feature can make it very quick and easy to load a long series of clips into a transition track with correct transitions.
Working with Foot-Based Transitions
Much like Motion Flow, transitions in the Mixer between foot-based motion clips (clips where IK constraints keep the feet planted at various times) must be carefully placed and adjusted to make the animation look as natural as possible. The workflow depends on whether you are animating a biped, or 3ds Maxobjects such as a rigged character.
Foot-Based Transitions with Biped
For the most natural transitions between foot-based motions, follow this workflow:
Study both clips to find a start time and range for the transition that will result in smooth motion. Look for times when each foot has the same planting or free status in both clips. For example, a time period when both clips have the left foot planted and the right foot free is a good time range for a transition.
You can fine-tune your choice of transition time by optimizing the transition. This features searches each clip, either in its entirety or near an existing transition, to find the best timing for the transition.
You can improve a transition between foot-based clips by changing the transition focus on the Transition Editor dialog (Biped Object). In the example described above, the left foot would be chosen as the transition focus, because this would keep the left foot planted while the animation moves around it.
When transitions cause a planted foot to slide or pop slightly, or force a leg to straighten unnaturally, you can use a mixdown to correct these problems. See Exporting Animation to the Biped.
Foot-Based Transitions with 3ds Max Objects
For foot-based motions, follow this overall workflow:
To create a transition between two clips:
 From Files from the pop-up menu. Choose at least two clips to load.
The clips are placed on the transition track with transitions between them.
With foot-based clips, you can use the Optimize command to help you find the best timing for a transition. The Optimize command exhaustively searches the specified time period for times when the foot positions match most closely.
The Transition Optimization dialog appears.
The best transition is calculated, and the transition changes position and/or length in the Mixer to reflect the change.
To change the focus on a foot-based transition with Biped animation:
 Zoom in on the feet in any viewport.
 Edit from the Motion Mixer menu.
The transition editor appears. In addition, two stick figures appear in viewports to show the bipeds' positions in the two clips. The yellow stick figure shows the biped's position in the first clip, while the red figure shows the second.
As you change the Transition Focus, you will see the foot positions change. The Transition Focus sets a center or focal point for the transition, changing the biped's position slightly depending on the setting. On foot-based transitions, try different settings to bring the yellow and red skeletons closer together on a planted foot.