The application version of the network rendering Server provides a graphical user interface for control and monitoring purposes. It runs as a foreground process on your desktop, and remains active unless specifically shut down. Its components include a menu bar, list window, and status bar.
Once you initially set up the server using the application version, you can run it as a service from then on. The service version provides no user interface, but once it's installed as a service and started, it's always available when you boot the system. Whichever version you use, you can monitor and control the rendering queue and system with the Queue Monitor.
To start the server service, execute the following from a Command Prompt window or the Start menu  Run function:
“[drive letter]:\Program Files\Autodesk\Backburner\serversvc.exe” -i
Replace "[drive letter]" with the letter of the drive Backburner is installed on. If you used a different install path, change the command line accordingly.
Then either reboot the computer or go to Control Panel Administrative Tools Services and start the service. Thereafter the service will remain resident and active, even surviving reboots.
To remove the server service from memory, execute the following from a Command Prompt window or the Start menu Run function:
“[drive letter]:\Program Files\Autodesk\Backburner\serversvc.exe” -r
To start/stop the server service upon logoff/logon:
If you work on a computer that's part of a render farm, you probably don't want the computer to be available for rendering while you're using it. By following this procedure, you can have the computer automatically turn off the server service while you're logged on, and turn it back on when you log off.
net start backburner_srv_200
net stop backburner_srv_200
Next, you'll to edit the logon and logoff policy for the system.
The Group Policy dialog appears. It lets you edit and manage the Group Policy for the system.
Windows Settings, and then click Scripts (Logon/Logoff).
You have now set up the system to stop the Backburner service at any user logon, and to start it at any user logoff.
The menu bar provides access to the functions available in the Network Rendering Server application.
Opens the Network Server General Properties dialog.
Opens the Network Server Logging Properties dialog, which lets you filter the types of messages to appear in the list window, and specify whether the messages will be sent to the list window, a log file, or both.
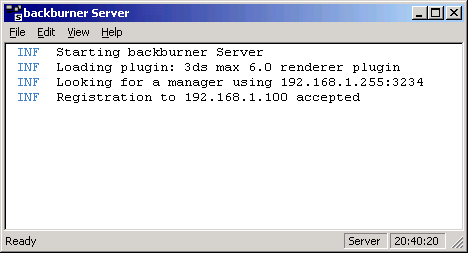
This area of the Server interface lists different types of information regarding the current status of Server. Depending on the selections made in the Logging Properties dialog, messages are displayed alerting the user, for example, to the following:
This information can be filtered using the Logging Properties dialog.
The Server General Properties dialog contains configuration settings for the Network Rendering Servers. The default settings in this dialog work in most cases, but certain situations may require adjustment of these settings, mostly the Manager or IP settings in case the Automatic detection fails. The information specified in the Server Properties dialog is contained in the backburner.xml file (in the \Network subdirectory). If you run Server and the backburner.xml file does not exist or does not contain information pertinent to the Server, the backburner.xml file is created or updated.


