A Link constraint is used to animate an object linking from one target object to another.
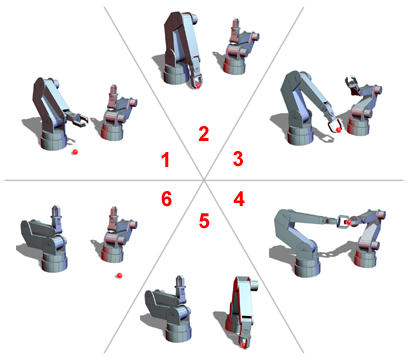
A link constraint enables the robot arms to pass a ball.
The Link constraint causes an object to inherit the position, rotation, and scale of its target object. In effect, it allows you to animate a hierarchical relationship, so that the motion of an object to which the Link constraint is applied can be controlled by different objects in the scene throughout an animation.
An example of using a link constraint is to pass a ball from one hand to another. Assume that at frame 0 the ball is in a character’s right hand. The hands are animated to meet at frame 50, when the ball is passed to the left hand, and then spread apart until frame 100. This is achieved by assigning the Link constraint to the ball, with the right hand as its target at frame 0, changing to the left hand as target at frame 50.
Example: To assign the Link constraint and animate links:
 Go to frame 0.
 Select the sphere.
 Motion panel.
 (Assign Controller).
This changes the Transform entry to Transform: Link Constraint and adds a child controller named Link Params: Position/Rotation/Scale, which becomes the immediate parent of the individual transform tracks. It also adds a controller track named Link Times: LinkTimeControl.
The purpose of the LinkTimeControl controller is to expose the Link constraint keys in the track bar so they can be manipulated there.
You can also assign the Link constraint from the Animation menu  Constraints submenu.
It is recommended that you apply Link To World before linking to any target objects. This allows you to animate the object on its own, before the first link to a target object takes place.
This adds a World entry at frame 0 in the link list on the Link Params rollout.
The cylinder becomes a target and is added to the link list. The Link constraint relationship is now active between the sphere and the cylinder.
 (Auto Key) and move the cylinder a good distance away from where it is.
 Play the animation.
The sphere follows the cylinder as it moves. The sphere is link-constrained.
Select the sphere.
Motion panel Link Param rollout, click Add Link, select the box, and turn off Add Link.
You have now added another target that becomes active at frame 25.
 (Auto Key) and play the animation. The sphere is linked to the cylinder from frame 0 to 24, so it follows the cylinder until frame 25, at
which point it links to the box.
(Auto Key) and play the animation. The sphere is linked to the cylinder from frame 0 to 24, so it follows the cylinder until frame 25, at
which point it links to the box.
Notice the “Sphere01: Link Times” item. This is a special key made accessible on the track bar by the LinkTimes: LinkTimeControl controller. You can use these keys to modify link animation directly on the track bar, like regular animation keys, by dragging them on the time line or deleting them. However, unlike other animation keys, they cannot be cloned by Shift+dragging them.
To access the Link constraint’s parameters through the Motion panel:
Select the Link-constrained object.
Motion panel, expand the Link Params rollout, if necessary.

Once you assign a Link constraint, you can access its properties on the Link Params rollout in the Motion panel. In this rollout you can add and delete targets and animate the time at which each target becomes the active parent of the constrained object.
You can also modify the animation of link frames by manipulating the keys on the track bar and in Track View. However, standard methods for deleting keys in those contexts do not apply to link keys; you must use the Delete Link function on the Link Params rollout instead.


