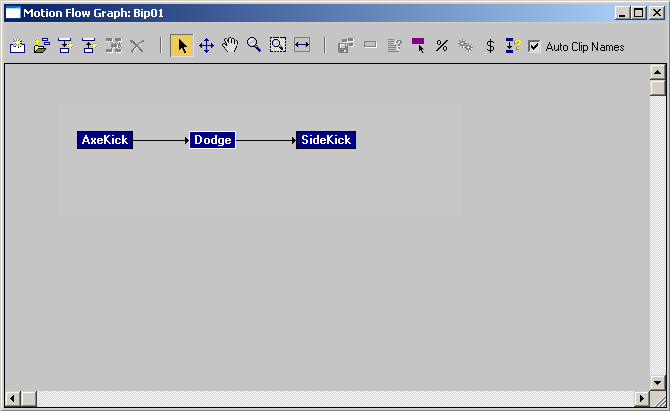
Transitions, shown as arrows, link motion files (clips) together to create longer character animation and crowd simulations. Transitions can be created manually with the Transition Editor or automatically by character studio.

Transitions can also be optimized for better flow. To create optimized transitions, use the Optimize Selected Transition on the Motion Flow Graph toolbar or Optimize Transition in the Transition Editor. By default, minimum motion loss is used to compute transitions. Optimized transitions use an algorithm that minimizes foot sliding. Optimized transitions take longer to compute but yield very fluid results.
Crowd simulations can use dozens of motion clips so automatic creation of optimized transitions can be a big time saver. Whether you plan on animating one or many bipeds using Motion Flow mode you’ll need transitions between the clips in the Motion Flow Graph.
To create transitions using the From > To or To < From method:
 (Show Graph) to open the Motion Flow Graph.
 (Create Multiple Clips).
Use the file dialog to choose the location of your BIP files.
Once processed, multiple clips appear in Motion Flow Graph.
 (Create Transition From -> To) or
  (Create Transition To <- From) and then drag from one clip to another clip.
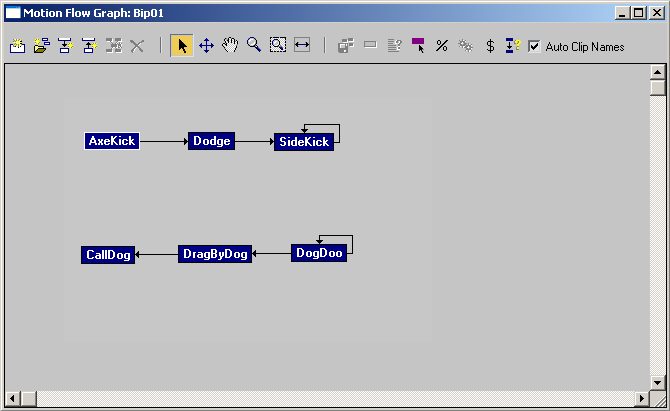
The top set of clips are linked using Create Transition From->To. The bottom set of clips are linked using Create Transition To<-From.
To create transitions using Create All Transitions:
 (Show Graph) to open the Motion Flow Graph.
 (Create Multiple Clips)
Use the file dialog to choose the location of your .bip files.
Once processed, multiple clips appear in the Motion Flow Graph dialog.
 (Select Clip/Transition) and select all the clips you added.
 (Create All Transitions).
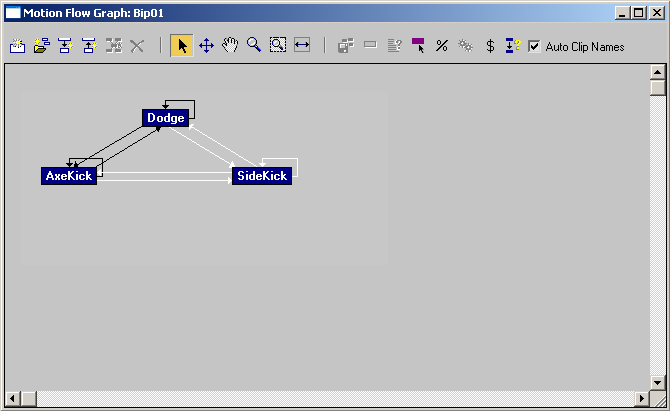
3ds Max creates transitions between all the clips, including from each clip to itself.

Possible transitions from one clip to the next are automatically generated.
To optimize transitions in the Motion Flow Graph:
 (Select Clip/Transition) and select one or more transitions.
Selected transitions display in white
 (Optimize Selected Transitions).
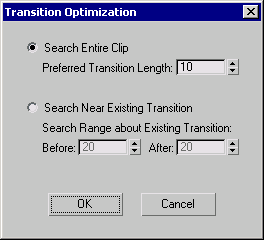
The Transition Optimization dialog is displayed.

While the optimizations are being processed, a processing bar scrolls across the top of the Motion Flow Graph window.