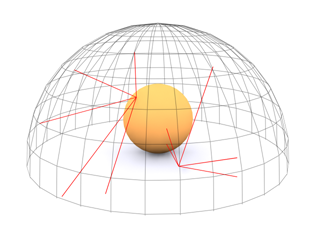
The Skylight light models daylight. It is meant for use with the Light Tracer. You can set the color of the sky or assign it a map. The sky is modeled as a dome above the scene.

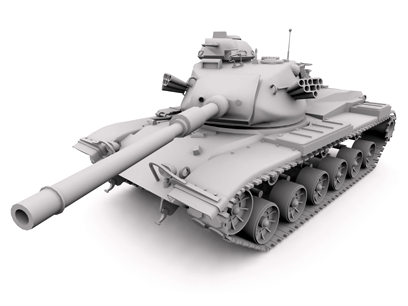
Model rendered with a single skylight, and light tracing
When you render with the default scanline renderer, Skylight works best with advanced lighting: either the Light Tracer, or radiosity.

A skylight is modeled as a dome above the scene.
If you use a map with a Skylight, the following guidelines can improve its effect:
Be aware that using sufficient samples with a mapped Skylight will take longer to render than if the light were not mapped.
Skylight and Radiosity in Architectural Design
In order for radiosity to be processed correctly when a Skylight is added to the scene, you need to make sure that walls have closed corners and floors and ceilings have thickness under and over the walls. In essence, your 3D model should be built just like the real-world structure is built.
If you build your model with walls that meet along a single edge or floors and ceilings are simple planes, when you process radiosity after adding a Skylight, you can end up with “light leaks” along those edges.
Some of the ways to repair a model so light leaks do not occur are as follows:
You can fix this by extruding those surfaces at a sub-object level or by applying modifiers like Shell or Extrude.
The Wall command is programmed to make sure corners are constructed of solid objects instead of leaving a single, thin edge.
Floor objects need to extend under walls and ceilings need to extend over walls.
By building your 3D model using these guidelines, light leaks will not occur when you process radiosity after adding a Skylight to the scene.
Using Render Elements with a Skylight
If you use Render Elements to output the lighting element of a skylight in a scene using either radiosity or the light tracer, you cannot separate the direct, indirect, and shadow channels of the light. All three elements of the skylight lighting are output to the Indirect Light channel.

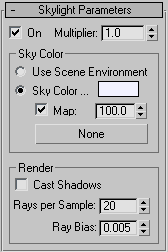
Amplifies the power of the light by a positive or negative amount. For example, if you set the multiplier to 2, the light will be twice as bright. Default=1.0.
Using this parameter to increase intensity can cause colors to appear "burned out." It can also generate colors not usable in videos. In general, leave Multiplier set to its default of 1.0 except for special effects and special cases.
Colors the light using the environment set up on the Environment panel.
These let you use a map to affect Skylight color. The button assigns a map, the toggle sets whether the map is active, and the spinner sets the percentage of the map to use (when the value is less than 100%, map colors are mixed with the Sky Color).
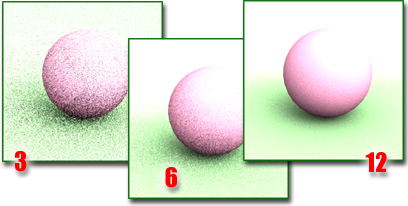
The number of rays used to calculate skylight falling on a given point in the scene. For animation, you should set this to a high value to eliminate flickering. A value of around 30 should eliminate flickering.

Increasing the number of rays increases the quality of your image. However, it also increases rendering time.