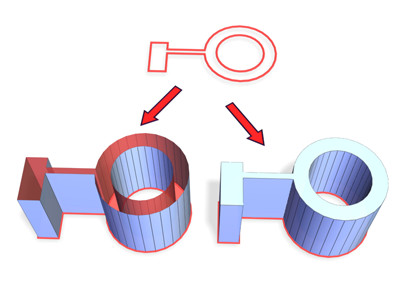
The Extrude modifier adds depth to a shape and makes it a parametric object.

Above: Spline before extrusion
Below left: Extruded spline with Cap End off
Below right: Extruded spline with Cap End on

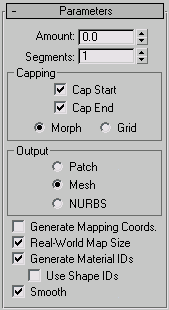
Arranges cap faces in a predictable, repeatable pattern, which is necessary for creating Morph targets. Morph capping can generate long, thin faces that don't render or deform as well as grid capping. Use morph capping primarily if you're extruding multiple morph targets.
Arranges cap faces in a square grid trimmed at the shape boundaries. This method produces a surface of evenly sized faces that can be deformed easily by other modifiers. When you choose the Grid capping option, the grid lines are hidden edges rather than visible edges. This primarily affects any objects assigned a material with the Wire option turned on, or any objects that use the Lattice modifier.
Produces an object that you can collapse to a patch object; see Editing the Stack.
Produces an object that you can collapse to a mesh object; see Editing the Stack.
Produces an object that you can collapse to a NURBS surface; see Editing the Stack.
Controls the scaling method used for texture mapped materials that are applied to the object. The scaling values are controlled by the Use Real-World Scale settings found in the applied material's Coordinates rollout. Default=on.
Assigns different material IDs to the sides and the caps of the extruded object. Specifically, the sides receive ID 3, and the caps receive IDs 1 and 2.
This check box is turned on as a default when you create an extruded object, but if you load an extruded object from a MAX file, the check box is turned off, maintaining the same material ID assignment for that object as it had in R1.x.