A Boolean object combines two or more other objects by performing a Boolean operation or operations on them. ProBoolean adds a range of functionality to the traditional 3ds Max Boolean object, such as the ability to combine multiple objects at once, each using a different Boolean operation.
ProBoolean can also automatically subdivide the Boolean result into quadrilateral faces, which lends itself well to smoothing edges with MeshSmooth and TurboSmooth.
Materials, Textures, Vertex Colors
ProBoolean and ProCutter transfer texture coordinates, vertex colors, optionally materials, and maps from the operands to the final results. You can choose to apply the operand material to the resulting faces, or you can retain the original material. If one of the original operands had material maps or vertex colors, the resulting faces derived from that operand maintain those graphical attributes. However, when texture coordinates or vertex colors are present, it is impossible to remove coplanar faces, so the resulting mesh quality will be lower. We suggest that you apply textures after the ProBoolean operations.
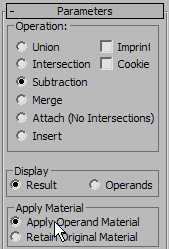
ProBoolean provides two options for applying materials, available in the Apply Material group on the Parameters rollout (see above illustration). The default method is Apply Operand Material, which applies the operand material to the resulting faces. The alternative, Retain Original Material, causes the resulting faces to use the material of the first selected object in the Boolean operation.
The following illustration shows the difference between the two methods. The Boolean operation starts with a red box and a blue sphere, on the left. The box is used as the base object and the sphere is the subtracted operand. Using the default Apply Operand Material option gives the result shown in the center of the illustration. Choosing Retain Original Material yields the result shown on the right side of the illustration.

Left: Original operands
Middle: Apply Operand Material active
Right: Retain Original material active
ProBoolean supports Union, Intersection, Subtraction, Merge, Attach, and Insert. The first three operations work similarly to their counterparts in the standard Boolean compound object. The Merge operation intersects and combines two meshes without removing any of the original polygons. This can be useful for cases in which you need to selectively remove parts of the mesh.
The Attach operation combines multiple objects into one without affecting their topology; they remain essentially separate elements of the compound object. And the Insert operation subtracts the bounding shape of operand A from operand B, and then replaces the cut-out part with operand A.
Also supported are two variants of the Boolean operations: Imprint and Cookie Cutter. The Imprint option inserts (imprints) the intersection edges between the operands and the original mesh without removing or adding faces. Imprint only splits faces and adds new edges to the mesh of the base object (original selected object). Cookie Cutter performs the specified Boolean operation but does not add the faces from the operands into the original mesh. It can be used to cut a hole in a mesh or to get the portion of a mesh inside of another object.
When you access a ProBoolean or ProCutter object from the Modify panel, you can add operands to the existing set. You can also remove and transform (move, rotate, etc.) operands.
ProBoolean and ProCutter have a built-in decimation function. Typically, decimation is of better quality if it is integrated with the Boolean operations. The reason for this is that the Boolean object contains meta-information about which edges are intersection edges. The decimation function takes this information into account and uses it to properly maintain intersection edges.
When performing Boolean operations with text objects, make sure characters don't intersect each other and that each letter is closed. Also, it's easy to inadvertently create loft objects and NURBS objects in such a way as to have self-intersections. With loft objects, check the ends and points where the loft curve bends.
To create a ProBoolean compound object:
 Create panel, with
  (Geometry) active, choose Compound Objects from the drop-down list. On the Object Type rollout, turn on ProBoolean.
When the Modify panel is active, you can add objects to a selected ProBoolean object by clicking the Start Picking button and then picking the objects to add.
Example: To change an existing Boolean with sub-object operations:
ProBoolean offers a great deal of flexibility in combining various Boolean operations simultaneously, plus the ability to change the way operands combine both as you build the Boolean object and after the fact.
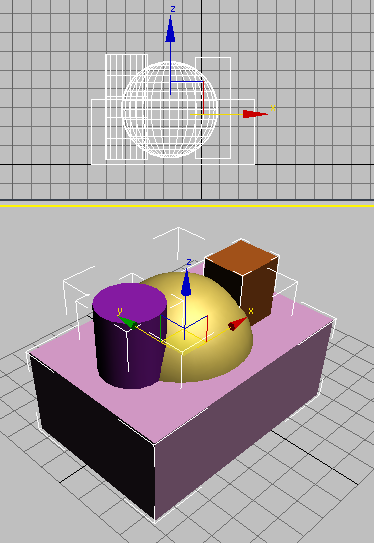
Top: Front viewport
Bottom: Perspective viewport
 Select the box.
 Create panel, with
  (Geometry) active, choose Compound Objects from the drop-down list. On the Object Type rollout, turn on ProBoolean.

The result is the intersection of the sphere and the box; that is, a single object that represents the common volume both objects occupy. In this case, it's the overlap of the sphere and the box. Although neither has a material at this point, the result uses the default color originally assigned by 3ds Max, at random, to the box when it was created.
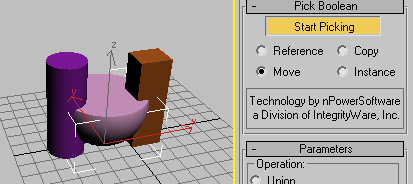
Note that Start Picking stays active (yellow). This means you can continue picking objects to incorporate into the Boolean object, optionally changing the operation as you go.
The result is the union (adding) of the small box with the intersection of the sphere and larger box. Again, the original object's color is assigned to the result.

The cylinder's intersecting volume is subtracted from the previous Boolean result.
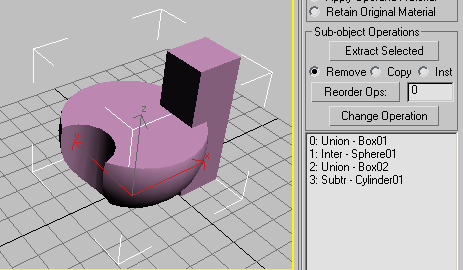
Note that the entire history of operands and operations used to build the Boolean object is listed in the hierarchy view list at the bottom of the Parameters rollout. Box01 starts the Boolean with Union, Sphere01 is then incorporated with Intersection, Box02 is incorporated with Union, and finally Cylinder01 is incorporated with Subtraction.
You can use the list and the other controls in the Sub-object Operations group to change the results.
As a result of the change of operation, the cylinder appears in the Boolean object as an additive volume instead of a subtractive one. Also, its entry in the list changes to “Union - Cylinder01”, showing that the Boolean operation for the cylinder is now Union.
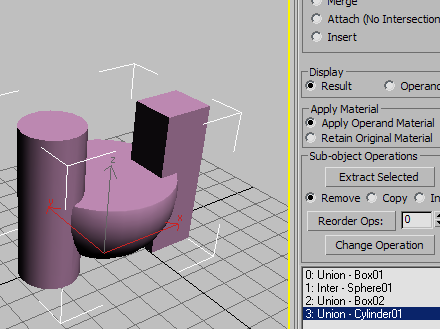
You can also change the order of the operations, which can affect the results.
Note that its position in the list, 1, appears in the editable field next to the Reorder Ops button.
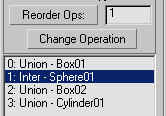
The Inter - Sphere01 item jumps to the end of the list.
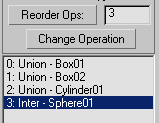
The Boolean object changes significantly. The new order in the list tells you how this shape was achieved: The two boxes and the cylinder were all combined with Union, adding their volumes together, and then the sphere was incorporated into that result with Intersection, leaving only the volume shared by all four objects.

With an unmodified ProBoolean object selected, the modifier stack shows a single, expandable entry: ProBoolean.
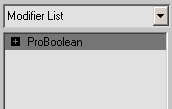
Expanding this entry (by clicking the + icon) reveals a single subsidiary branch: Operands.
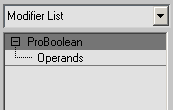
To transform operands in the ProBoolean object independent of the entire object, click the Operands branch to highlight it.
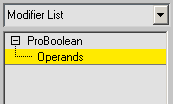
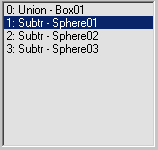
You can then select one or more operands, either by using standard selection methods in the viewport, or by highlighting their names in the hierarchy view list at the bottom of the Parameters rollout.
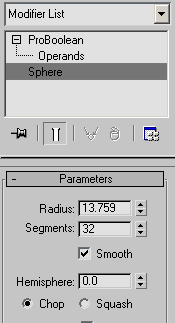
When one, and only one, operand is selected, the object type (not its name) appears as a separate stack entry below the ProBoolean entry. Clicking this entry provides direct access to the operand's parameters on the Modify panel.
If Parameters rollout  Display is set to Result, selecting an operand displays the operand's axis tripod or transform gizmo in the viewport, although
the operand itself is not visible by default.
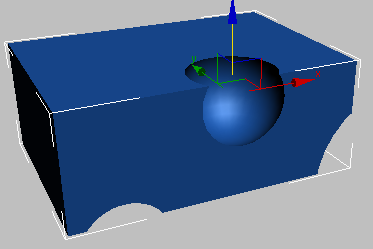
To view the operand, set Parameters rollout  Display to Operands.

Whether or not the operands are visible, you can transform and animate them at the Operands sub-object level, as with any other object in 3ds Max.

Changing a ProBoolean object by animating the position of the subtracted operand
You can also transform and animate the base object; that is, the first object in the hierarchy view list.

Click this and then click each operand to transfer to the Boolean object in turn. Before picking each operand, you can change the Reference/Copy/Move/Instance choice, the Operation options, and the Apply Material choice.
 Display to Operands. Then, when you're finished, set it back to Result. Alternatively, on the Advanced Options rollout set
Update to Manually, and then click the Update button to view the results after performing the Boolean operations.
Choose a radio button to specify how the next operand you pick is transferred to the Boolean object:
These settings determine how the Boolean operands interact physically.
Combines objects into a single object without removing any geometry. New edges are created where the objects intersect.

Left: Original object (box) and operand (small box)
Center: Union operation; part of the smaller box is removed.
Right: Merge operation, showing new edges at intersection
First subtracts the second operand’s bounding volume from the first, and then groups the two objects.
In effect, Insert treats the first operand as a liquid volume, so that if there’s a hole in the inserted operand or some other way for the “liquid” to enter its volume, it does. The following illustration shows examples of this effect, with shaded geometry on the left and wireframe equivalents on the right.
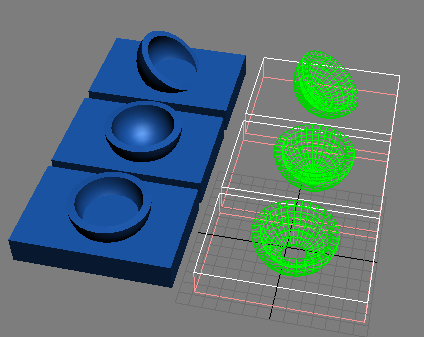
A bowl inserted in liquid; if the bowl has a hole in it or is tilted, the liquid enters its cavity.
Cuts the faces of the original mesh shape, affecting only those faces. The faces of the selected operand are not added to the Boolean result.

1. Original object (box) and operand (sphere)
2. Standard Subtraction operation
3. Subtraction with Cookie on
4. Standard Intersection operation
5. Intersection with Cookie on
Choose one of the following display modes:
Choosing Result also activates the ProBoolean level in the modifier stack.
Choosing Operands also activates the Operands level in the modifier stack.
Also, when picking many operands, use this mode to avoid having to recalculate the result each time, and then set Display back to Result at the end.
These functions operate on operands highlighted in the hierarchy view list (see following).
Based on the chosen radio button (Remove, Copy, or Inst; see following), Extract Selected applies the operation to the highlighted operand in the hierarchy view list. Three modes of extraction are available:
Changes the type of operation (see Operation group) for the highlighted operand. To change the operation type, highlight the operand in the hierarchy view, then choose the operation type radio option, and then click Change Operation.

The hierarchy view, found at the bottom of the Parameters rollout, displays a list of all of the Boolean operations that define the selected mesh. Each time you perform a new Boolean operation, 3ds Max adds an entry to the list.
You can highlight operands for modification by clicking them in the hierarchy view list. To highlight multiple contiguous items in the list, click the first, and then Shift+click the last. To highlight multiple non-contiguous entries, use Ctrl+click. To remove highlighting from a list entry, Alt+click the highlighted item.
At the ProBoolean level in the modifier stack, you can perform only sub-object operations on highlighted items. At the Operands sub-object level, you can transform highlighted operands as well as perform sub-object operations; see Modifier stack for details.
These options determine when updates are performed on the Boolean object after you make changes. Choose one of the following:
Quadrilateral Tessellation group
These options enable quadrilateral tessellation of the Boolean object. This makes the object suitable for editing subdivision surfaces and for smoothing meshes. It also makes the object suitable for conversion to Editable Poly format.
For further discussion of this option, see the topic Quad Meshing and Smoothing.