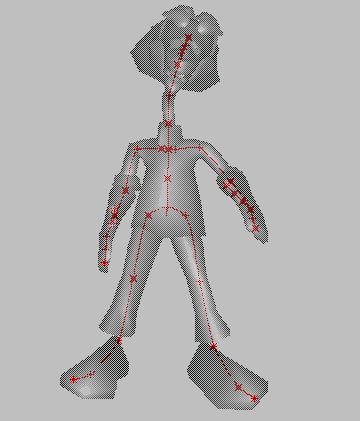
Physique creates a continuous spline through each of the joints in the hierarchy. The spline is represented by an orange line within the object. It maintains continuity through each joint: as a joint angle changes, the spline passing through the joint remains a smooth curve. Physique relies on the deformation spline to obtain smooth bends of the skin object. Physique offers bias and tension controls to adjust the shape of the deformation spline.

Links depicted by deformable spline.
You can use controls at the Link sub-object level to adjust the skin behavior about a given link. These link parameters define how the skin deformation behaves, relative to the motion of the underlying skeleton.
There are four kinds of link parameters:
Twist parameters apply to link rotation whose axis is the same as the axis along the length of the link.
The sliding effect tightens the outside to keep detail at the joint and prevent the facets of the mesh from moving apart. It relaxes the inside to prevent the mesh from bunching up at the joint.
Link Scale provides a way to globally scale all the vertices influenced by the link. CS Amplitude scales the effect of bulge cross sections across the entire link. It can be used for animated scaling of the bones or for general mesh adjustments. The intent is not to edit the character itself, but rather the effect the bones have on it.
You set Link parameters at the sub-object level, in the Physique Link Settings rollout.