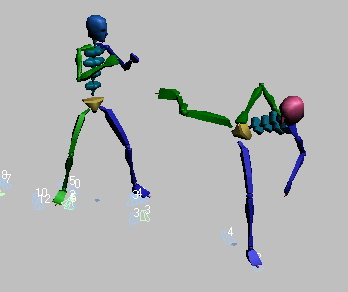
Motion Flow mode lets you graphically arrange motion clips into a network and create and edit transitions between clips for animating one or more bipeds. The networked clips are joined together by transitions.
A motion flow script associates the network of clips with a biped. To animate one biped, you create a single motion flow script that uses a list of clips to animate the biped. To animate multiple bipeds or a crowd of bipeds, you can either use the random method of clip selection or a delegate–driven approach.

The random method simply picks clips at random and creates random scripts for each biped. This approach works well if the bipeds are standing still or are far apart and don’t require collision detection: a crowd of cheering fans at a ball game, for example. Clip and transition percentages are set with the Create Random Motion command during motion synthesis.
When dealing with a crowd, or multiple bipeds that are close together, the delegate-driven approach is the best solution. This approach uses many parameters to simulate moving crowds and incorporates collision detection, surface follow and other parameters. The delegate–driven method uses a network of clips, but instead of random selection. it bases clip selection on a delegate's speed and heading.
In a delegate–driven crowd simulation, clips are arranged to follow a logical sequence. For example, the first clip could be a start walk clip, then a walk loop, then a branch to a turn right and turn left clip, then a slow to stop clip and so on. During motion synthesis, this arrangement is used to pick clips. If character studio senses a collision ahead, it applies a slow-to-stop or a veer-to-avoid clip. For details about delegate-driven crowd behavior, see Crowd Animation.
The Motion Flow Graph provides tools for adding clips to the dialog window, calculating optimized transitions, setting random script transition values, moving and deleting clips, and displaying clip dependencies. Clips display as icons and transitions appear as arrows in the Motion Flow Graph.
Transitions, shown as arrows, link motion files (clips) together to create longer character animation and crowd simulations. Transitions can be created manually with the Transition Editor or automatically by character studio.
A script is a list of clips (BIP files) that control the character you are animating. To create a script, add clips to the Motion Flow Graph, then click Define Script in the Scripts section of the Motion Flow rollout, and click a sequence of clips in the Motion Flow Graph. Default transitions are assigned if no transitions exist between the clips. The clip names and starting frame numbers display in the list on the Motion Flow Script list.
Scripts, transitions, and clip references are saved in a Motion Flow Editor MFE, file, for later editing. This format lets you save a Motion Flow and script from one biped and load it onto another biped.
A good transition links two clips together seamlessly. The motion through the transition should appear natural, as though the motion was captured as one long motion sequence. If clips do not transition smoothly, you might find it necessary to edit or customize your transitions.
You can randomly traverse clips in a motion flow graph to animate one or more bipeds using controls in the Create Random Motion dialog. You set parameters for random motion in the Motion Flow Graph, in the clip and transition dialogs, as well as in the Create Random Motion dialog.
The Create Unified Motion command allows you to create one motion from a script. The entire unified motion is then available when you exit Motion Flow mode.
Shared Motion Flow allows you to assign one motion flow to multiple bipeds or crowds. Rather than building a motion flow network of clips for each biped, you can create a motion flow with all the clips and transitions to animate multiple bipeds. Random motion creation will use each biped's own motion flow. If a biped’s motion flow happens to be a shared motion flow, then the shared motion flow will be used to compute random motion.
On a Motion Flow Graph, the location of the referenced BIP files is saved in the MFE file. If a BIP file cannot be found, 3ds Max looks in the Animations directory specified by Configure User Paths File I/O.
In Motion Flow mode, you combine BIP files, using either velocity-interpolated transitions or optimized transitions that compute minimum foot sliding, to create longer character animations.