Frizz displacement is accomplished by doing a Perlin noise lookup at the hair's rest position root, and then displacing the hair much the way bump mapping displaces a surface normal. The frequency of the noise function is set by the Frizz X/Y/Z Frequency parameters. The magnitude of the displacement is controlled with Frizz Root and Frizz Tip. If you set dynamics mode to Live, the viewports show the effects of changing these settings in real time.
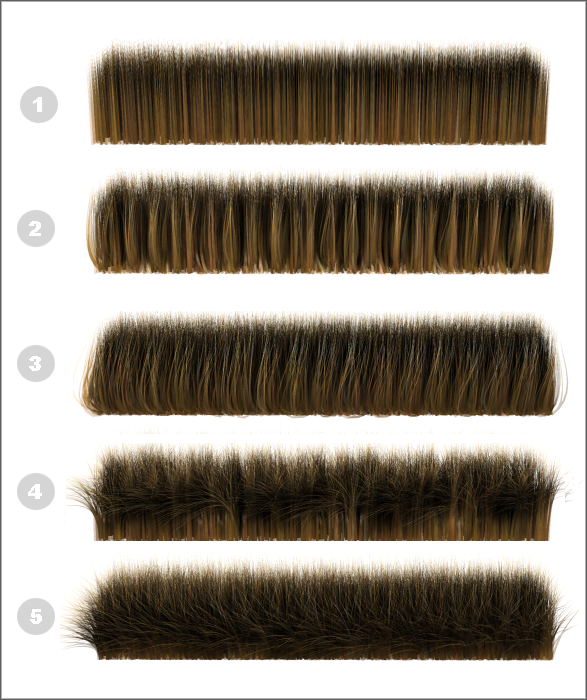
1. Frizz Root/Tip=0.0
2. Frizz Root=50.0, Frizz X/Y/Z Freq=14.0
3. Frizz Root=150.0, Frizz X/Y/Z Freq=60.0
4. Frizz Tip=30.0, Frizz X/Y/Z Freq=14.0
5. Frizz Root=50.0, Frizz Tip=100.0, Frizz X/Y/Z Freq=60.0
Frizz actually calculates two noise fields, both of which use the same frequency settings and tip/root amplitudes. One of the noise fields is static relative to the hair. The Anim parameters let you animate the second noise field through the hair over time. This is useful for things like grassy fields, where it would be overkill to compute real dynamics. These parameters give you a similar result, at a small fraction of the computational overhead.
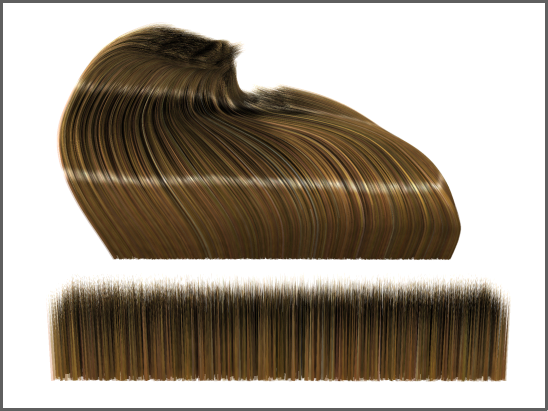
All Frizz/Kink settings=0.0; this reference image provided for comparison with the Frizz illustration (following) and the Kink illustrations in the next topic.
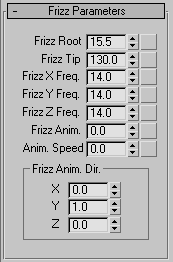
Controls the displacement of the hair at its tip. Default=130.0. Range=0.0 to 360.0.
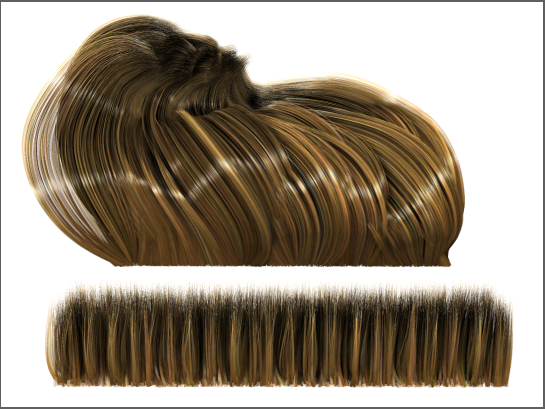
Frizz Root=30.0, Frizz Tip=100.0, Frizz X/Y/Z Freq=14.0
Top: Styled
Bottom: Unstyled
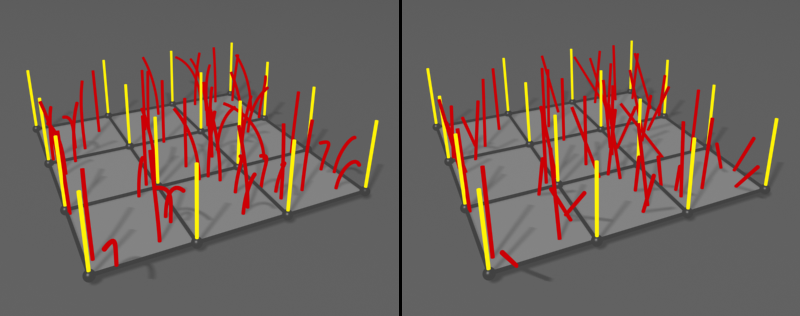
Left: Differing values for Frizz Root and Frizz Tip result in curved hairs.
Right: When Frizz Root=Frizz Tip, the hairs are straight.
Controls the frequency of the frizz effect on each of the three axes. Default=14.0. Range=0.0 to 100.0.
Like frizz, Frizz Anim displaces the hair with a noise field. The difference is that you can move the noise field to create animated displacement, resulting in wavy movement without having to resort to dynamics.
Sets the direction vector of the frizz animation. Default=0.0. Range=–1.0 to 1.0.
This vector is not normalized before use. This means that you can apply small tweaks to the values to achieve fine control over the speed of the animation on a given axis. To reduce confusion it’s a good idea to keep these directions either –1, 0, or 1. Once you’ve got the animation close to what you want, you can diverge from these and adjust the values to achieve the exact result you need.