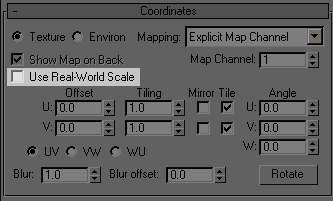
Real-world mapping is an alternative mapping paradigm. The idea behind real-world mapping is to simplify the correct scaling of texture-mapped materials applied to geometry in the scene. This feature lets you create a material and specify the actual width and height of a 2D texture map in the Material Editor. When you assign that material to an object in the scene, the texture map appears in the scene with correct scaling.
By default, real-world mapping is of in 3ds Max, and on in 3ds Max Design.
Autodesk Materials require you to use real-world mapping.
For real-world mapping to work, two requirements must be met. First, the correct style of UV texture coordinates must be assigned
to the geometry. Essentially, the size of the UV space needs to correspond to the size of the geometry. To this end, a new
option called Real-World Map Size has been added to many of the dialogs and rollouts that let you generate texture coordinates
(see list at the end of this topic). Any dialog or rollout that lets you turn on Generate Mapping Coords also lets you enable
Real-World Map Size. Also, you can toggle this option globally on the Preferences dialog  General panel.

Most object parameters settings now include a Real-World Map Size toggle.
The second requirement is available in the Material Editor. All 2D texture maps, such as Bitmap, provide a Use Real-World Scale check box on the Coordinates rollout. Like Real-World Map Size, by default this check box is off in 3ds Max and on in 3ds Max Design. When on, the U/V parameter names change to Width/Height and the Tiling label changes to Size. You can then specify the horizontal/vertical offsets and size of the texture map in current system units.

2D map coordinates settings now include a Use Real-World Scale toggle.
Following is a list of affected features (note links to topics with more extensive information):
 Geometry button
 Surface Parameters Rollout