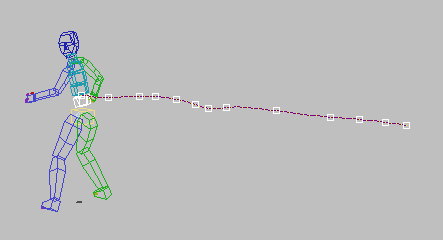
When a biped is animated, you can view its motion not only using Biped Playback, but you can also see the path, or trajectory, the biped (or selected biped links) follows throughout the motion.

Display of the trajectory of a biped's lower spine
You turn on trajectory display by clicking Trajectories in either of these user-interface locations:
 Motion panel
  Biped rollout
  Expand Biped rollout.
  Display group
 (Trajectories)
 Motion panel
  Key Info rollout
 (Trajectories)
 Display Properties
  Trajectory on the quad menu, and those under Motion panel
  Trajectories text button.
Trajectories provide useful visual feedback as you edit keys, showing the effects on the motion path for the parameters you're adjusting. You also can use trajectory display to compare filtered and unfiltered motion capture data.
Changes to Tension, Continuity, Bias, Dynamics Blend, Ballistic Tension, and the overall gravity setting GravAccel are reflected in the trajectories.
You can customize the trajectory information for the selected biped link by using the Display Preferences dialog. You can choose between Bone Base and Bone Tip, show an entire trajectory, or a moving range of frames.
To edit biped trajectory keys in a viewport:
 Select an animated biped and go to the
  Motion panel.
 (Body Horizontal) or
  (Body Vertical).
 (Trajectories).
 (Select And Move).