In this lesson, you use Revit to change the carport so it can accommodate two cars instead of one. This gives us a chance to demonstrate the dynamic capability of the File Link Manager.
Use Revit to edit the carport:
To complete this procedure, you must have Revit installed on your workstation. If you do not have Revit installed, proceed directly to the next procedure, Reload the FBX file.
 Carport.
 Zoom in to get a good view of the carport area.

Revit expands the size of the carport.
 Exterior.

 Application menu and choose Export FBX.
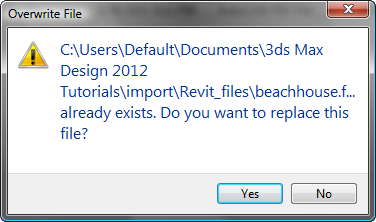
Revit warns you that you are about to overwrite beachhouse.fbx.
In 3ds Max Design, reload the FBX file:
 Application menu, choose References File Link Manager.

The entry for beachhouse.fbx now shows a red flag icon: This indicates that the FBX file has changed.

3ds Max Design opens a File Link Settings: FBX Files dialog.

3ds Max Design displays a progress bar while it reloads the FBX file. Leave the File Link Manager dialog open for now.
 Select the SunAndSky-002 Daylight object, and go to the
  Motion panel.
You need to reset the North Direction because the Daylight values were saved in the FBX file.
 render the scene.
Now the beach house has a double-wide carport in 3ds Max Design as well as in Revit.
Bind the FBX geometry to 3ds Max Design:
We don’t plan to revise the beach house model further in Revit, so at this point, you will bind the model to 3ds Max Design. This has the advantage of making the beach house geometry into full-fledged mesh objects that you can edit with the 3ds Max Design tools.
Files panel, click Bind. 
3ds Max Design displays a warning that you are about to break the live link.

3ds Max Design binds the geometry and converts it to Mesh objects.
 Close the File Link Manager dialog.
From this point on in this tutorial, you will work exclusively with 3ds Max Design geometry and lighting.
In the next lesson, you use an “mr Sky Portal” object to take some of the daylight and channel it into the beach house, to give its interior more ambient illumination.


