


The floor and sides of the swimming pool are also made of ceramic tiles, but in this case the tiles are small, and might better be described as terrazzo or mosaic.
 (Select Objects In Current Layer).
Now only the swimming pool is selected and visible in all viewports.

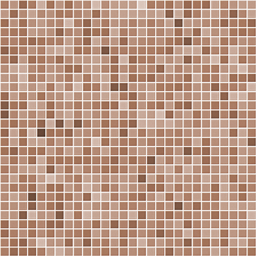
Mosaic map for the sides and bottom of the swimming pool

 Size = Length Size = 3.0m (meters).
 (Show Shaded Material In Viewport) to turn it on. (If you use a legacy viewport driver, this button's tooltip reads, "Show
Standard Map In Viewport.")
(Show Shaded Material In Viewport) to turn it on. (If you use a legacy viewport driver, this button's tooltip reads, "Show
Standard Map In Viewport.")
 (Assign Material To Selection).
The swimming pool is an editable mesh, so as with the terrace, you need to apply a mapping modifier.
 Modify panel, and choose UVW Map from the Modifier List drop-down list.
Make sure the UVW Map modifier’s Real-World Map Size toggle is turned on. (It should be on by default.)

The bottom of the pool doesn’t look bad, but the sides are streaked.
Unlike the wooden deck and the tiled terrace, which are flat surfaces, the swimming pool has both flat (or nearly flat) surfaces and vertical ones, so the default Planar mapping doesn’t work.
Modify panel Parameters rollout, change the map projection from Planar to Box.
The radio buttons at the top of the UVW Map Parameters rollout control how a map is “projected” onto the surface of an object. For the pool, Box projection works better than Planar.

Now the pool has a fine-grained mosaic tile texture of the correct size. It’s a little too fine-grained to show up well in viewports, but when you render it, it looks correct, and it interacts nicely with the Water - Pool material above it.
