


Bouncing a ball on an uneven surface can cause changes of direction. In this lesson, you use a point helper to control those changes, making the animation easy to edit.
 (Open File), navigate to the \scenes\animation\auto_key folder, and open bouncing_chaos_start.max.
The scene is the bouncing golf ball from the previous lesson. The plane has a texture that suggests a tile floor with recessed grooves for the grout. Uneven surfaces such as asphalt, tiles with grout, and so on, can make a bounce take off in unexpected directions.

You will retain the bounces, but remove the forward motion and replace that with changes of direction in X and Y.
 Select the ball, right-click it, and choose Curve Editor from the quad menu.
Now the ball bounces in place, with no forward motion.

 Close the Curve Editor.
Now you want to add more “chaotic” motion to the ball: When it strikes the face of a tile, it should continue in the same direction, but when it strikes a groove with grout, it should change its direction.
You could animate this lateral motion using the ball itself, but a better method is to use a helper object: With this method, the helper animation is independent of the ball and its bounce track, so if you later need to change the lateral motion, you can do so without affecting the bounce.
Create a Point helper to control the ball:
 Create panel, turn on
  (Helpers), then in the Object Type rollout, click to turn on Point.
 (Maximize Viewport Toggle) to display all four viewports.
 (Go To Start).

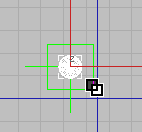
 (Align), and then click the ball.
 Align Position (Screen) group, turn on X Position, Y Position, and Z Position. Then choose Center for both Current Object
(the Point helper) and Target Object (the golf ball).
Align Position (Screen) group, turn on X Position, Y Position, and Z Position. Then choose Center for both Current Object
(the Point helper) and Target Object (the golf ball).
Link the ball to the Point helper:
 zoom in to get a better view of the ball and the helper.
 (Select And Link).
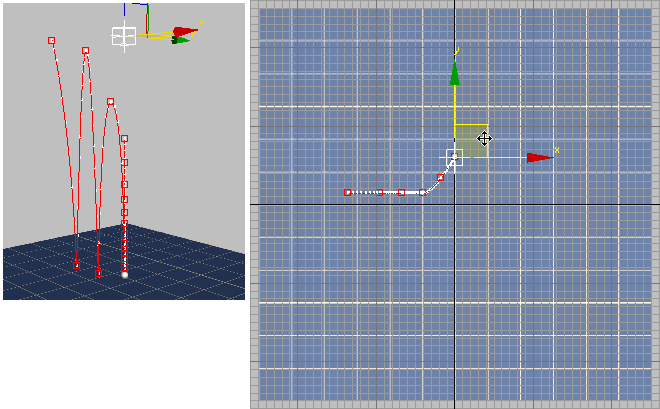
Now the ball is a child of the Point helper: When you move the point, the ball will follow along.
 Move the Point helper.
 Undo the Point helper movement.
Animate the changes in direction:
To make the ball move erratically, you want to give it lateral motion (via the Point helper) every time the ball hits the ground. If the ball hits a tile, it should continue forward. If the ball hits grout, it should change direction.
It’s easiest to move the Point in the Top viewport, while you watch the effect in the Perspective viewport.
 (Zoom Extents) so you can see all of the floor, once again.
 (Auto Key).

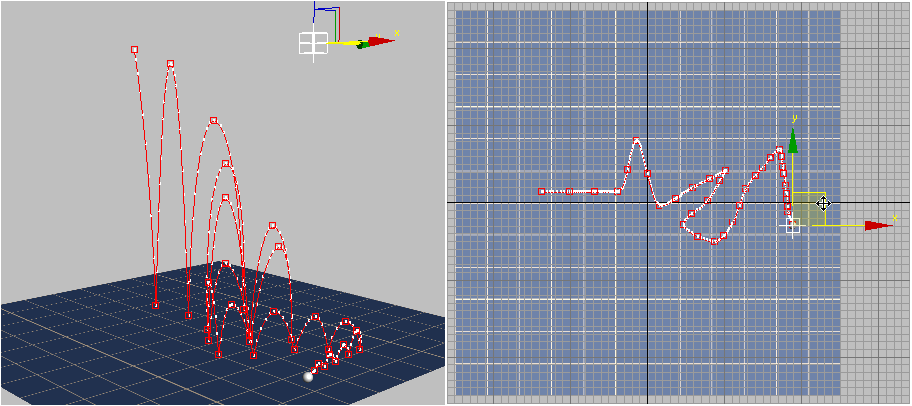
At frame 37, the ball lands on grout.
At frame 59, the ball has veered to the right, only to land on grout once again.
Keep the ball moving laterally in the same direction if it lands on a tile, and change the lateral direction if it lands on grout.
Here is how the completed scene looks, after animating the helper:
To see a completed version of the chaotic bounce, you can open the scene, bouncing_chaos_completed.max.
You can also play the movie chaosbounce.avi to see a rendered version of this animation. This movie file is in the project folder \sceneassets\renderassets\.
This tutorial introduced several basic techniques of animating with Auto Key:
The Curve Editor also lets you create “out of range” repetition of an animation, and adjust amplitude by using a multiplier curve.
This tutorial also introduced you to some of the general principles of animation: