 (Open File), navigate to
the \scenes\modeling\container folder, and
open container_start.max.
(Open File), navigate to
the \scenes\modeling\container folder, and
open container_start.max.
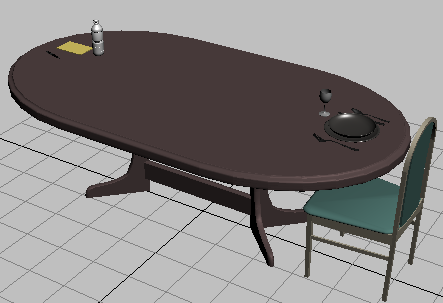
The scene contains a table, a chair, and two place settings: one for eating a meal and another for attending a meeting at work.
Get acquainted with container tools:
 (Zoom Extents All).
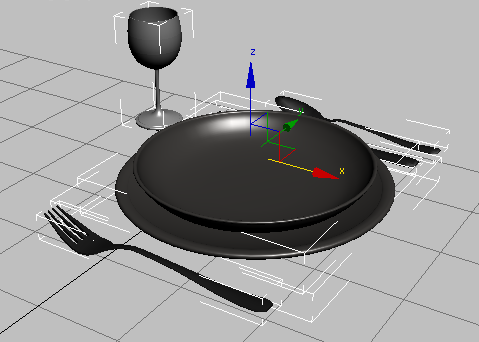
The dinnerware set is maximized in all viewports.
3ds Max provides various ways of accessing container-related commands, but one of the handiest is the Containers toolbar.
 Right.
The toolbar docks on the right side of the interface, next to the command panel.
 (Create Container From Selection).
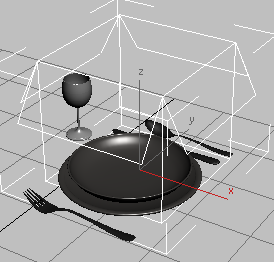
This command adds a new container to the scene and then places the selected objects in the container. The container appears in the viewports as a wireframe box with the lid flaps open. The box’s position is calculated from the average of the selected objects’ locations.
Alternatively, you could create a new container and then add objects to it, but if you already know which objects you want in the container, using Create Container From Selection is the easiest method.
Because the container starts out in an open state, you can manipulate it and its contents freely.
 Move the container and note
that its contents move along with it. Then move some of the contained
items and note that their movement doesn’t affect other objects.
Move the container and note
that its contents move along with it. Then move some of the contained
items and note that their movement doesn’t affect other objects.
In effect, the objects in the container are children of the container. But there’s much more to the Container feature than a simple hierarchical relationship.
 Modify panel and on the
Manage Container rollout, click the Close button.
Modify panel and on the
Manage Container rollout, click the Close button.
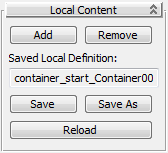
A file dialog titled Container Definition File opens, with the default file name container_start_Container001, based on the scene-file name and the container name. The file name extension .maxc is added when you save the file.
After you close the container, its appearance in the viewport changes to indicate that it’s now closed.
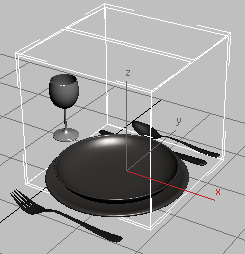
Moving the container works as before, but you can no longer select the contents. This behavior mimics the real world; if you put stuff in a box or other container and then close it, the contents are no longer directly accessible.
The box returns to its previous status, with one difference: On the Local Content rollout, the Saved Local Definition field contains the name of the saved container. When a container has a local definition, that effectively means you’re the container’s owner, although it doesn’t necessarily mean you have full control of its contents; this will become clearer later in the tutorial.
Share the container with yourself:
Henceforth this tutorial will refer to Session 1 and Session 2 of 3ds Max. The best way to learn how the Container feature works without getting mixed up is by working in two different sessions of the program. In effect, you’re simulating two users: one who originates a container in Session 1, and another who inherits it in Session 2. When you inherit a container, you can still use it, but only within the limits set by the originator.
One way to work in two different sessions of 3ds Max is by saving your work, resetting the program, and then reloading your work from the other session. As you can imagine, however, going back and forth this way is slow and cumbersome. Much better is to run 3ds Max twice, thus having two different sessions running concurrently on the same machine. We recommend this method if your machine has at least 2GB of system memory and 512MB or more of graphics memory. If you’re not sure whether you have enough memory, the best way to tell is just to try it.
Or, if you have two networked machines, run 3ds Max on both and switch back and forth. This latter method is closer to a typical studio setup with multiple users on the same team sharing data, but the single-machine approach works fine as well.
 (Inherit Container). Using
the Inherit Container file dialog, navigate to the folder in which
you saved the container file (container_start_Container001)
in the previous section, and then open the file.
(Inherit Container). Using
the Inherit Container file dialog, navigate to the folder in which
you saved the container file (container_start_Container001)
in the previous section, and then open the file.
The container and its contents appear in the viewports, in the same location from which you saved them. The container is closed and selected.
Click (Zoom Extents All).
You can move the container, but you cannot open it because the Open button on the Manage Container rollout is unavailable. Also note that the Edit In Place button is unavailable. To see one reason for this, return to Session 1.
The When Inherited, Allow option is set to No Access (Closed), which means that the inheritor can work with the container, but not its contents. This capability is useful for a team in which one member creates the content and another simply arranges that content to set up a scene, such as a game level.


