


Placing the Particle Trees
In this lesson you use polygon selection to define the area in which tree particles appear.
 Open ptrees_placement.max.
The scene consists of an undulating terrain bisected by a riverbed and populated by a number of particle-based trees.
Use polygon selection to define where trees will appear:
 Maximize the Top viewport
and set viewport shading mode to Smooth + Highlights (you can press F3).
Maximize the Top viewport
and set viewport shading mode to Smooth + Highlights (you can press F3).
 Zoom in to the river.
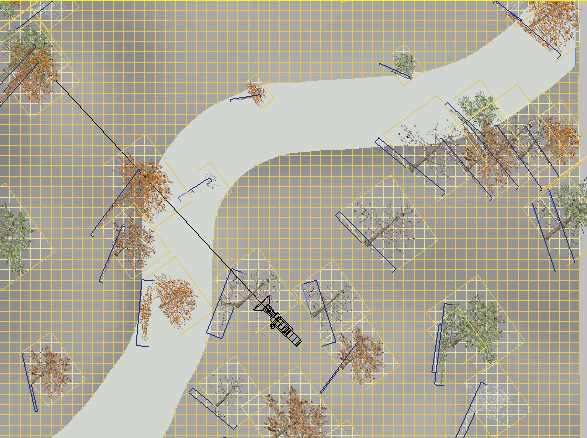
Notice how a few particle trees stand in or on the very edge of the river bed.
 Zoom out again and select
the Camera01 object.
Zoom out again and select
the Camera01 object.
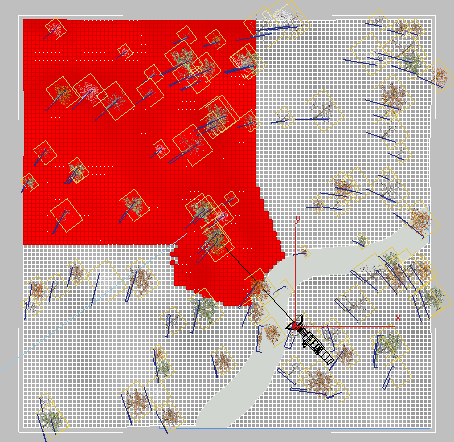
The light blue guidelines show the camera’s field of view. Assume for the moment that you want only a static shot, or plan to have the camera move toward the upper-left corner of the terrain. This means there are many particle trees elsewhere on the plane that will never be seen and consequently do not need to be generated.

Camera field of view
Now you will use polygon selection to indicate where to place the particle trees (within the field of view and not in or near the river).
Switch back to a four-viewport
layout,  select the Plane01 object,
then go to the
select the Plane01 object,
then go to the  Modify panel.
 (Polygon).
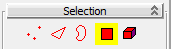
Click just outside the top
left corner of the Plane01 object and drag toward
its center.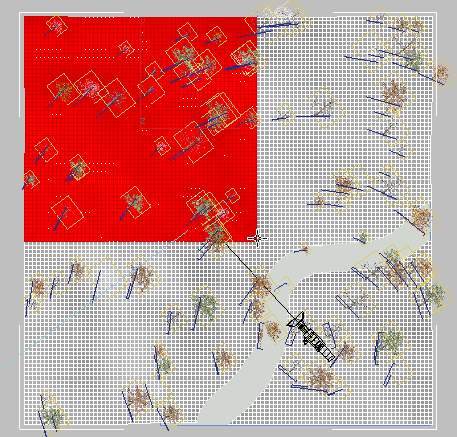
 (Paint Selection Region)
from the Selection Region flyout (initially it shows
(Paint Selection Region)
from the Selection Region flyout (initially it shows  (Rectangular Selection Region)).
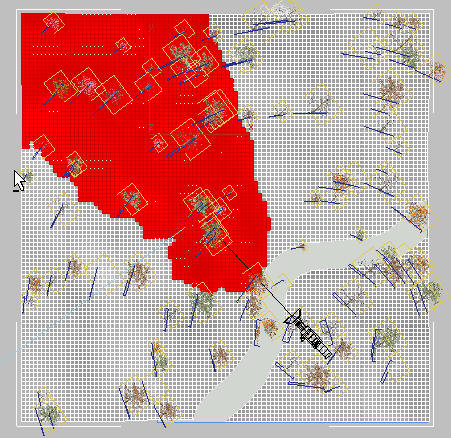
Selected polygons near riverbank
Top view, showing selection of polygons near the riverbank.
Top view, with polygons beyond periphery of camera view deselected
 (Polygon) again to exit
the polygon sub-object level.
(Polygon) again to exit
the polygon sub-object level.
Set the particle system to use the sub-object selection:
Click an empty area of the
Top viewport to deselect the Plane01 terrain
object, then press 6 to
open the Particle View window.
 Location group, open
the Location drop-down list and choose Selected Faces.
Location group, open
the Location drop-down list and choose Selected Faces.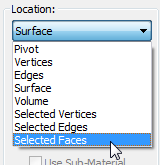
Previously, particles were generated across the entire plane. Now, the same number of particles are generated only on the polygon faces you just selected.
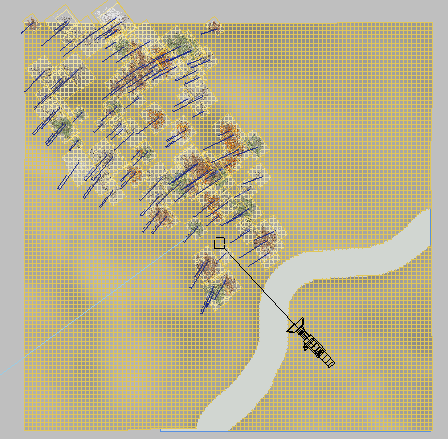
Particle generation restricted to top left region of plane object
Because the generation area is reduced, you can reduce the total number of particles generated.
If you like, adjust tree
placement in the Position Object 01 rollout Uniqueness group by clicking New until you
see a grouping you prefer.
Uniqueness group click New until the Camera01
viewport displays a mix of trees that looks good to you.
 Render your scene.
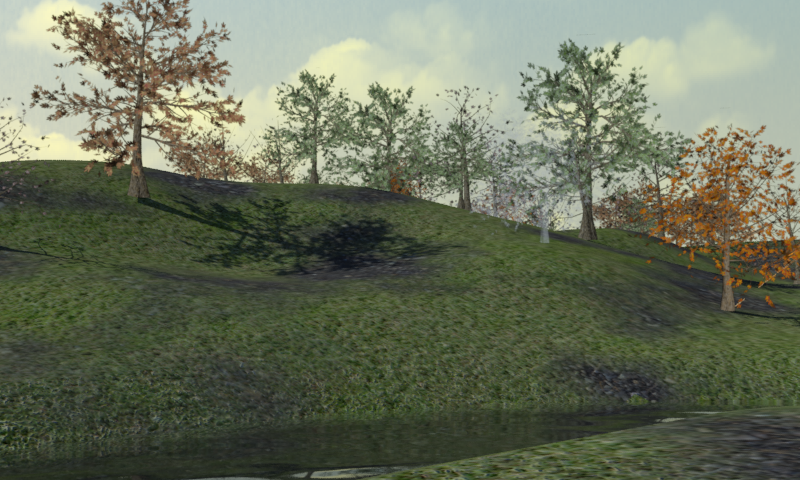
Rendered 50-tree view of the particle forest
The 50 particle trees should take just a minute or two to render. If, on the other hand, the scene were made up of 3D trees at 30,000 polygons each, 3ds Max would need to process over a million polygons: This would require a great deal more time to render.
There is one aspect to watch out for when using particle systems to create trees with shadows. As the next illustration demonstrates, the base of the tree on the left does not quite match the base of its shadow.
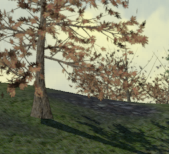
Tree trunk not aligned with particle tree shadow
Recall that you created two sets of particle trees: One set oriented to face the camera and another, hidden set that faces the sun. Depending on the respective positions of the light source and the camera, a hidden tree might cast a shadow that is out of alignment with the visible tree.
To solve this problem, you can rearrange tree placement by changing the particle trees’ Seed value, or you can add objects such as rocks to obscure unwanted detail.
You can find a completed version of this scene in the \scenes\dynamics_and_effects\particle_trees folder, called ptrees_completed.max.
Particle systems offer a fast, effective way to populate scenes with multiple objects.
In this tutorial you used images of trees and mapped them onto billboard-sized particles. But you could just as easily have mapped other types of images; for example, you could use photographs of people to create a crowd scene.
When using this particle-creation technique, make sure your particles are set to face the camera. If you need to cast shadows, generate a second set of particles and make sure their shadows continually face the light source.