


Use the Curve Editor to
Improve the Motion
The Curve Editor is part of the Track View feature, which is a general-purpose tool for managing and adjusting animation.
3ds Max opens the Curve editor. The tracks you just created for the ball should be visible on the left, and the curves themselves should appear in the curve window to the right.
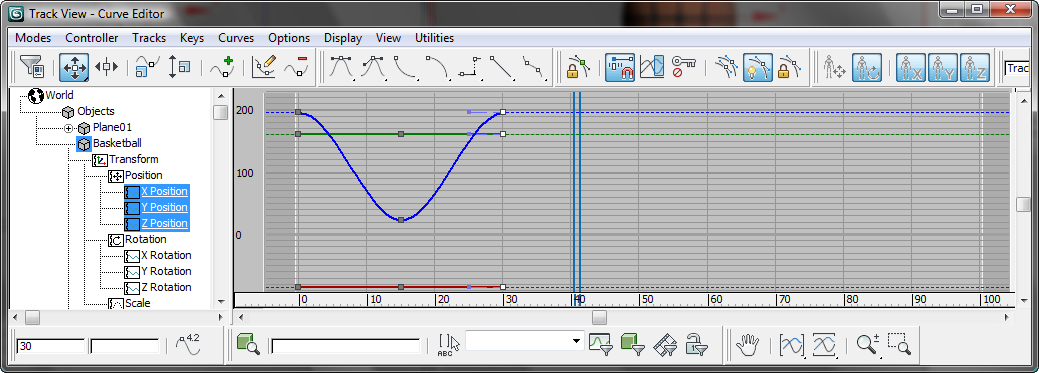
The Z track, in blue, clearly shows the up-and-down movement of the ball. The X and Y tracks are both flat, which indicates no change in these dimensions. In fact, the ball should travel along the X-axis, as if it were given some forward momentum when it was dropped.
Add movement along the X-axis:
 (Auto Key) once again, then
in the Left viewport, move the ball to the right along its X-axis.
(Auto Key) once again, then
in the Left viewport, move the ball to the right along its X-axis.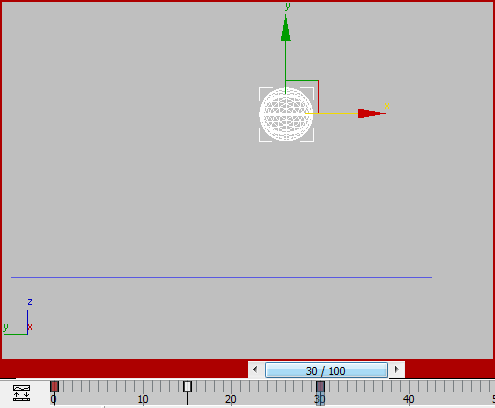
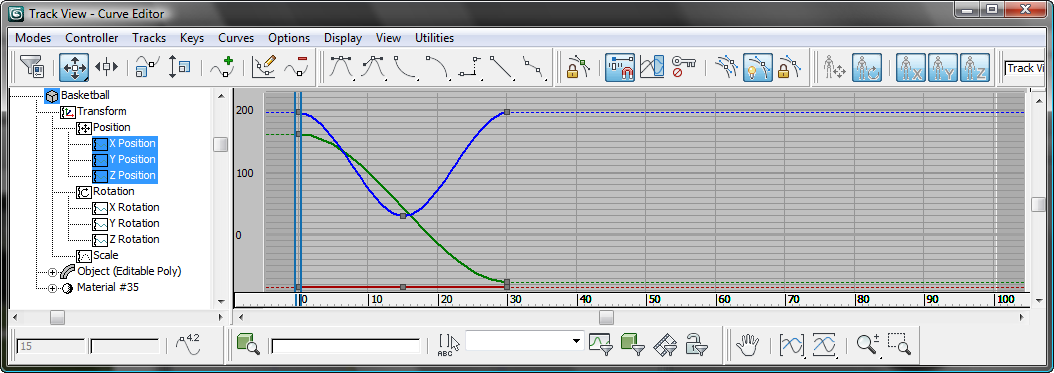
The curves in the Curve Editor also update to show the change you made.

That doesn’t look quite right: As you can see if you scrub the time slider, the ball drops vertically, and then travels forward. Instead, the effect we want is a smooth forward motion, as in the diagram at the beginning of this lesson. The culprit is the Y Position key at frame 15, which pins the ball to the same Y position it has at frame 0.
 (Auto Key).

The key turns white when you select it. It also shows some tangent handles.
Now the basketball moves forward from frame 0 to frame 30, as you can see if you scrub the time slider. The animation still looks too mechanical, but you’ll improve that soon.
Add a trajectory and ghosting to improve animation display in the viewports:
You can display the trajectory of an object in viewports, and also “ghost” images of the moving object. Both these options help you visualize your animation.
 Display Properties group,
click Trajectory to turn it on, and then click OK.
Display Properties group,
click Trajectory to turn it on, and then click OK.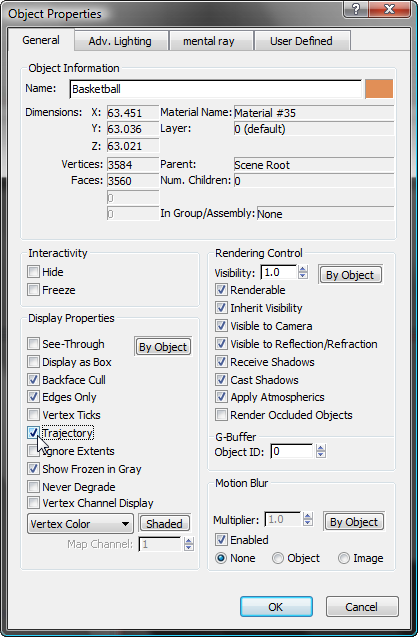
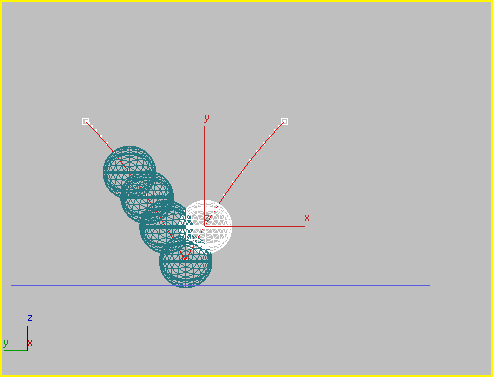
Now viewports show a trajectory for the basketball, in red, with white tick marks along its length. Each tick represents a frame.
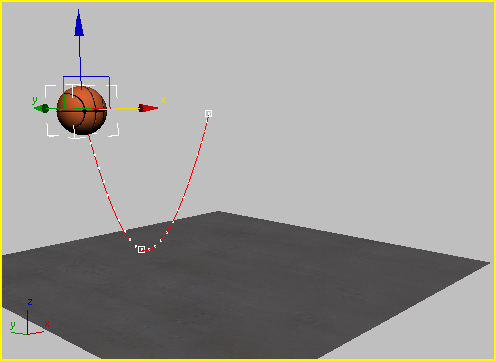
Basketball trajectory in a viewport
The ticks are more closely spaced at the beginning and end of the trajectory (this is easiest to see in the Left viewport). This is a timing effect known as “ease in, ease out” (or “slow in and slow out”). However, the ticks are evenly spaced around frame 15, where the ball bounces off the floor. This is one reason the bounce doesn’t appear realistic, yet.
Show Ghosting to turn
it on.
Now when you drag the time slider, viewports show ghost images of where the ball has traveled.
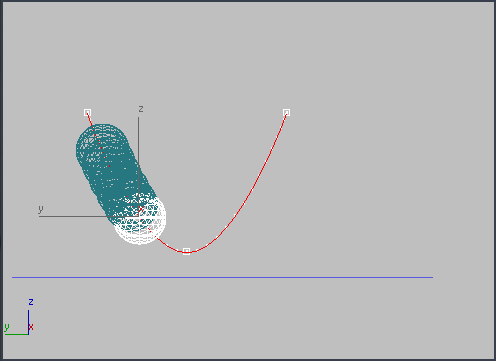
The default ghosts are closely spaced, and a little hard to read. You can improve this by changing the default settings.
Preferences. Go to the
Viewports tab.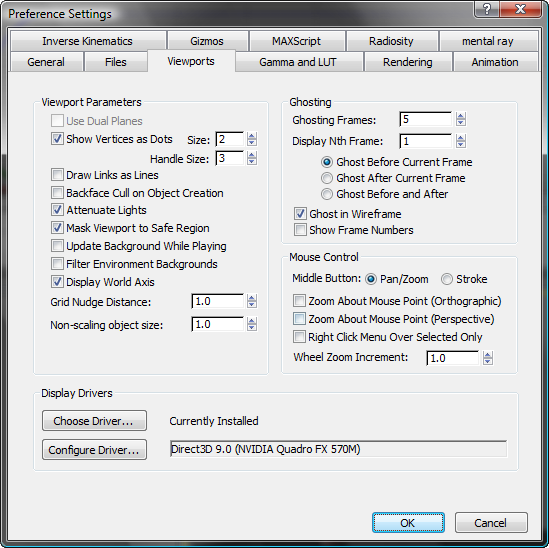
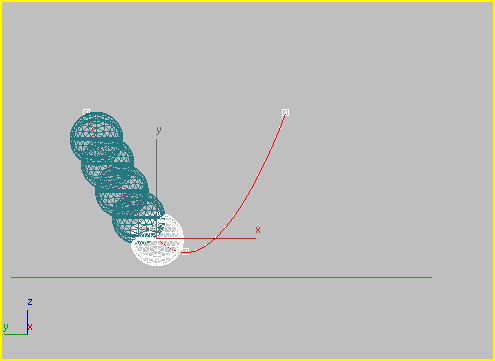
Now when you scrub the time slider, you see fewer ghosts, spaced two frames apart. This makes it a bit easier to see how the animation is progressing.
Adjust the timing of the bounce, in the Z dimension:
Controller window (the list of objects and
tracks at the left), click the Z Position track to display the curve
for just that track.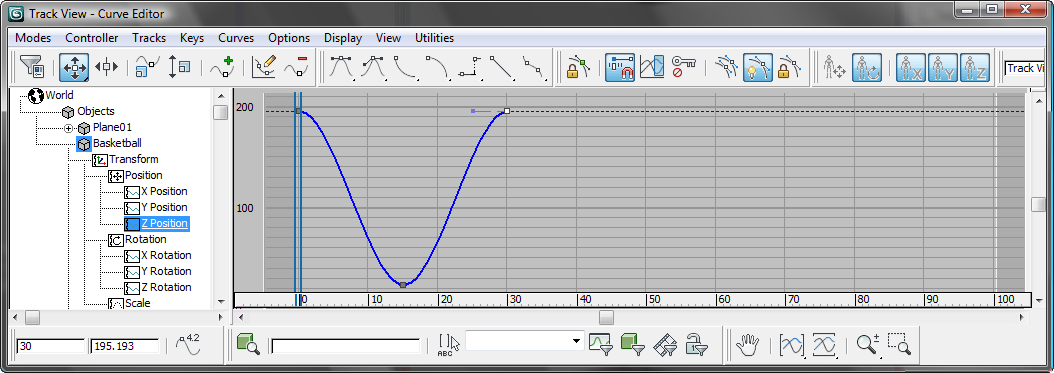

 (Set Tangents To Fast).
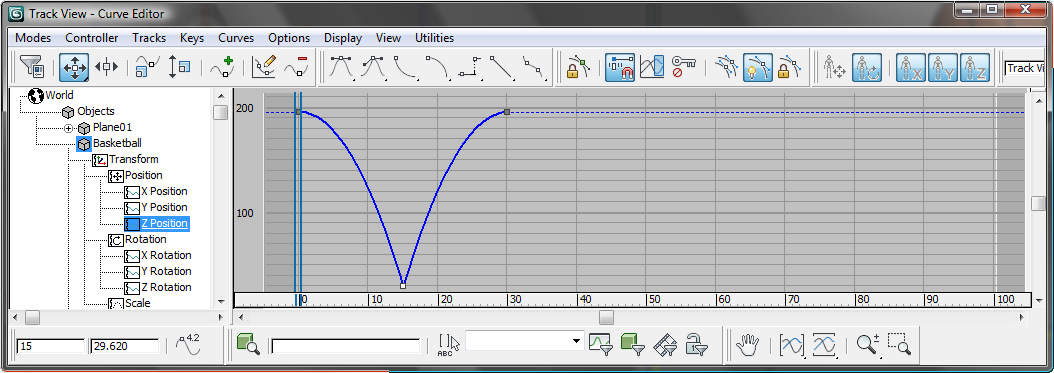
Now the bounce has a snap to it that makes it look more like a real bounce.
Adjust the basketball’s forward motion:
As it did for the ball’s up-and-down motion, Auto Key applied ease in, ease out to the ball’s forward motion. But this isn’t necessary, and in fact would give strange results when you repeat the bounce, as you do in the next section.
Controller window, click the Y Position
track to display the curve for that track.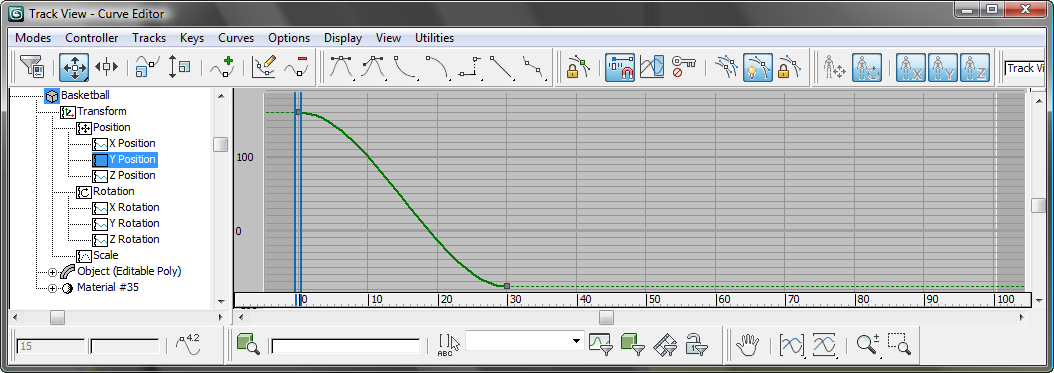
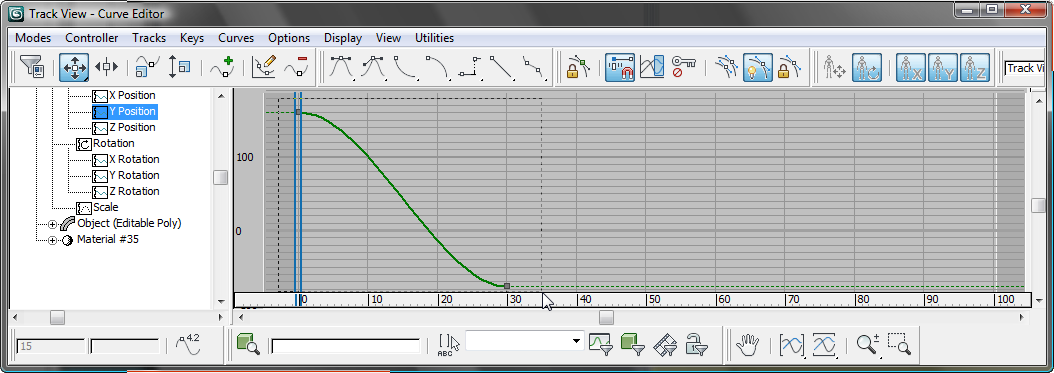
 (Set Tangents To Linear).
3ds Max removes the ease curves from this track, making the forward movement uniform.
