The bounce is beginning to look good, but as it bounces forward, the basketball remains perfectly level, and that is not realistic.
The rotation of the textured ball is easier to see if you turn off ghosting.
 Select the basketball, if
it is not already selected.
Select the basketball, if
it is not already selected.
 Show Ghosting to turn
off this option.
Show Ghosting to turn
off this option.
If you were to use Auto Key to set rotation keys for the ball, without any preparation, you would run into trouble. The reason is that 3ds Max uses Euler XYZ as the default rotation controller. For continuous animation, there are a couple of problems with this controller: It is not good at handling rotation greater than 180 degrees, and it sets keys for all three tracks, even when you animate only a single axis. These problems are exaggerated when you set the Out-Of-Range type; for example:
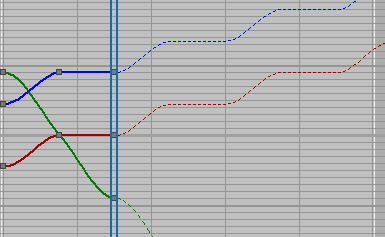
Out-of-range curves with Euler XYZ rotation
In this example, 3ds Max has generated extraneous and unrealistic sideways rotation for the ball.
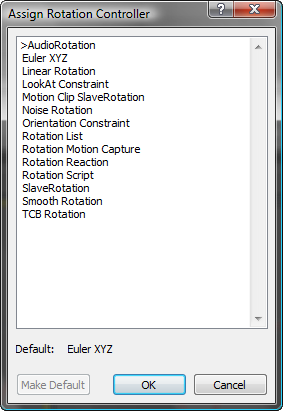
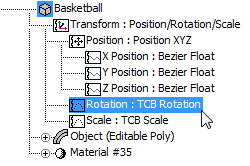
When you want rotation greater than 180 degrees, or continuous rotation about a single axis, the solution is to use a TCB rotation controller.
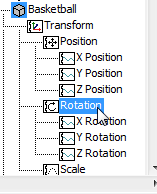
The main Rotation track
3ds Max opens an Assign Controller dialog.
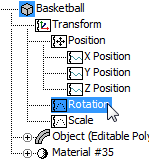
Now the basketball has a single Rotation track, with no subordinate X, Y, and Z Rotation tracks.
 (Filters).
3ds Max opens the
Track View Filters
dialog.
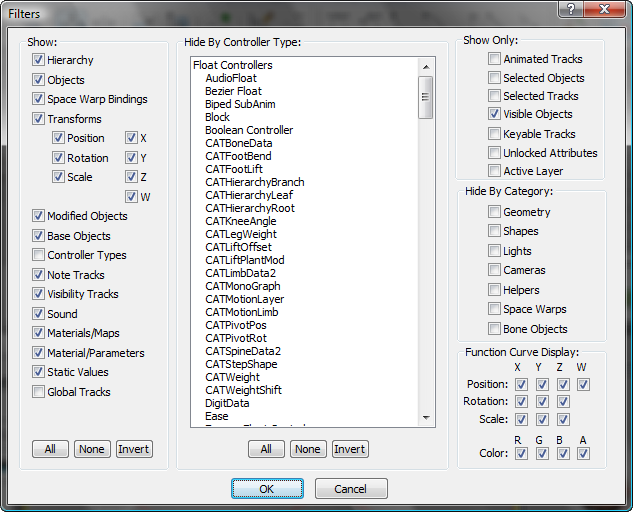
Show group (on the left), click to turn
on Controller Types, and then click OK.
Now the controller window lists controller types.
Now you are ready to create rotation keys for the basketball.
Add rotation to the basketball:
 (Auto Key).
 (Angle Snap).
 rotate the basketball 90
degrees forward in the X-axis. Watch the X field in the status bar
to check the value.
rotate the basketball 90
degrees forward in the X-axis. Watch the X field in the status bar
to check the value.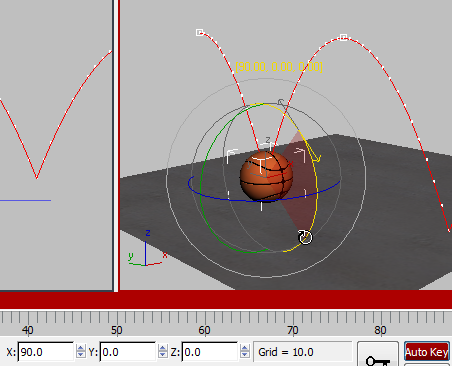
Forward rotation at frame 15
Rotate the basketball forward
another 90 degrees along the X-axis.
 (Auto Key).
 (Parameter Curve Out-Of-Range
Types).
(Parameter Curve Out-Of-Range
Types).
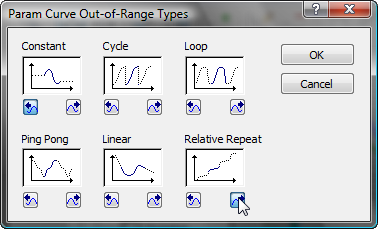
(As before, you can leave the incoming animation set to Constant, because the bounce begins at the start of the scene animation.)


 open
open