Creating the beard demonstrates the basic controls for Hair And Fur.
 (Open File), navigate to
the \scenes\effects\hair folder,
and open viking_start.max.
(Open File), navigate to
the \scenes\effects\hair folder,
and open viking_start.max.
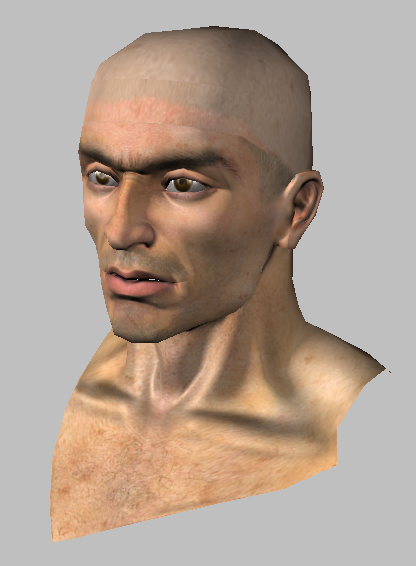
The scene contains the head of a warrior character.
Create the faces for the beard:
You can grow hair directly from the Head object, or from a subset of its faces, but creating a separate set of nonrendering faces gives you more flexibility, as the following steps will show.
 Select the Head object.
 Polygon Modeling group,
click to turn on Modify Mode.
Polygon Modeling group,
click to turn on Modify Mode.
 (Polygon) to go to the Polygon
sub-object level.
(Polygon) to go to the Polygon
sub-object level.
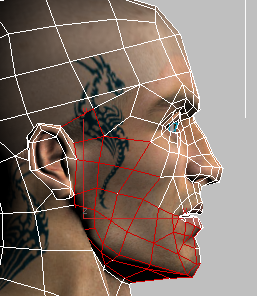
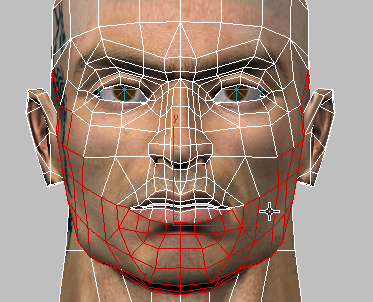
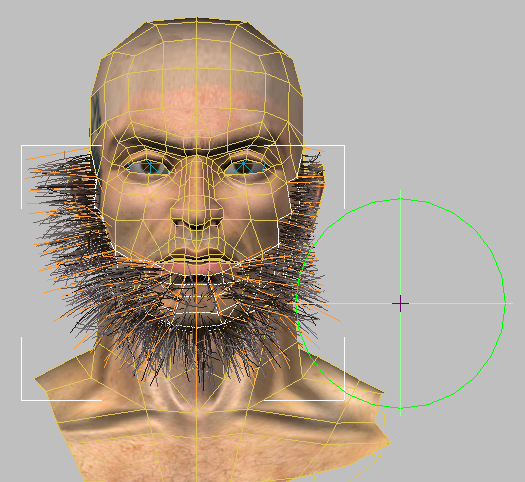
select the polygons in the
area where the beard will grow. Use the following illustration as
a reference.
If the viewport doesn’t show face edges, press F4 to turn on Edged Faces display.
Geometry (All) group,
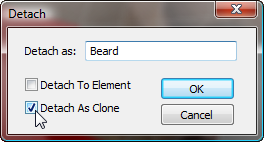
click  (Detach).
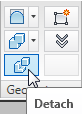
 (Polygon) again to exit the
Polygon sub-object level.
(Polygon) again to exit the
Polygon sub-object level.
Make the beard faces nonrendering:
Select the Beard object. Right-click,
and from the Tools (lower right) quadrant of the quad menu, choose
Object Properties.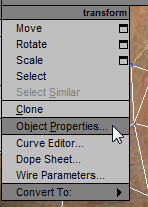
Rendering Properties
group, click to turn off Visible To Camera, and then click OK.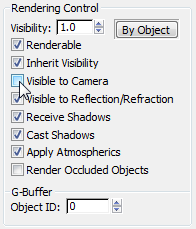
The Beard faces are for growing the hair of the beard, but they don’t need to appear in renderings.
Adjust the shape of the beard:
Polygon
Modeling group, turn on  (Vertex).
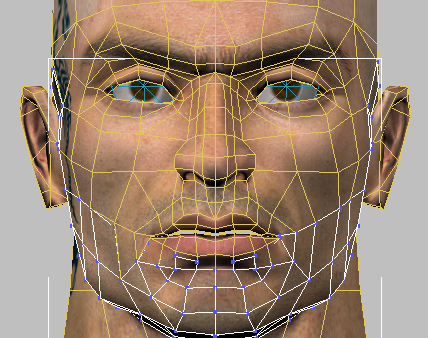
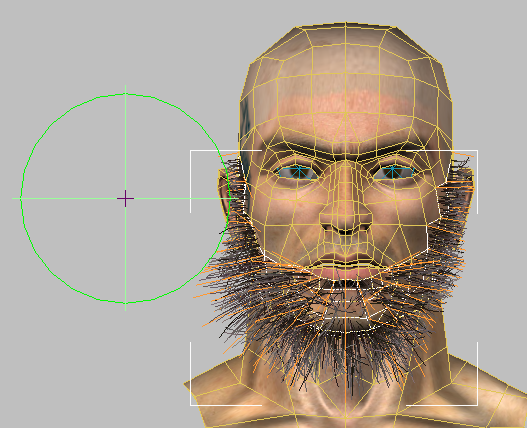
 move the vertices along
the cheek so the beard has a smoother outline. Also move the vertex
for the area of the sideburn that extends behind the ear. Use the
following illustration for reference.
move the vertices along
the cheek so the beard has a smoother outline. Also move the vertex
for the area of the sideburn that extends behind the ear. Use the
following illustration for reference.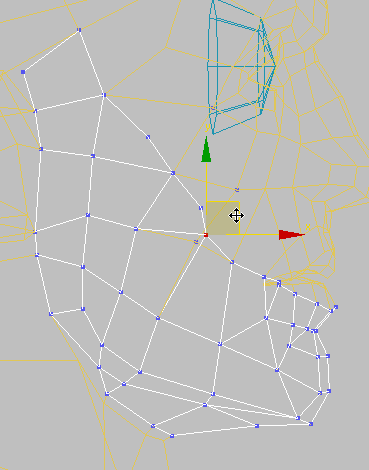
region-select the vertices along
the lip. Move them slightly downward
and a little to the left.
 (Vertex) again to exit the
Vertex sub-object level.
(Vertex) again to exit the
Vertex sub-object level.
Apply the Hair And Fur modifier:
 Modifier List, choose WORLD-SPACE MODIFIERS Hair And Fur (WSM).
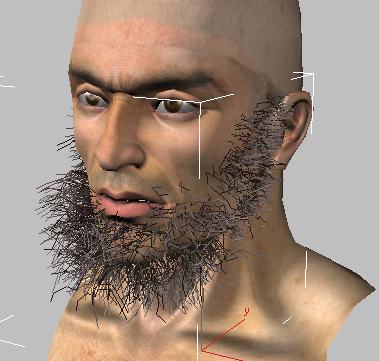
Hair now grows from the faces of the beard.
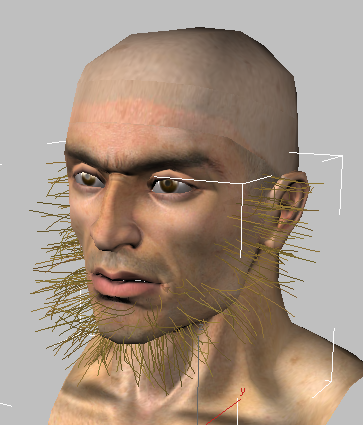
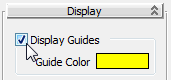
In the viewport, hair guides display as yellow lines.
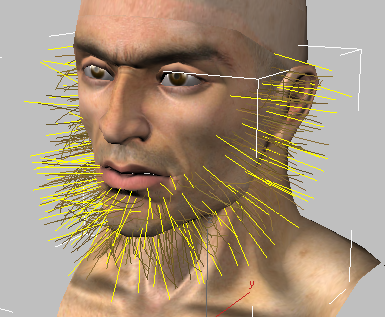
The Hair And Fur modifier generates guide hairs at the corners of polygons. When you style hair, you are styling only the guides: The hairs between the guides are interpolated from the guide hairs.
Percentage
value to 10.0.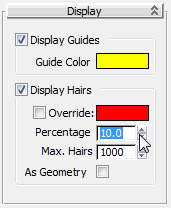
3ds Max increases the number of hairs shown in the viewport.
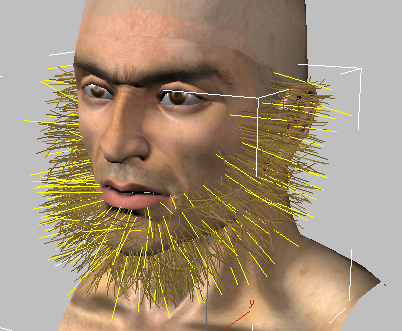
Increasing the percentage of displayed hairs helps you visualize how the beard will look.
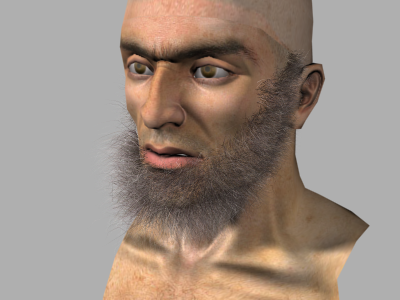
The Viking should have reddish-brown hair. He is middle aged, so the hair should also be starting to turn gray.


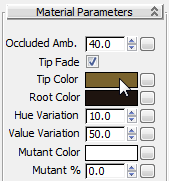
The color at the tip of the hairs is a brownish gray.
The Hair And Fur modifier shades hairs from the Root color, where they begin, to the Tip color, where they end. But actual hairs usually vary, and you can use the Mutant Color controls to model this variation.
3ds Max opens a Copy Or Swap Colors dialog. Click Copy.
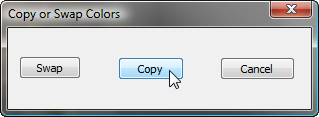
Now Hair will randomly choose 15 percent of the hairs to maintain the Root color: That is, they will be dark instead of graying.
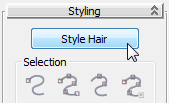
Styling group, click  (Hair Cut) to turn it on.
In the active viewport, the Hair Cut cursor appears as a green circle. If you look at other viewports, you can see that the cursor is actually a cylinder: Its effect goes deep into the scene.
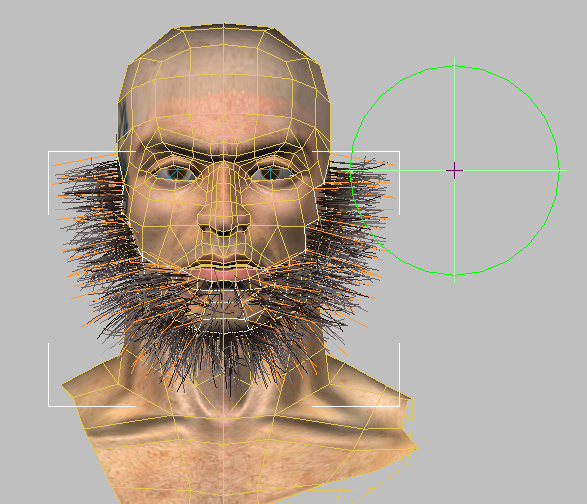
The cursor has falloff: Its effect is greatest at the center, and less at the edges.
Don’t worry about being perfectly symmetrical. We can imagine that the Viking didn’t care.

Adjust some more Hair And Fur settings:
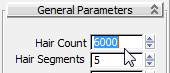
You can improve Hair And Fur render time by reducing the Hair Count value, and setting hairs to have multiple strands.
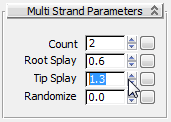
The beard is now bushier and a little more wild.
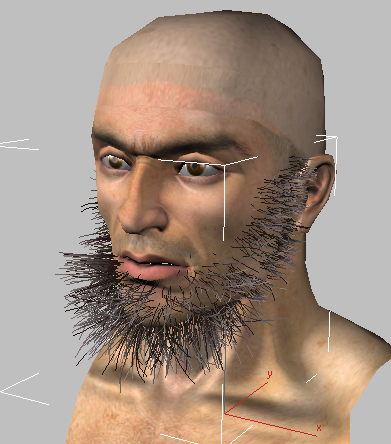

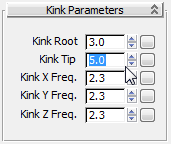
The Frizz and Kink setting changes make the beard even more bushy.
 (Render Production).
3ds Max renders the head of the Viking quickly. It takes a more little time to render the beard.


 (Graphite Modeling Tools (Open)).
 (Lasso Selection Region)
can be a convenient way to select faces in such an irregular shape.
(Lasso Selection Region)
can be a convenient way to select faces in such an irregular shape.