Although the cockpit is essentially done, you need to add edges and adjust their position so the cockpit still looks good when you smooth the model.
Use smoothing to preview the model and help you refine the geometry:
 Zoom,
Zoom,  pan, and
  orbit the Perspective viewport
so you have a more conventional view of the whole airplane, or most
of it. Angle the view so you are looking down on the cockpit area.
orbit the Perspective viewport
so you have a more conventional view of the whole airplane, or most
of it. Angle the view so you are looking down on the cockpit area.
 Edit panel, turn on
  (NURMS), and then on the
ribbon Use NURMS
panel, increase the number of iterations to the usual value (for
the P-47) of 2.
(NURMS), and then on the
ribbon Use NURMS
panel, increase the number of iterations to the usual value (for
the P-47) of 2.
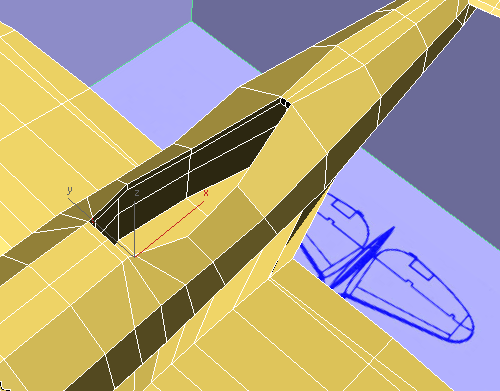
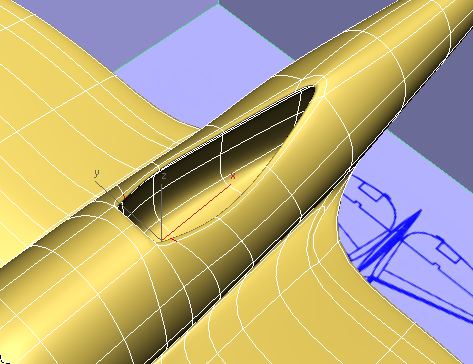
The model is smoothed nicely, and the cockpit is smoothed all the way around. This is easiest to see in the Top viewport.
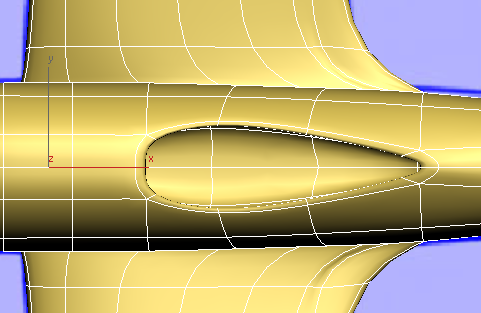
However, the blueprint image shows that the leading edge of the cockpit should be straight. You can fix this by adding some edges (as you saw when you refined the air-intake portion of the engine cowl, placing edges close together reduces the effect of NURMS smoothing).
 (NURMS).
 (Edge) sub-object level.
Edit panel, turn on
(Edge) sub-object level.
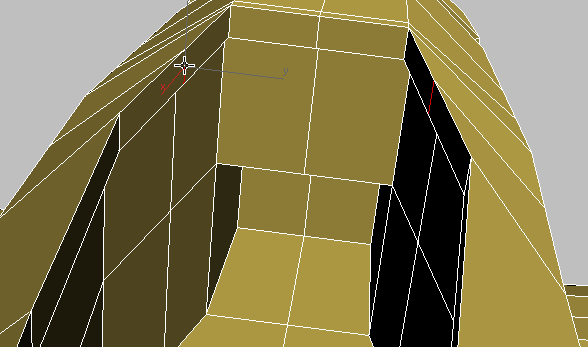
Edit panel, turn on  (SwiftLoop). Add a new lateral
loop of edges, about halfway between the leading edge of the cockpit
and the loop of edges that is now in front of it.
zoom in before you make
the changes.
(SwiftLoop). Add a new lateral
loop of edges, about halfway between the leading edge of the cockpit
and the loop of edges that is now in front of it.
zoom in before you make
the changes.
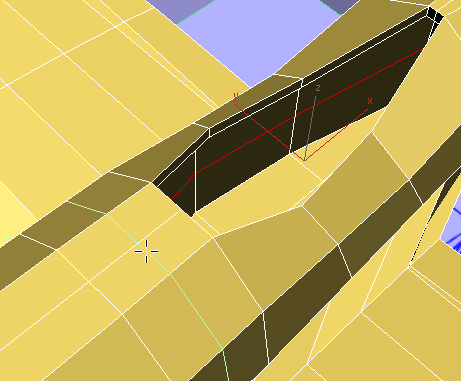
 Click and Ctrl+click to select the two edges
on top of the fuselage, in the new loop you just created.
Click and Ctrl+click to select the two edges
on top of the fuselage, in the new loop you just created.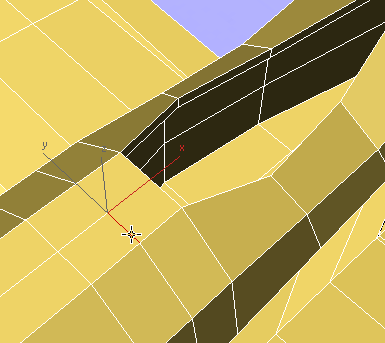
Edit panel, activate  (Constrain To Edge).
 Move the two edges so they
are close to the leading edge of the cockpit.
Move the two edges so they
are close to the leading edge of the cockpit.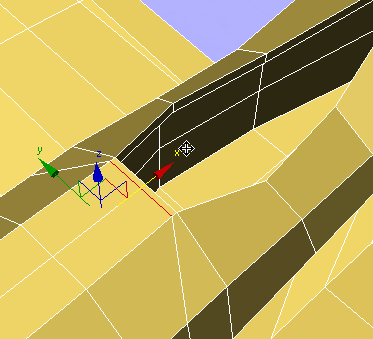
(SwiftLoop) again, and add
another lateral loop of edges behind the leading edge of the cockpit,
about halfway to the edges that trail it.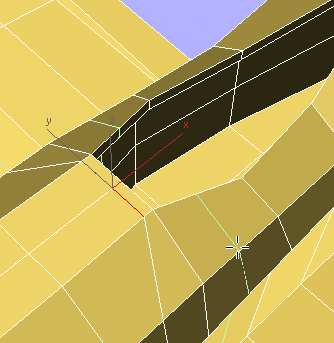
Click and Ctrl+click to select the two small
edges along the rim of the cockpit, in the new loop you just created.
To select both edges,
you have to orbit the Perspective view.
Move the two rim edges forward
so they too are close to the leading edge of the cockpit.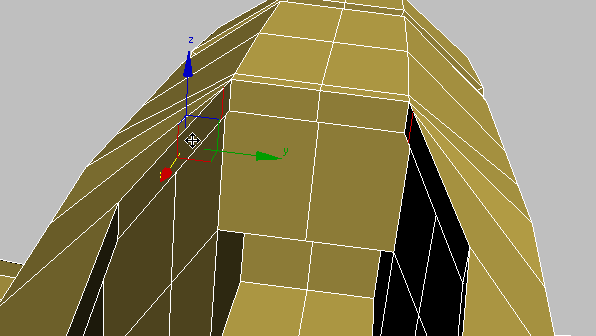
Edit panel, activate  (Constrain To None).
 (Select Object) to exit
Move.
(Select Object) to exit
Move.
Edit panel, turn on (NURMS).
The leading edge of the cockpit is now straight, as it is in the blueprint images.
(NURMS).


