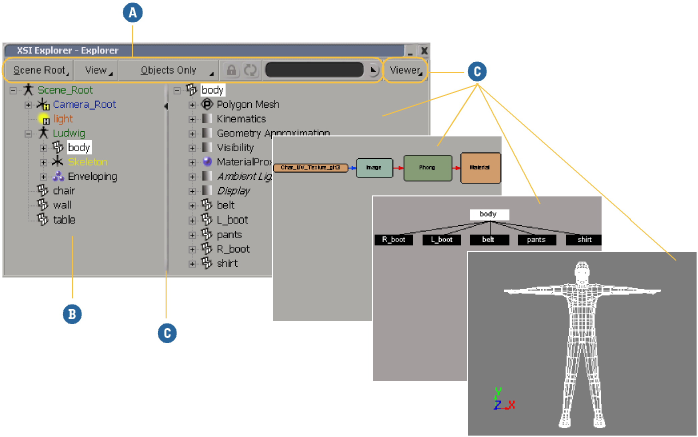
The XSI explorer presents a two-pane view of your scene. The left pane shows an explorer view that lets you quickly navigate through your scene and select an element. The right pane shows a different view of the selected element. You can set the right pane to show a schematic view, object view, texture editor, image clip viewer, property editor, render tree view, or another more finely detailed explorer view.

You can open an XSI explorer view in a viewport or as a floating window, the same as with most the Softimage views.
Use the Viewer menu to choose what to display in the right pane. These other views are described elsewhere in the Autodesk Softimage documentation.
Most of the views add their own commands to the XSI explorer command bar. However, the explorer does not. Also, be aware that when an explorer is displayed in the right pane, the command bar affects only the explorer in the left pane.
In floating windows, the name of the current viewer is displayed in the title bar.
Use the explorer in the left pane to select an element to view in the right pane. You can use the command bar to control which elements are listed in the left pane — for more information see The Explorer.
The element displayed in the right pane changes only when you use the left pane to select something else. The right pane does not respond when you select a new element outside of the XSI explorer. This lets you use the XSI explorer to focus on a specific object without losing it while you work on something else.
If you want the XSI explorer to update automatically when you select something in another view, set the scope of the left pane to Selection. In this mode, you can still lock the view to prevent it from updating automatically, as well as update it manually when it is locked.

 Except where otherwise noted, this work is licensed under a Creative Commons Attribution-NonCommercial-ShareAlike 3.0 Unported License