There are many ways angles from which you can view your scene in the 3D views. These points of view are available from the Views menu in viewports and from the View menu in the object view.
These menus have somewhat different options:
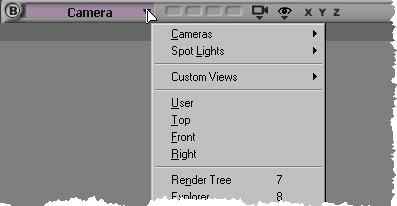
The viewports' Views menu lists the various camera, spotlight, and viewpoint views from which you can view your scene, as well as other views, like editors and data views, that you can open in viewports.
The object view's View menu lists the various camera, spotlight, and viewpoint views from which you can view your scene, as well as a number of viewing options that are unique to the object view (see Object Views for more information).
The following sections describe the views available from both types of 3D views.
Camera views let you display your scene in a 3D view from the point of view of a particular camera object in the scene. You can also choose to display the viewpoint of the camera associated to the current render pass.
The Render Pass view is also a camera view: it shows the viewpoint of the particular camera associated to the current render pass. Only a camera associated to a render pass is used in a final render.
Selecting a camera or the Render Pass item from a viewport's Views menu switches the viewpoint to that of a "real" camera in your scene. All other 3D views such as User, Top, Front, and Right are not associated to an actual camera.
In addition to listing the cameras in your scene, the object view's View > Cameras menu lists the Default camera. This camera is a special perspective viewpoint that the object view uses to view selected objects. It does not correspond to a camera object in the scene, and you cannot render from it.
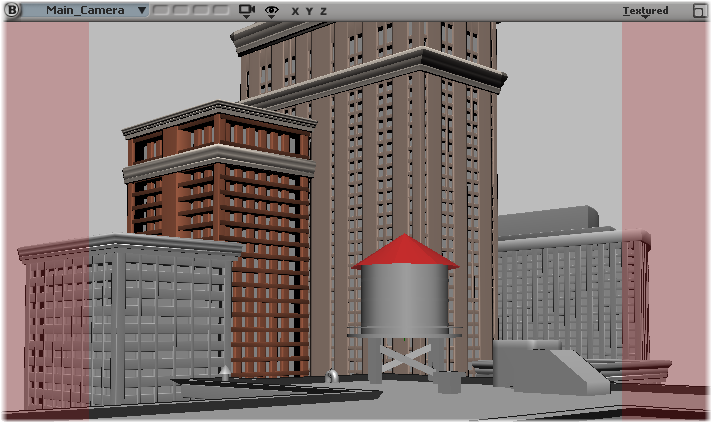
If a camera's picture ratio is different from the ratio of the viewport or Object view, the areas that are not within the camera's field of view are displayed as vertical or horizontal bars. These bars are called film gates. Parts of the scene may be displayed in the film gates, which can make it easier to work in the scene. However, whatever is displayed in the film gates is not rendered by the camera (and you can't draw a render region in the film gates).
You can change the film gate color and level of transparency using the Film Gate sliders in the Scene Colors Property Editor.
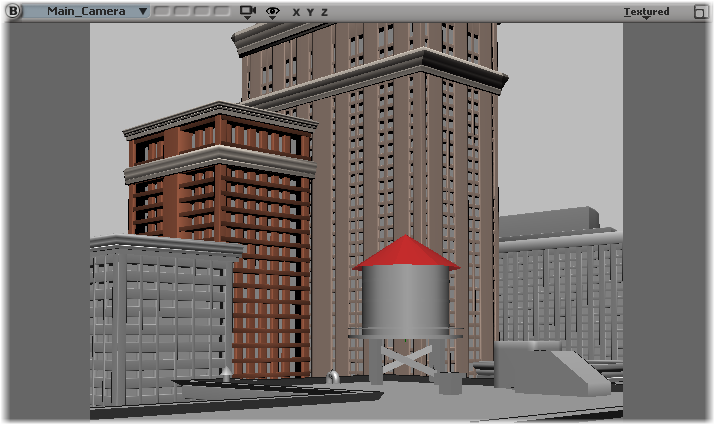
You can also clip the displayed image so that nothing is displayed in the film gates: they remain opaque gray blocks. To do this, select the Clip Drawing to Camera Film Gate option in the Display Preferences. When this option is selected, you can't change the film gate color or transparency.
Spotlight views let you select from a list of spotlights available in the scene. Selecting a spotlight from this list switches the point of view in the active 3D view relative to the chosen spotlight. The point of view is set according to the direction of the light cone defined for the chosen spotlight.
For more information about working with spotlights, see Showing Spotlight Views and Manipulating Lights.
Viewpoints are angles from which you can view the objects in a scene. Unlike "real" camera objects in the scene, viewpoints cannot be used for final rendering but you can preview materials and lights in them using the render region.
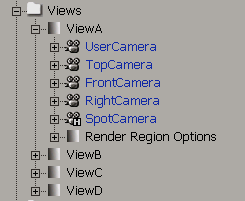
You can find the camera settings for the UserCamera, TopCamera, RightCamera, and FrontCamera in an explorer set to the Application scope. Each viewport has its own viewpoint camera.
The Top, Front, and Right views are parallel projection views, called such because the object's projection lines do not converge in these views. Because of this, the distance between an object and the camera has no influence on the size of the object. If one object is close to the camera, and an identical object is farther away, both appear to be the same size.
The Top, Front, and Right views are orthographic, which orients the camera so it is perpendicular (orthogonal) to specific planes:
The X, Y, and Z buttons are displayed in the menu bars of viewports and object views.

X, Y, Z viewpoints in viewport

X, Y, Z viewpoints in object view
Clicking these buttons lets you quickly switch to a right, left, top, bottom, front, or back view of the selected object as shown in the following table. You can still orbit the viewpoint afterwards, unlike when you select the Top, Front, or Right views from the Views menu in a viewport.
| X Button |
Y Button |
Z Button |
|
|---|---|---|---|
| Left-click |
Right View (+X) |
Top View (+Y) |
Front View (+Z) |
| Middle-click |
Left View (-X) |
Bottom View (-Y) |
Back View (-Z) |
In object views, the axes of the object being viewed are used (which may or may not be the current selection if you have locked the view). In viewports, the axes of the current selection is used. If there is no selection, the global axes are used. If multiple objects are selected, the first one is used.
In viewports, you can also press Shift while clicking the XYZ buttons to frame the selection as well. If no objects are selected, all visible objects in the scene are framed.
In viewports, the XYZ buttons act as a temporary override on the viewpoint. The current button is highlighted — click it again to return to the original view before you clicked any of the XYZ buttons.
The User view is a user-defined viewpoint that shows objects in a scene from a virtual camera's point of view. This view can be either perspective or orthographic.
In the perspective view, objects appear to converge toward a central vanishing point, and objects closer to the camera appear larger than those farther away.
In the orthographic view, objects remain in parallel projection with the view being perpendicular (orthogonal) to the XY plane in camera space.
The User point of view can be placed at any position and at any angle within the global 3D coordinate system. You can orbit, dolly, zoom, and pan in this view.
 Except where otherwise noted, this work is licensed under a Creative Commons Attribution-NonCommercial-ShareAlike 3.0 Unported License