Once you've created your lights, you'll probably want to adjust them and move them around a bit to get just the right illumination for your scene.
You can translate, rotate, and scale a light as you would any other object in your scene. However, scaling a light only affects the size of the icon and does not change any of the light properties. For more information about transformations, see Transformation Basics.
However, scaling does have an effect when manipulating an area light's geometry. You can also transform (scale and rotate) the size of the surface from which the area light rays emanate. For spotlights, you can interactively manipulate their start and end falloff, as well as their spread and cone angles.
Area lights have a set of manipulators that let you scale the geometric area from which the light rays emanate. You can transform an area light's geometry by changing its scaling and rotation values in the light's property editor or using manipulators in any 3D view.
Select an area light and press enter on the keyboard to display the selected light's property editor.
On the Area tab, set the Area Transformation values to set the size of the surface from which the light rays emanate:
For rectangles, the X and Y values control the length and width when scaling.
For discs and spheres, the X value controls the radius and the Y and Z values have no effect when scaling.
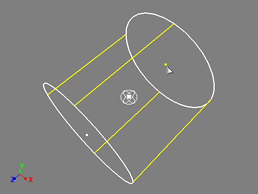
For cylinders, The X value controls the radius, the Z value controls the length, and the Y value has no effect when scaling.
If desired, set the X, Y, and Z Rotation values to further control the rotation of the surface from which the light rays emanate. X, Y, and Z rotations are always defined according to the geometry's local space; that is, according to its own center of orientation.
Select an area light and press B to display its manipulators.
Press Tab until the area light geometry appears thicker. This indicates that the manipulators are active.
Drag the manipulators to set the size of the surface from which the light rays emanate:
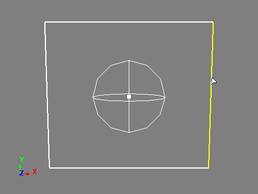
For rectangles, click and drag an edge of the manipulator to scale the light surface in X or Y.
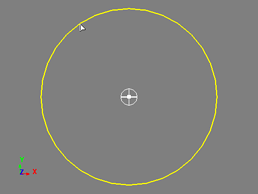
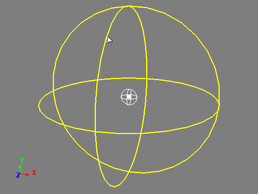
For discs and spheres, click and drag anywhere on the manipulator to scale the radius of the light surface.
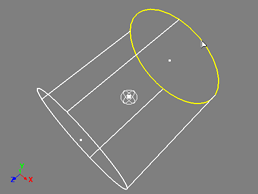
For cylinders, click and drag either end of the cylinder to scale the radius of the light surface. Click and drag the point in the center of either end of the cylinder to adjust the length of the light surface.
A spotlight casts its rays in a cone aimed at its interest. Spotlights have special options that control the size and shape of the cone. You can set these options using the spotlight's 3D manipulators.
You can set the distance attenuation values using the light's 3D manipulators.
Press Tab until the light's start and end falloff manipulators appear.
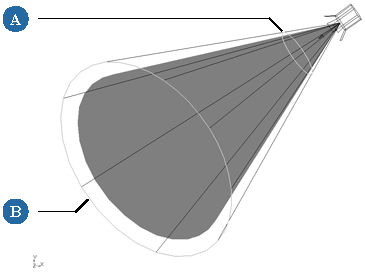
The exterior cone-angle control displays a light blue start falloff disc (if falloff is already activated, you see this before displaying the 3D manipulators).
Ctrl+click the disc at the base of the white cone angle cone to activate the falloff.
Click and drag this disk toward or away from the light to set the Start value.
The exterior Cone Spread control also displays a magenta end falloff disk at its base. Click and drag this disk toward or away from the camera to set the End value.
Shift+click and drag either disk to increase or decrease both Start and End Falloff values simultaneously. The distance between the planes of each disk remains the same.
To deactivate falloff, Ctrl+click either the start or end falloff disk.
Press Tab until the spotlight' cone and spread-angle manipulators appear.
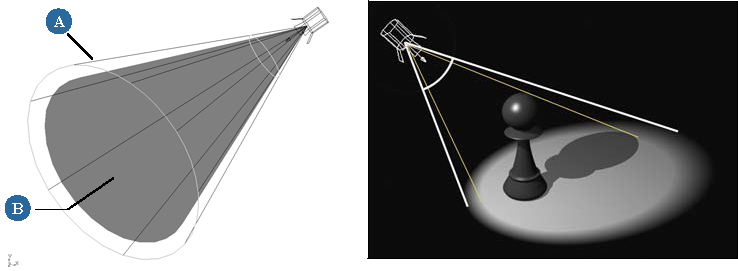
The exterior wireframe cone controls the light's cone angle. Click the edge of the cone and drag outward or inward to interactively increase or decrease the Cone Angle value, respectively.
The interior yellow shaded cone controls the light's spread angle. Click the edge of the cone and drag outward or inward to interactively set the Cone Spread value.
Shift+click and drag the edge of either cone to increase or decrease both angles simultaneously. The distance between the angles of each cone remains the same.
 Except where otherwise noted, this work is licensed under a Creative Commons Attribution-NonCommercial-ShareAlike 3.0 Unported License