An instance is an exact replica of a model. Any type of model can be instanced. You can create as many instances as you like and position them anywhere in your scene. When you modify the original "master" model, all instances update automatically.
Instances are useful because they require very little memory: only the transformations of the instance root is stored. However, you cannot modify, for example, an instance's geometry or material. If you need to individually modify copies of an original object, use a duplicate or clone instead, as described in Duplicating and Cloning Objects.
Instantiation has the following advantages:
Instances use much less disk space than duplicates or clones because you're not duplicating the geometry.
Editing multiple identical objects is very simple because you only have to edit the original.
Instantiation uses the same options as duplication and cloning. For complete details, see Duplicating and Cloning Objects.
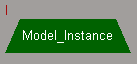
Instances are displayed in the explorer with a cyan i superimposed on the model icon. In the schematic view, they are represented by trapezoids with the label I.
Choose one of the following commands from the Edit  Duplicate/Instantiate menu:
Instantiate Single creates a single instance of the selected models using the current options set in the Duplicate/Instantiate Options property editor.
Instantiate Single without Options creates a single instance of the selected models, ignoring any transformation options set in the Duplicate/Instantiate Options property editor. The instance is automatically selected and is at the same location as the original.
Instantiate Multiple creates any number of instances from the selected models.
Select a model whose root node transformations have been animated.
Choose Edit Duplicate/Instantiate Duplicate/Instantiate from Animation from the Edit panel.
In the Duplicate from Animation dialog box, set the start and end frames of the animation to use for the duplicates, as well as the step values.
For example, if the Start Frame is 10, the End Frame is 40, and the Step Value is 15, the duplicates are created based on the object's state at frames 10, 25, and 40.
Make sure that Instance is activated, and click OK.
An instance of the original model is created for each frame interval along the animated transformation.
You can click on any part of an instance in a 3D view to select it. You do not need to click on the root of the model.
You can display the relationship between instances and masters in the schematic view. When Show Associated Model Links is on and an instance is selected, an orange link labeled Inst is displayed between the instance and its master. When a master
is selected, links between the master and all its instances are displayed.
The Visibility property has special options for controlling the visibility settings of instances and masters. For more infor about visibility settings in general, see see Visibility Property Editor.
The Instance Master Hidden option in the visibility properties of the master instance model allows you to hide an object for display and rendering if it is part of a master model hierarchy. This is especially useful with particle and hair instancing, where you often don't want the master hierarchy in the rendered images.
By default, model instances inherit their visibility properties from the instance master. When you modify visibility properties for the master model, or any object in its hierarchy, the results are propagated to all of the instances.
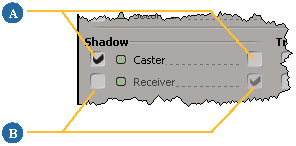
To set different parameter values for individual instances, you need to specify which parameters should not be inherited, which you can do by checking the unlabeled check box next to the parameters that you wish to change for the instance.
Because instances are treated as single objects, the visibility properties of instances are limited in the sense that they affect the entire instance hierarchy. You cannot set visbility options for individual objects within that hierarchy.
If you apply a visibility property override to a model instance, or a group containing a model instance, you need to specify that the parameters you wish to override are no longer inherited from the instance master. You can do this by adding each parameter's Master Override parameter to the override.
Adding a Master Override parameter to an override forces any instances affected by the override to use the override's setting for the corresponding parameter, rather than using the instance master's setting.
So for example, if you want to override an instance's primary ray visibility, you would add both Primary Ray Visibility and Primary Ray Visibility Master Override to the override.
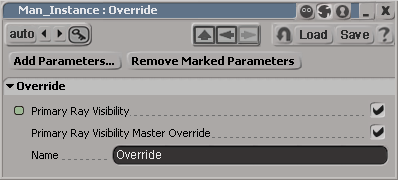
You can then toggle the Primary Ray Visibility Master Override parameter to force the instance to use whatever Primary Ray Visibility setting is specified in the override. This is possible for most object visibility parameters.
For more information about overrides, see Overriding Properties.
This section includes some information you should be aware of when working with instances.
When you instantiate a model, a new group is created in the master model called InstanceGroup. This group keeps track of all the instances of the master model in the scene.
The InstanceGroup is locked: you cannot add or remove members manually. Deleting a member of this group deletes the instance from the scene.
Instances are replicas of the master model. This means that, for example, you cannot modify the geometry nor change materials. However, you can:
Add new properties, such as annotations or custom parameter sets.
Add new children and modify any of their properties, materials, and so on. These children are "real" children of the instance's model root, and have no association with the master model.
Apply a property or material in branch mode to the model root of the instance. These properties are propagated to the instance's children, but do not affect any elements from the master model.
 Except where otherwise noted, this work is licensed under a Creative Commons Attribution-NonCommercial-ShareAlike 3.0 Unported License