


You can retarget mocap data from either C3D or BVH files to a tagged rig.
C3D data is a standard optical marker-based file format that is widely used for motion capture. Before you can use the mocap data from C3D files on a rig in Softimage, you must prepare the data from each mocap session. This involves loading the zero (base) pose C3D file into Softimage and creating pose map files. These files map the mocap data to a structure file in Softimage.
A pose map creates links between the marker names in the C3D mocap data file and the corresponding tag names on a rig. You cannot load mocap data without a pose map.
A pose map provides a reference of the proportion of the human actor's body from whom you captured the motion capture data. The pose map takes a snapshot of the position of the mocap markers on the actor in the default pose (the T-pose) which allows Softimage to map that data onto a tagged rig.
When you do a mocap session with the same human actor and markers, the marker names will be the same for all C3D files captured in that session and the body proportions will all be the same. This way, you need to create only one pose map that will apply to all the C3D files from that session set.
It is probably best if the person who placed the mocap markers on the model or supervised the mocap marker placement creates a "cheat sheet" of the marker placement on the actor to help somebody else figure out which marker is which when the mocap data is loaded into Softimage.
Choose Tools  MOTOR Mocap to Rig from the Animate toolbar to open the Mocap to Rig property editor.
Select C3D Motion Capture file (*.C3D) as the File Type to load.
Select the Structure for the C3D rig you're loading: Mocap Biped or Mocap Biped Fingers.
Click the Import C3D button to load in a .c3d mocap data file. This should be a zero or base pose C3D file, which is the classic T-pose.
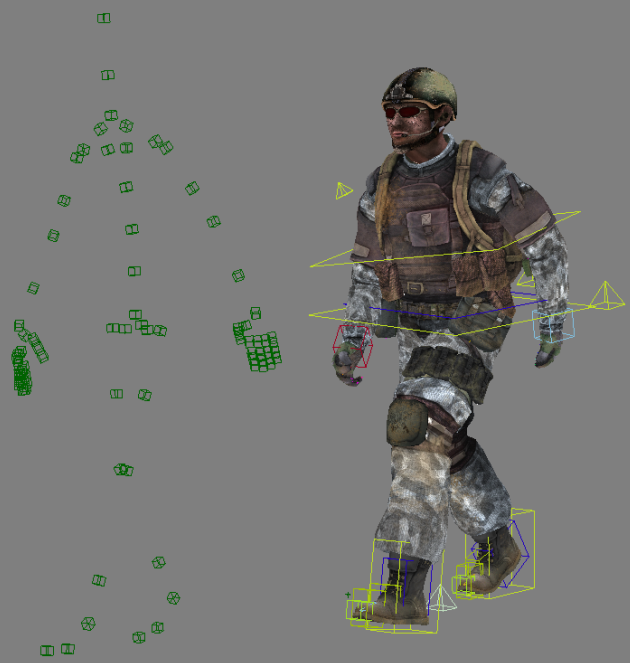
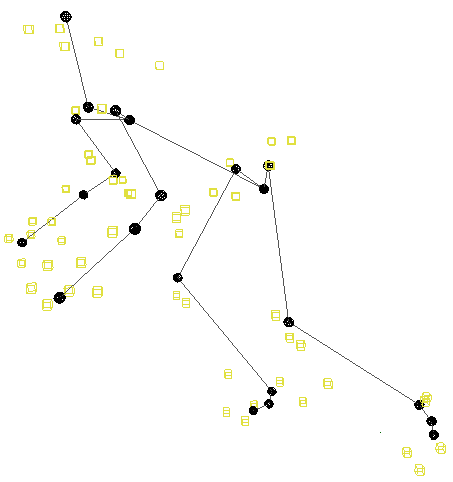
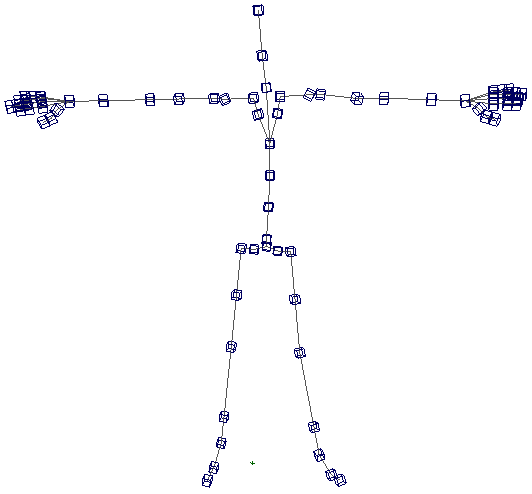
A set of yellow markers in the shape of a body is loaded into the viewport, as well as a structure rig represented by black spheres in the shape of a skeleton. Each of the yellow markers represents a mocap marker that was on the actor's body during the mocap capture session.
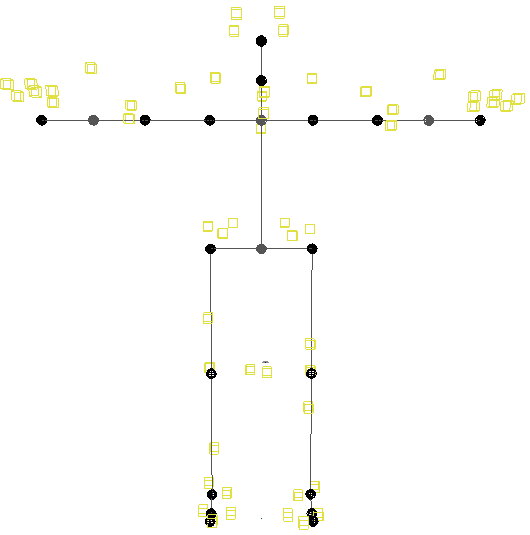
Move the black spheres of the structure rig so that they fit inside the yellow markers like you would fit a skeleton inside a body's musculature.
The Enable Symmetry option in the Mocap to Rig property editor is on so that you can move the sphere on the left or right side of the body to move the matching sphere on the other side of the body. Deselect this option to move the spheres independently.
Click the Save Pose Map button and save this new information as a C3D pose file (.c3dpose). This defines how to constrain the structure rig to be driven by the mocap data on the yellow mocap markers.
This pose map file appears in the text box beside the Pose Map parameter.
Click the Import C3D button to load a .c3d mocap data file (one with animation). This applies the animation on the markers in this file to the associated skeleton structure rig.
This file needs to have been created with the same set of markers from the same mocap session as were used to create the pose map file.
Adjust that animation as necessary (see Adjusting the Retargeted Animation on a Rig), then click the Save Motor File button to save the animation as a normalized motion file that can be applied to any tagged rig of the same structure.
Apply the .motor motion file onto a tagged rig as described in Applying Normalized Motion (.motor) Files to a Rig.
The mocap data is retargeted from the C3D file onto the target rig. Softimage does this by reading the mocap data on the mocap rig, extracting the motion from the mocap rig, putting it into a structure file, then retargeting the animation from the structure file to the target rig's tagged animation controls.
To convert the retargeted animation to fcurves, you can plot the animation — see Plotting Retargeted Animation on the Rig for information.
Biovision BVH files are hierarchical structure files that import a skeleton. Before you can use the mocap data from BVH files on a rig in Softimage, you must prepare the data from each mocap session. This involves first loading a static T-pose BVH file into Softimage and creating a tag template file (.tagt) from it to map the BVH mocap data to a structure file in Softimage (see Tagging a Rig's Elements). The BVH skeleton must be in the classic T-pose because the template file includes the skeleton's spatial geometric data in order to map the BVH animation data.
As with other animation data, a tag template file creates links between the marker names in the BVH mocap data file and the corresponding tag names on a rig.
After you have created a tag template for the BVH rig, you can load BVH mocap animation data. You cannot load BVH mocap data without a tag template file.
Choose Tools MOTOR Mocap to Rig from the Animate toolbar to open the Mocap to Rig property editor.
Select BioVision Motion Capture (*.BVH) as the Source Mocap File Type to load.
Click the browser button for the BVH File Location to import a BVH mocap file.
To create a tag template file for the BVH mocap data, this file should contain a BVH skeleton that is static and in a classic T-pose. If it's not in a T-pose, you can adjust the skeleton in Softimage to fit this pose.
The skeleton appears only when you click the Create button, as described in the next step.
In the Load or Create Tag Template for your BVH File area, click the Create button to create a tag template file. The BVH skeleton that is loaded needs to be in the classic T-pose before you tag it, so you may need to adjust it first.
In the Tag property editor that opens, select a Structure in the Tag property editor, then tag the parts of the BVH skeleton as you would a regular rig (see Tagging a Rig's Elements).
Click the Save button in the Tag property editor, and save this tag template as a .tagt file.
Load the tagged target rig to which you want to apply the mocap file data (have it ready in the scene).
Choose Tools MOTOR Mocap to Rig from the Animate toolbar to open the Mocap to Rig property editor.
Select BioVision Motion Capture (*.BVH) as the Source Mocap File Type to load.
Click the browser button for the BVH File Location to import a BVH animation file. This is a BVH file that actually contains animation data.
In the Load or Create Tag Template for your BVH File area, click the Load button and load an appropriate tag template (.tagt) file for the BVH motion data.

Click the Pick button in the Target Model area and select your rig as the target rig. The tag template file is applied to the target rig so that the BVH mocap animation data is applied correctly to it.
Click the Apply button to retarget the specified Mocap File (BVH) onto the target rig.
Softimage does this by reading the mocap data on the BVH skeleton, extracting the motion from it and putting it into a structure file as defined by the tag template file, then retargeting the motion from the structure file to the target rig's tagged animation controls.
If you want to adjust the retargeted animation on the rig, click the Adjust button to open the Retarget Adjust property editor — see Adjusting the Retargeted Animation on a Rig for more information.
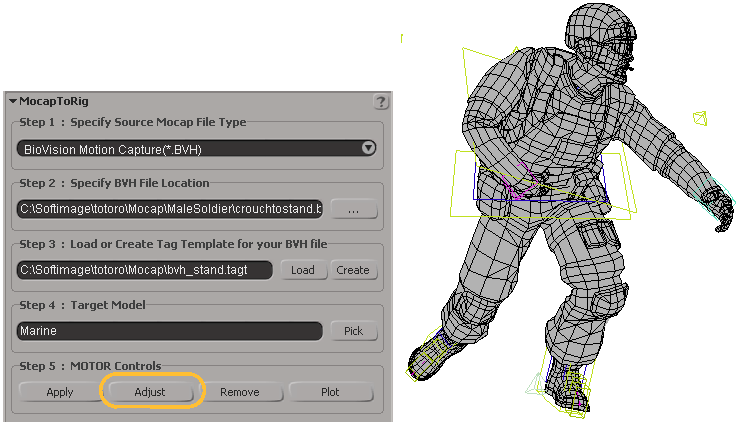
Motion capture data from the BVH animation file is retargeted onto a Softimage rig.
To convert the mocap animation on the target rig to fcurves, click the Plot button to plot the animation — see Plotting Retargeted Animation on the Rig for information.
 Except where otherwise noted, this work is licensed under a Creative Commons Attribution-NonCommercial-ShareAlike 3.0 Unported License