The Color Sampler shader [Shader Reference] samples an object's surface and writes the result to a texture file. This is conceptually similar to RenderMap's surface color map, but works in a different way.
Rather than using a virtual camera to sample an object's surface from a specified distance, the Color Sampler shader evaluates the object's render tree directly. Whatever portion of the render tree is connected to the color sampler's Input port is computed and written to a texture file.
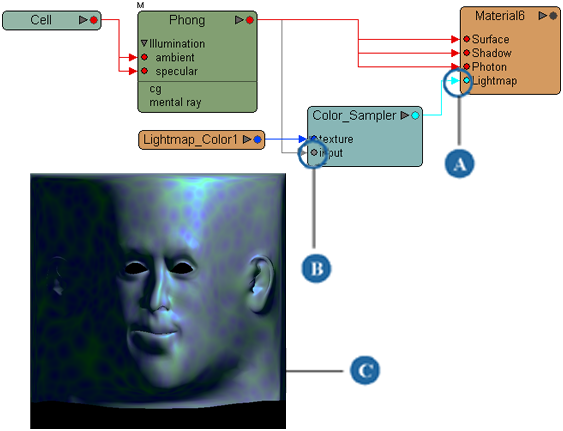
The Color Sampler shader itself must be connected to the Material node's Lightmap port in order to generate the texture.
Although Color Sampler is implemented as a lightmap shader, it is not a true lightmap in the conventional sense.

|
|
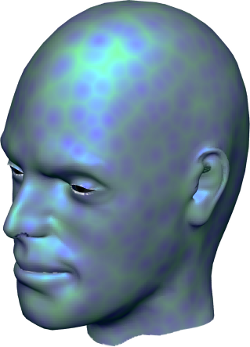
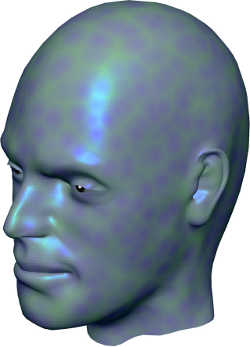
| This unusual-looking fellow was textured using a procedural cell-shader. You can bake the procedural texture into an image using the Color Sampler shader. |
|
Select the object whose surface you wish to sample and press 7 to open the render tree.
From the preset manager, drag and drop a Lightmaps  Color Sampler node to the render tree workspace.
Connect the Color Sampler node's output to the Material node's Lightmap port.
Connect to the Color Sampler node's Input port the output of the node or branch of the render tree that you wish to sample.
Double-click the Color Sampler node to open its property editor.
On the Color Sampler page, use the Texture Space options to choose a texture projection to use during sampling.
Ideally, you should choose the same projection that the object's textures use. However, in some cases, you may need to click New to create a new texture projection. For example, if the object is textured using only surface shaders (Phong, Lambert, and so on), or using procedural textures that are applied using a spatial projection (the color sampler shader cannot use spatial projections for sampling).
Choose User Tools Create SSS Lightmap. Connect the sss_lightmap_clip node's output to the Color Sampler's texture port, and set the output file options as desired.
Note that the image's file name contains a hash mark (#) by default. This is used to specify the frame number when you render a sequence.
Render the object to generate the Color Sampler's output texture.
If you only want to output a single-frame texture, you can use the render region or render preview tools.
If you need to render a texture sequence, you will need to render all of the required frames.
For more information about these rendering methods, see Rendering Methods [Rendering].
The Color Sampler shader and the RenderMap tool do similar things. This section is intended to give you an idea of when it is preferable to use one instead of the other.
For more information about the RenderMap property, see Baking Surface Attribute Maps.
Because the color sampler shader evaluates the render tree directly, you don't have to worry about other objects getting in the way of a virtual camera. Nor do you have to worry about introducing distortion the way you might when setting RenderMap's camera-distance value too high.
You can quickly generate a texture from any shader or branch in the render tree by simply changing what is connected to the color sampler's input.
The color sampler shader can easily be set to output texture sequences rather than still images.
Using the color sample shader involves very little setup. You need only make a few render tree connections and set a few parameters.
Depending on the material being evaluated, the color sampler shader can be faster than RenderMap.
In many cases, it is desirable to include objects other than the sampled object in the output texture. For example, you can create a sprite by placing an object in front of a grid and then rendermapping the grid.
RenderMap is designed to create several specific types of maps, such as normal, binormal, and tangent maps, that are complicated to create using the render tree.
RenderMap can generate several images in a single rendering. The color sampler shader can generate only one at a time.
It is easier to capture bump mapping information using RenderMap because the color sampler shader cannot use the material node itself as an input.
 Except where otherwise noted, this work is licensed under a Creative Commons Attribution-NonCommercial-ShareAlike 3.0 Unported License