Creating Scene Layers
You can either add a blank layer to the scene, or select some scene elements and create a new layer to which they are automatically
added.
New layers are automatically named Layer, Layer1, Layer2, and so on, but you can rename them to something more meaningful
as described in Renaming Scene Layers.
To create a blank scene layer
Do one of the following:
- In the scene layer manager, click the icon (next to the menu).
-
In the scene layer manager, choose .
-
In the scene layer manager, right-click on any name and choose .
-
In the Layers scope of an explorer, right-click on any of the listed layers and choose .
To create a new scene layer from selected scene elements
-
Select the elements that you wish to add to the new layer.
-
In the scene layer manager, do one of the following:
Renaming Scene Layers
You can rename a scene layer using the scene layer manager or the explorer.
To rename a scene layer using the scene layer manager
-
In the scene layer manager, double-click the name of the layer that you wish to rename.
-
Type the new name and press enter.
To rename a scene layer using the explorer
Setting the Current Scene Layer
When you create new objects, they are automatically added to the current layer.
To set the current scene layer from the scene layer manager
Click the row heading for the layer that you wish to set as the current layer.
To set the current scene layer from the explorer
Moving Objects to a Scene Layer
You can move objects from one scene layer to another using the scene layer manager or an explorer.
NoteEach object in your scene can belong to only one layer at a time. It is possible for different objects within a given hierarchy
or group to be assigned to different layers.
To move objects to a scene layer using the scene layer manager
-
Make the layer current.
-
Select the objects that you wish to move to the layer.
-
Choose .
To move objects to a scene layer using the explorer
-
In the Layers scope of an explorer, expand the layer that contains the objects to be moved.
-
Select the objects that you want to move, and then drag and drop them onto a different layer.
Nesting Scene Layers
Scene layers can be nested under another scene layer. This allows you to use the parent layer to control multiple child layers.
- When one of the parent layer's options is set to , you can control the child layers' option independently.
- When the parent layer's option is set to another value, it overrides the child layers' options. However, the child layers
remember their settings and return to their original state when the parent is set back to .
ImportantScene layers can be nested only one level deep.
NoteScene layer groups from earlier versions are no longer supported. However if you open a scene with scene layer groups, the
name of the scene layer group that it used to belong to is preserved in its LegacyLayerGroupName which is accessible through scripting and the object model. You can use this information to re-create nested layers based
on the previously existing layer groups.
To create a nested scene layer
- Make the parent layer current.
- If desired, select one or more objects to put in the new nested layer.
- Choose one of the following:
To nest an existing scene layer
Do one of the following:
- In the scene layer manager:
- Make the parent layer current.
- Right-click on the child layer and choose .
- In an explorer, drag and drop a layer onto the desired parent layer.
To un-nest a scene layer
Do one of the following:
- In the scene layer manager, right-click on the child and choose .
- Select the child layer in an explorer and click on the panel of the MCP.
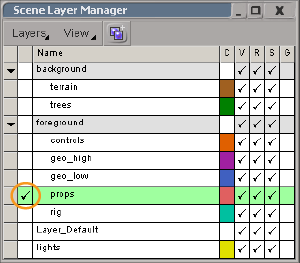
Selecting Scene Layers
To select a layer, set the scope of an explorer to Layers and click the layer's name. When you select a layer, its members
are branch-selected as well. Note that selecting a layer does not make it the current layer.
Selecting the Objects in a Scene Layer
You can use the scene layer manager to select all of the objects in any layer, whether it is the current layer or not.
To select all objects in the current layer
To select all of the objects in a specific scene layer
To select all of the objects in all of a scene layer's children
Locking Scene Layers
Locking a layer prevents further modifications to the layer by locking all of its parameters. However, the lock applies only
to the layer itself, and not the objects that belong to it.
-
Locking a layer using the scene layer manager locks it at all levels (node lock, animation lock, and value lock).
-
Locking a layer using the explorer allows you to select a specific lock level.
For more information about locks and lock levels, see Locking and Tagging Scene Elements [Data Exchange].
To lock the current scene layer using the scene layer manager
To lock a specific scene layer using the scene layer manager
To lock a scene layer using the explorer
-
In the Layers scope of an explorer, right-click on a layer, choose , and activate the desired lock level option.
Deleting Scene Layers
You can delete a scene layer at any time without deleting any of the objects it contains. Objects in the deleted layer are
moved to the current layer, or if you delete the current layer they are moved to the default layer (for more about the default
layer, see The Default Scene Layer).
Note
-
You cannot delete a scene layer when it's the only layer in the scene.
-
If you delete the current scene layer, the default layer becomes the new current layer.
-
If you delete the default scene layer, the oldest (least recently created) layer in the scene becomes the new default layer.
To delete the current scene layer using the scene layer manager
To delete a specific scene layer using the scene layer manager
To delete all nested scene layers using the scene layer manager
To delete all empty scene layers using the scene layer manager
To delete a scene layer from the explorer
 Except where otherwise noted, this work is licensed under a Creative Commons Attribution-NonCommercial-ShareAlike 3.0 Unported License


 New Layer