You can connect together points on an object using ICE springs and the Simulate Rigid Bodies node. These springs are based on Hooke's law which states that the force a spring exerts is directly proportional to how much it extends (its length).
You can also create dampers to reduce the spring's strength by providing a resisting force to it. Dampers are actually independent of springs and can be used on their own to reduce any velocity between points.
You can create springs and/or dampers between points in point clouds, polygon meshes, NURBs surfaces or curves, or lattices. This allows you to create different deformation effects such as soft body simulations, or create any type of collision where you want a springy reaction.
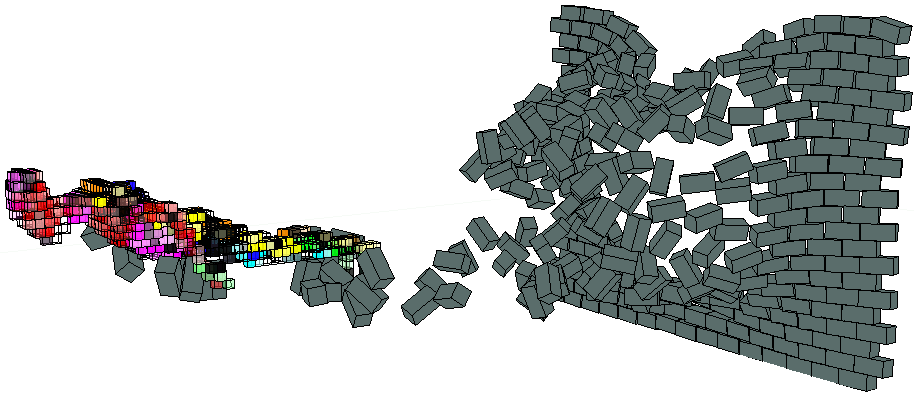
A character collides with a wall whose bricks are held together by springs. The springs make the bricks more cohesive, eventually snapping back together.
ICE springs are based on these attributes that you can set per point. The data can be either arrays or single values for these attributes:
ConnectionIndices is the point index or array of indices with which you can create ICE spring connections. This is the master array.
SpringLengths is the relaxed length (or rest length) that the ICE spring tries to return to during the simulation.
SpringCoeffs is the constant that determines the strength of the ICE spring (the spring constant in Hooke's law). Its value is multiplied by the difference in the spring's length from its relaxed length to determine the force exerted on each set of points.
DamperCoeffs is an opposing force which reduces the velocity between points (such as the velocity coming from springs). It basically tries to prevent two points moving relatively from one another. You can use dampers independently from springs, but you may want to combine them with springs to help stabilize some simulations.
ConnectionMute mutes the effect of the springs and/or dampers.
Here's a possible workflow that you can follow to use ICE springs and dampers using a simple object to show you the basics.
This is the minimum amount of data required for creating springs and/or dampers:
On the object on which you want to create springs, create a simulated ICE tree that includes the Simulate Rigid Bodies node, forces, and optionally, obstacles.
Set the object's mass in either a simulated or unsimulated ICE tree.
To create a spring, you must have at least one connection defined for the ConnectionIndices attribute, one length defined for the SpringLengths attribute, and the SpringCoeffs value set to a non-zero value. These attributes are often defined in an unsimulated ICE tree.
To create a damper, you must have at least one connection defined for the ConnectionIndices attribute and the DamperCoeffs value set to a non-zero value. These attributes are often defined in an unsimulated ICE tree.
Create a rigid body particle emission — see Creating an ICE Rigid Body Particle Emission, but using the Simulate Rigid Bodies node. Make sure that it includes forces and, optionally, obstacles.
Set the object or particle's Mass attribute to a value above 0.
This can be set in a simulated tree if you need it to be updated every frame, or in an unsimulated ICE tree if you want the value to stay the same.
If you're creating particles via an Emit compound, the particles have a Mass of 1 by default. If you're creating particles in another way or using another type of object, you'll need to set this separately, such as in a Set Data node.
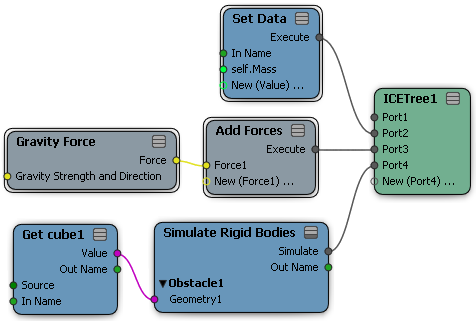
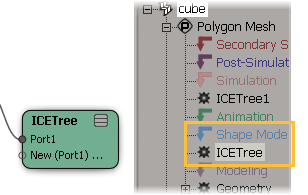
On the same point cloud or object, create an unsimulated ICE tree in which you can define the springs and/or dampers on the geometry.
It's preferable to have this tree unsimulated because you don't typically want the spring and/or damper attribute values to change as they do in a simulation (they don't need to be reset every frame).
However, you may want to define the spring and/or damper attributes in a simulated tree if their values need the data from the previous frame for their calculations. For example, you may want the SpringCoeffs value to change over time to vary the spring strength.
Get a Set Particle RBD compound and specify the Springs and Dampers options there: Connection Indices, Spring Lengths, Spring Coeffs, and optionally, Damper Coeffs.
You can also set these in a separate Set Data node, if you like.
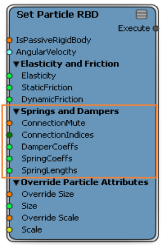
If you want to set Damper Coeffs independently from the springs, you need to also specify the ConnectionIndices attribute with it.
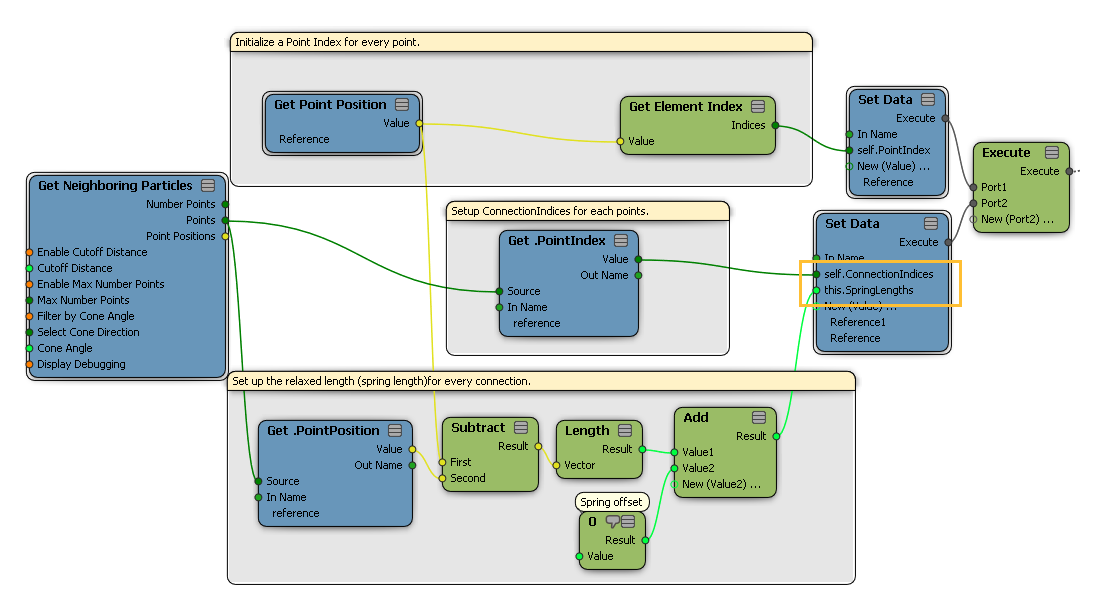
Get the connection data for the object's points that you want to have connected by springs and plug it into the Connection Indices port. The data can be either arrays or single values for this attribute.
There are different ways in which you can do this, depending on the complexity of the object and the type of spring connections you want to make. Here are three possibilities:
For a simple object, you could use the Build Array from Per Point Data compound that connects all points on an object.
For a more complex object, use a Get Data node and specify the Self.PointNeighbors attribute to get adjoining points.
For a point cloud, you could use the Get Neighboring Particles compound, then filter the points affected. This gives you multiple points in your index array to which you can attach the springs, but they are filtered by the distance or number of points that you specify in the Get Neighboring Particles compound.
Set the spring's relaxed length to any value you want and plug that into the Spring Lengths port. The data can be either arrays or single values for this attribute.
For example, the following tree shows how to set the spring length to the current distance between neighboring points in an object.
Set the spring strength and plug this value into the Spring Coeffs port. The data can be either arrays or single values for this attribute.
In this case, a simple Scalar node is used to define the spring coefficient's strength.
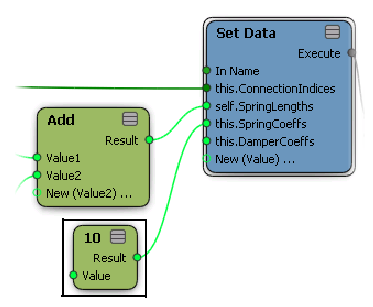
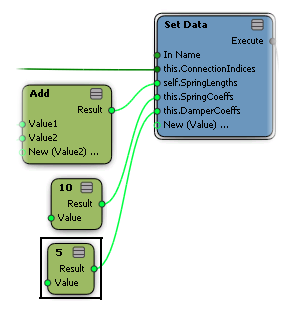
If you specified the Damper Coeffs attribute, set the damper strength and plug this value into the DamperCoeffs port. The data can be either arrays or single values for this attribute.
In this case, a simple Scalar node is used to define the damper coefficient's strength. It needs to be set to a value lower than the SpringCoeffs value.
Dampers are not necessary for springs, but they may help make some simulations more stable.
You can also select the Connection Mute option in the Set Particle RBD compound to mute the connections per spring.
If you like, you can hook this up into an If node or State setup to control its activation based on different conditions.
 Except where otherwise noted, this work is licensed under a Creative Commons Attribution-NonCommercial-ShareAlike 3.0 Unported License


