Once you have a basic particle emission set up, you can modify it in different ways, such as:
You can change at which frame a particle emission begins by setting the Offset value that is set in the Simulation Time Control Property Editor.
Deselect the Use start frame option so that the Offset text box is enabled; otherwise, the start frame on the scene's timeline is automatically used.
Set the Offset value, which is the number of frames that the simulation is offset from the scene's first frame.
Remember that ICE particles are actually emitted only starting the second frame of the simulation frame range. For example, if the start frame of the simulation is set to 100, the simulation starts at that frame, but particles are not actually emitted until frame 101. This means that if you want the particles to actually be emitted at frame 100, you would need to enter 99 as the Offset value.
Using the Limit by Time Range compound, you can limit the particle emission to occur only within a certain range of frames. These values must be between the Offset and Duration values that are currently set in the Simulation Time Control Property Editor.
Create a particle emission — see Creating a Basic Particle Emission.
Choose the Particles  On Emission Limit Time Range command from the ICE toolbar.
This command adds the Limit by Time Range compound to the ICE tree, plugging it into the Enable port of the Emit compound.
In the Limit by Time Range property editor, set the range of frames to which you want to limit the particle emission.
Play back the simulation and see how the particles are emitted only within the range you've specified.
To change particle emitters, you simply swap emitters that are plugged in to the Emit compound. Simple as that. Of course, the emitter object must match the Emit compound's geometry type, such as surface, curve, null, etc. This makes it easy to share compounds with others because you can easily switch one emitter for another: the same effect contained within the compound is simply created using a different emitter.
There are two ways you can do this:
Enter the new emitter's name in the text box or click the Explorer button and select it from the explorer.
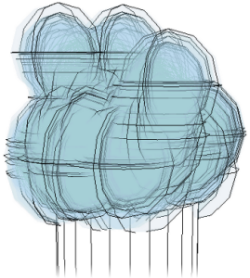
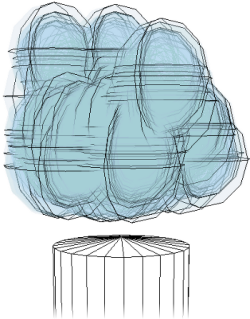
If the emitter is animated (moving) or deforming, you may notice that particles don't stay with it after emission. This is especially noticeable when the particle speed is set to 0, such as you often do for creating strands, or when you emit particles in an unsimulated ICE tree.
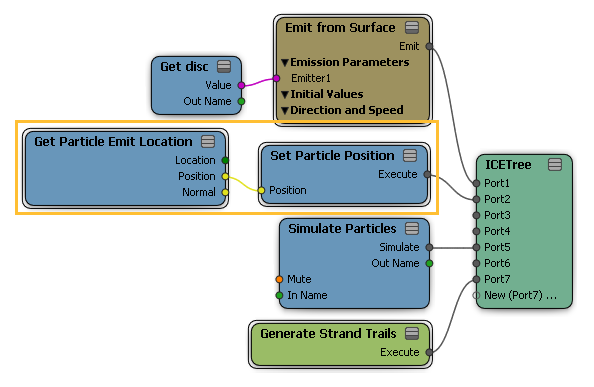
There is one simple thing that you need to do to ensure that the particles and their strands come along for the ride: set the particle position to be at the emit location.
To do this, get a Get Particle Emit Location compound, then plug its Position output into a Set Data node. You probably want to plug the Set Data node into the ICETree node directly after the particles are emitted.
You can offset the particles from their emitter object when they are born. This location is defined by the particle's EmitLocation attribute.
Create a particle emission — see Creating a Basic Particle Emission.
Choose the Particles On Emission Offset Emitter command from the ICE toolbar.
This command adds the Offset Particle from Emitter compound to the ICE tree, plugging it into the Execute on Emit port of the Emit compound.
If you there is another node plugged into an Execute on Emit port, such as Create Strands, make sure to plug the Offset Particles from Emitter compound above it so that the particles are offset before the strands are created.
In the Offset Particle from Emitter property editor, set the Distance (in Softimage units) from the emit location at which the particle is born. The particles are offset by this amount in whichever emission direction you have set.
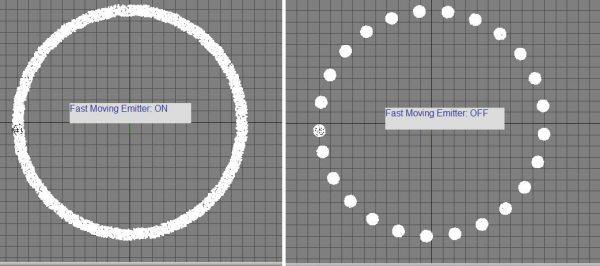
Sometimes when a particle emitter is moving very quickly, you may see clumps or bands of particles appearing as the emitter moves through space. In this case, empty spaces occur between particle emissions because particles are emitted only at every frame, and the velocity of the emitter is too high to keep up with the emission.
To create a continuous particle stream with fast moving emitters, select the Fast Moving Emitter option in any of the Emit compound's property editor. This option can help smooth out streams of emitted particles so that there is no banding. It works by using a linear blend to interpolate the particle's previous frame;s emit location with its current emit location, so it generates particles "between" two frames.For greater control over banding effects, especially with emitters that don't move in a linear fasion, you can set the subframe sampling - see ICE Simulation Subframe Sampling.
Muting temporarily disables the particle emission. This lets you lets you isolate and fine-tune the effects of other particle emissions in the scene, or simply play back the scene's animation without this emission being calculated as part of it.
As well, you can animate the muting to do such things as having particle bursts being intermittently emitted.
To mute the particle emission, select the Enable option in any of the Emit compound's property editor to mute only that particle emission.
To disconnect a particle emission, unplug the Emit compound's Execute output from the Simulation Root node or ICETree node port. This disables the particle emission, as well as all compounds and nodes that are connected to that Emit compound.
 Except where otherwise noted, this work is licensed under a Creative Commons Attribution-NonCommercial-ShareAlike 3.0 Unported License