


You can import a dotXSI 6.0 (*.xsi) file saved in ASCII format to a Crosswalk-enabled 3ds Max installation. You can export an object, multiple-selected objects, or the entire scene to a single dotXSI 6.0 (*.xsi) file saved in ASCII or Binary format.
For details on which scene elements are imported or exported, see the following sections:
Softimage to 3ds Max: Supported Scene Elements and Attributes
3ds Max to Softimage: Supported Scene Elements and Attributes
In the Select File to Import dialog box, do the following:
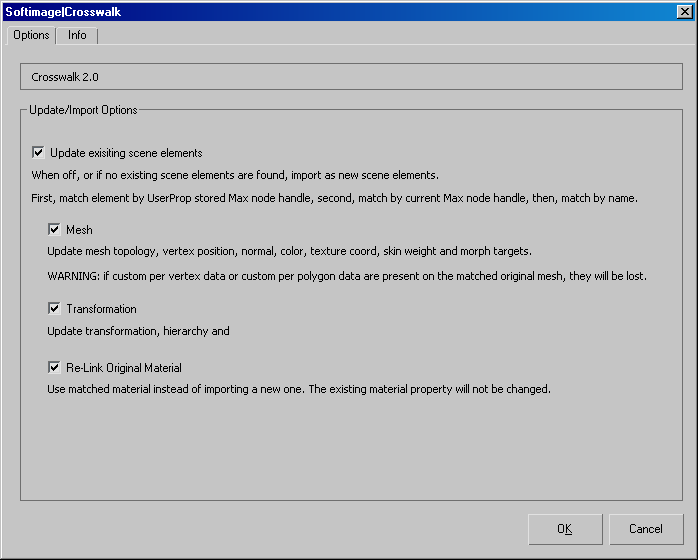
The Update/Import Options dialog box opens.
You can import scene elements in the following ways:
Add scene elements to an empty workspace or merge all scene elements into the current 3ds Max scene. See Merging Scene Elements.
Match and update scene elements with those in the current 3ds Max scene. See Updating Scene Elements and How Scene Elements Are Matched.
In the Update\Import Options dialog box, deselect the Update existing scene elements checkbox if you want to import using the merge mode. Merging scene elements can be useful in the following situations:
You are importing a dotXSI file into an empty 3ds Max workspace. In other words there is nothing to update, you are simply adding all elements in the dotXSI file to a new/untitled scene.
All modifications and the subsequent output of the scene file will remain within a 3ds Max workflow.
You want to make sure that the data in your currently open 3ds Max scene remains untouched and that the dotXSI file being imported is simply merged as is.
You made modifications to the original Max scene after exporting it to dotXSI and now you want to re-import the dotXSI file to merge it back without updating any of the modified scene elements.
You have two dotXSI files that may contain scene elements with the same name but are not the same objects. You want to import both files but you do not want to update/replace objects in the first file by objects (with the same name) in the second file.
You want to use the merge mode as a way of duplicating a scene.
You want to preserve vertex user data (this data gets overwritten when updating scene elements).
In the Update\Import dialog box, select the Update existing scene elements checkbox if you want to match and update scene elements in the dotXSI file with scene elements in the 3ds Max scene.
The update process looks inside the currently open 3ds Max scene for elements that "match" with elements that are being imported. When matches are found, the elements in the 3ds Max scene are replaced by the ones being imported in the dotXSI file.
Matching and updating occurs during import, but accurate matching also relies on the export mechanism (see How Scene Elements Are Matched).
The basic updating workflow is as follows:
Export from 3ds Max to dotXSI (see Exporting to dotXSI).
Save the current 3ds Max scene.
Exporting to dotXSI creates special user properties in the exported dotXSI file and also adds them to the 3ds Max scene itself. These properties ensure accurate matching of scene elements. Make sure you perform all subsequent updates on the 3ds Max scene containing these user properties. For more information, see How Scene Elements Are Matched.
In the Update\Import dialog box, select the Update existing scene elements checkbox.
If no matching scene elements are found, the scene elements are imported as new scene elements. New scene elements are merged into the current scene.
In the case where a new scene element is a child of a matched element in a hierarchy, it will be inserted as a child of the existing element. A new hierarchy is not created.
Select the scene elements and attributes you want to update:
Mesh: Update mesh topology, vertex position, user defined normals, vertex color, texture coordinates, skin weight data, and morph targets.
If custom per-vertex data or custom per-polygon data is present on the matched original mesh, they will be lost (overwritten).
Transformations: Update transformations, hierarchies, and animation.
Re-link Original Material: Use the matched original material instead of importing a new one. The existing material property will not be changed.
Every object (node) that gets imported or created in 3ds Max is assigned a unique identifier called a node handle.
On export, the node handle is stored in a user property labeled XSIProp_NodeHandle on the corresponding 3ds Max object (node) in the exported dotXSI file as well as in the 3ds Max scene itself. You must save your 3ds Max scene immediately after you export to dotXSI to preserve the property and use this scene to perform all subsequent updates. When the XSIProp_NodeHandle property is present in the scene you get more reliable matching of elements.
Scene elements are matched, first, based on the XSIProp_NodeHandle user property, second, matched on the current Max node handle, and then finally matched by object name.
Choose File  Export or File Export Selection from the main menu.
If you choose File Export, all elements are exported. When the file is imported into Softimage, the up-axis is corrected by placing all the elements
under a root node and rotating it by -90 degrees in X.
If you choose File Export Selection, only the selected elements are exported. When the file is imported into Softimage, you must fix the the up-axis manually
by rotating the objects.
In the Select File to Export dialog box, do the following:
The Autodesk Crosswalk dialog box opens.
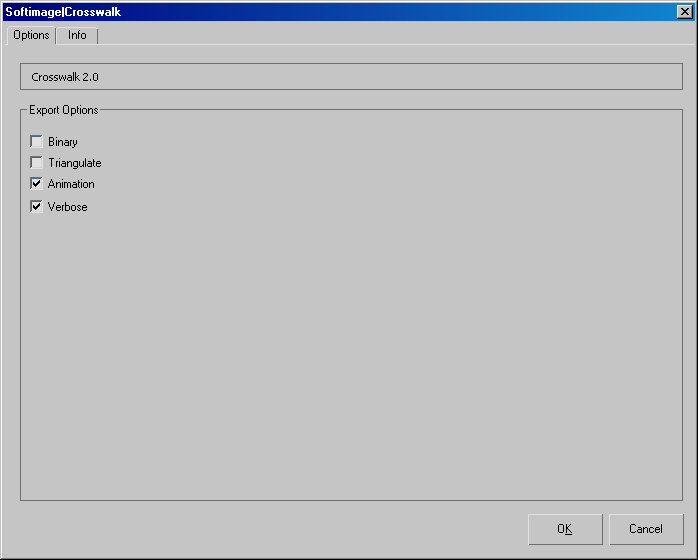
Binary: Exports scene data to a binary format with the .xsi extension. When this option is disabled, the dotXSI file is saved to an ASCII format with the .xsi extension.
Triangulate: Triangulates polygon mesh objects by subdividing quads and polygons with five or more sides to form triangles. Existing triangles are not affected.
Animation: Exports all animation to the dotXSI file.
Verbose: Activates verbose mode and writes the export progress details to a log file.
It is important that you save your 3ds Max scene immediately after exporting to dotXSI and use this scene to perform all subsequent updates. Saving after export applies the XSIProp_NodeHandle property to the elements in your scene and ensures more reliable matching of elements when you re-import modifications. See Updating Scene Elements and How Scene Elements Are Matched for more information.
 Except where otherwise noted, this work is licensed under a Creative Commons Attribution-NonCommercial-ShareAlike 3.0 Unported License