As in real life, combing hair in the virtual world is a basic requirement for good grooming. You can comb the guide hairs in different directions according to the emitter object's normals, the three axes, or away from the camera in a viewport. As well, you can recomb hair to "tidy up" hairs while keeping the guide hairs in the same approximate direction in which they are already going.
You can comb the guide hairs in different directions according to the emitter object's normals, the three axes, or away from the camera in a viewport.
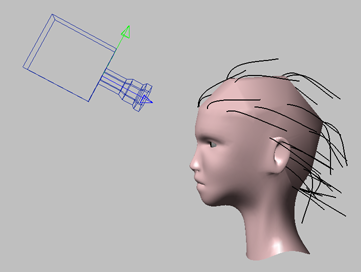
Select at least one point on each of the guide hairs, or select the hair object itself to comb all hairs.
Choose one of these commands from the Comb menu in the Hair toolbar:
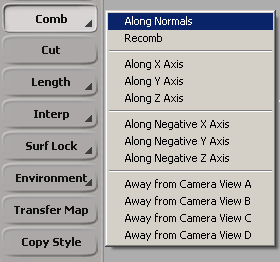
Along Normals: Makes the hairs stand on end in the direction of the emitter object's normals, as is the case with the initial groom state when you create hair. This command uses the Hair Puff operator (see Puffing and Straightening Hair).
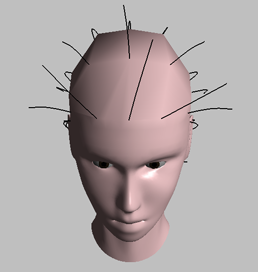
Along X, Y, Z or Negative X, Y, Z Axis: Combs in the positive or negative X, Y, and Z axes directions in global space.
Guide hairs that have been combed along the Negative Y axis.
Away from Cameras: These combing patterns are based on the four viewports (labelled A, B, C, D in their upper-left corners). They each comb
away from the camera currently assigned to that viewport. The most common way to use this is to orbit the camera and then
comb; for example, orbit the camera in the B viewport and choose Comb  Away from Camera View B.
To comb more accurately, the Comb property editor contains two parameters of use:
Comb Amount lets you specify the amount of combing you want, where 1 is fully combed and 0 is the previous state without any combing, thus allowing you to blend between the previous and combed states.
You can animate the Comb Amount to create movement on the hair; however, if you do this, you cannot use dynamics on the hair.
The X, Y, Z options let you select a vector that defines the combing direction.
After combing, you may need to use the Puff At Root command to lift the hairs away from the hair emitter's surface (see Puffing and Straightening Hair).
To "comb" a part between the hairs, use the Interp Split command (see Working with Groups of Guide Hairs).
Translating strands of hair on different axes also "combs" the hair in different directions (see Shaping the Hair with Transformations).
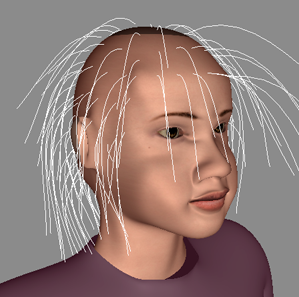
You can adjust the hair styling by "recombing" the guide hairs. Recombing combs each hair along the emitter's surface but keeps the guide hair in the approximate direction in which it is already going (using the root-to-tip vector).
For example, if you've carefully styled the guide hairs so that they are all pointing in various directions (such as when styling fur or short, messy hair), you can recomb the hairs so that they lie along the emitter, but the general shape of the hair style is unchanged.
|
|
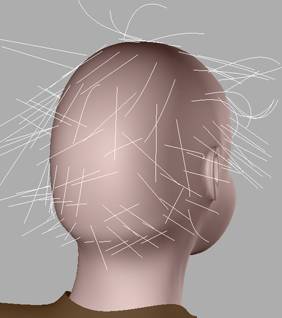
| Guide hairs that have been displaced in random directions. |
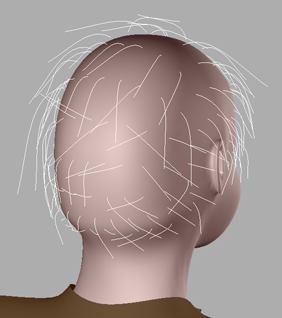
Guide hairs after they have been recombed. Notice that the direction of each guide hair remains the same. |
Select at least one point on each of the guide hairs, or select the hair object itself to comb all hairs.
Choose the Modify Comb Recomb command in the Hair toolbar.
This command applies a Hair Recomb Operator but does not open its property editor.
This property editor contains the Comb Amount parameter. This lets you specify the amount of combing you want, where 1 is fully combed and 0 is the previous state without any combing, thus allowing you to blend between the previous and combed states.
You can animate the Comb Amount to create movement on the hair; however, if you do this, you cannot use dynamics on the hair.
 Except where otherwise noted, this work is licensed under a Creative Commons Attribution-NonCommercial-ShareAlike 3.0 Unported License